This is the second part of the IBM MQ Lab. Here we'll see more advanced methods to interact with IBM MQ.
The first part of this codelab, for getting started, is here IBM MQ Lab: Basic Level
What you'll do
- Send data to IBM MQ, encode it (using cp037 encoding) and return a JSON.
What you'll learn
- Use the IBM MQ connector in Mule.
- Encoding of data.
What you'll need
- Docker
- Anypoint Studio
- Advanced Rest Client (or another rest client like Postman)
We are going to create an auxiliary queue to use in the next step of publish consume.
1. Go into the console of IBM MQ and login:
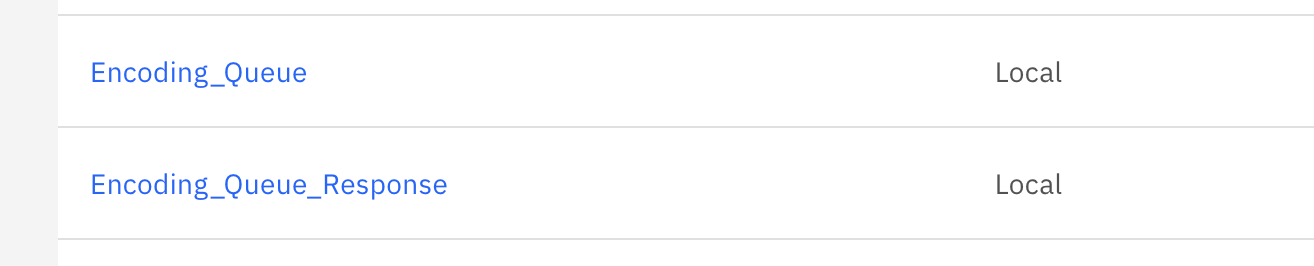
https://localhost:94432. Create a new local Queue with the name Encoding_Queue:

3. Give permissions to the user app:
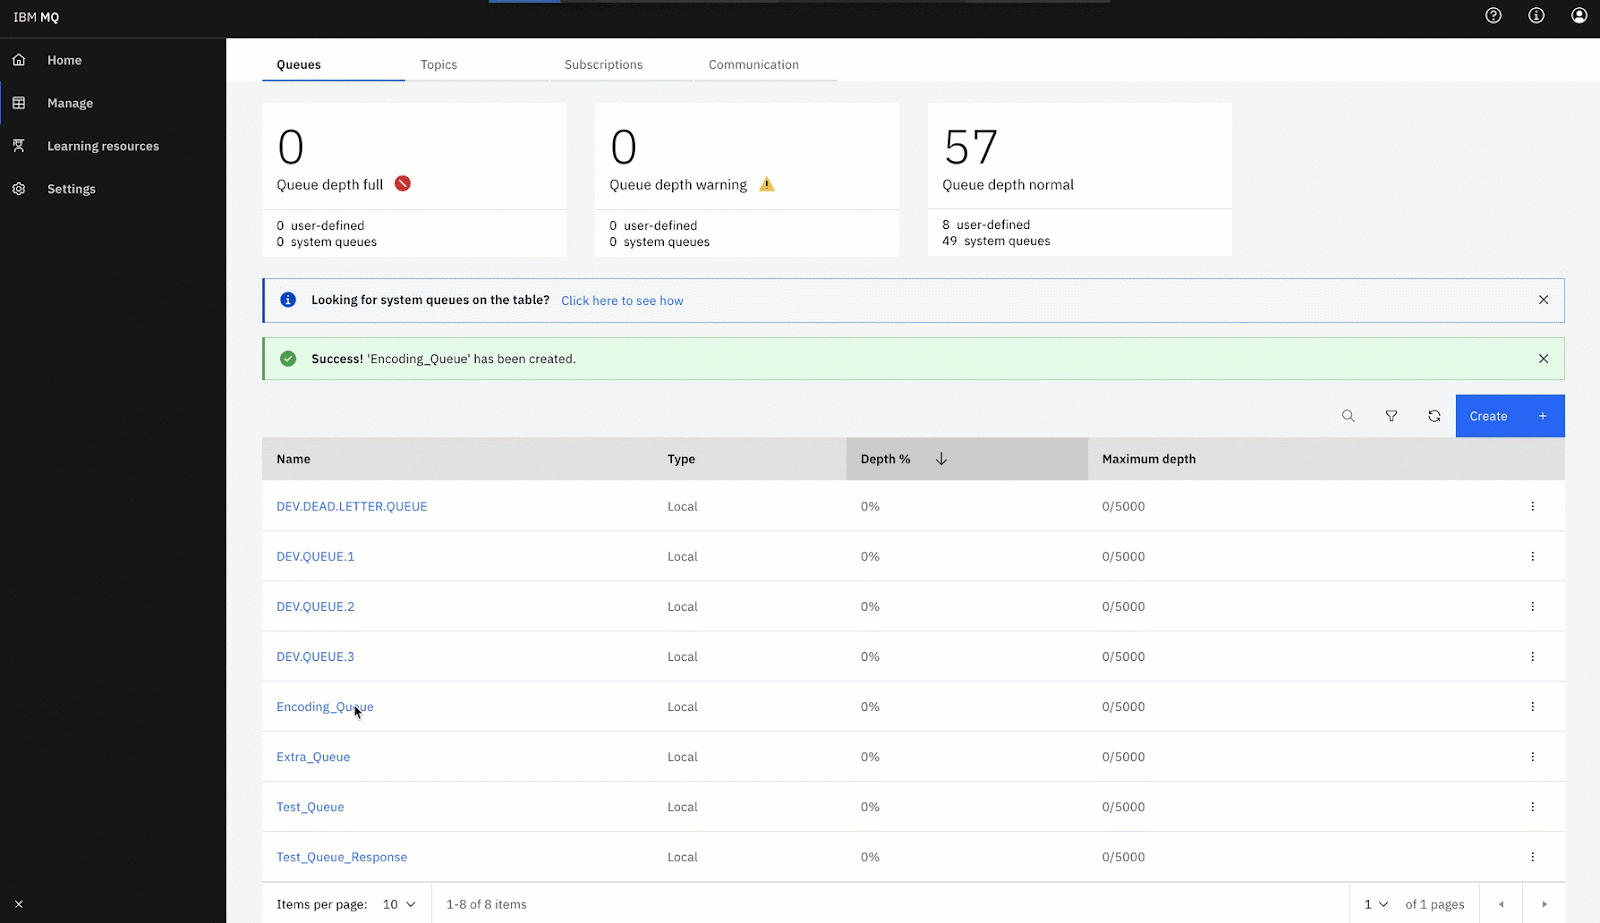
4. Now, follow the same steps to create a new auxiliary queue, named Encoding_Queue_Response and you will be ready to use the publish consume encoding method.
We are going to implement the publisher for the publish consume method and use encoding.
1. Create a new Schema. In the folder src/main/resources create a folder with the name schemas and in there a new flat file named BasicData.ffd.
This will be the COPYBOOK format we are going to use later:
form: COPYBOOK
segments:
- id: 'CUST_REQ'
  name: Customer creation request
  values:
  - { name: 'FIRST-NAME', type: String, length: 10 }
  - { name: 'LAST-NAME', type: String, length: 20 }
  - { name: 'EMAIL', type: String, length: 40 }
- id: 'CUST_RES'
  name: Customer creation response
  values:
  - { name: 'CUST-ID', type: String, length: 10 }
  - { name: 'MSG', type: String, length: 80 }
2. Create a new Flow with the name queue-publish-consume:
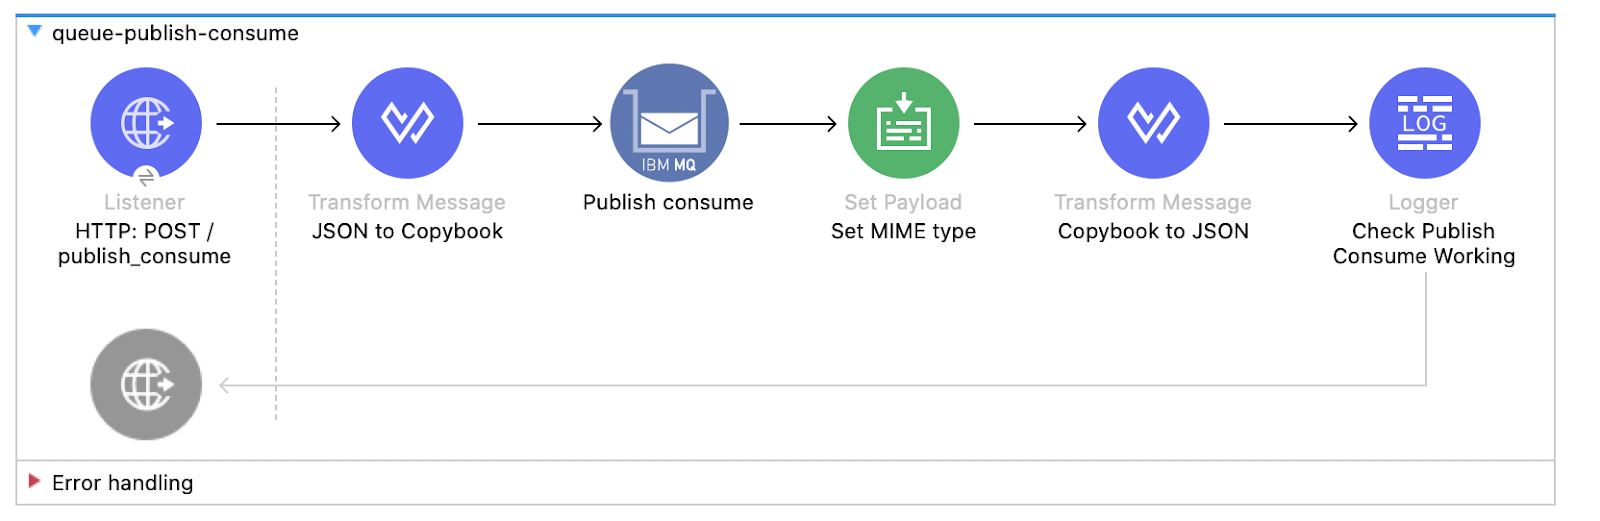
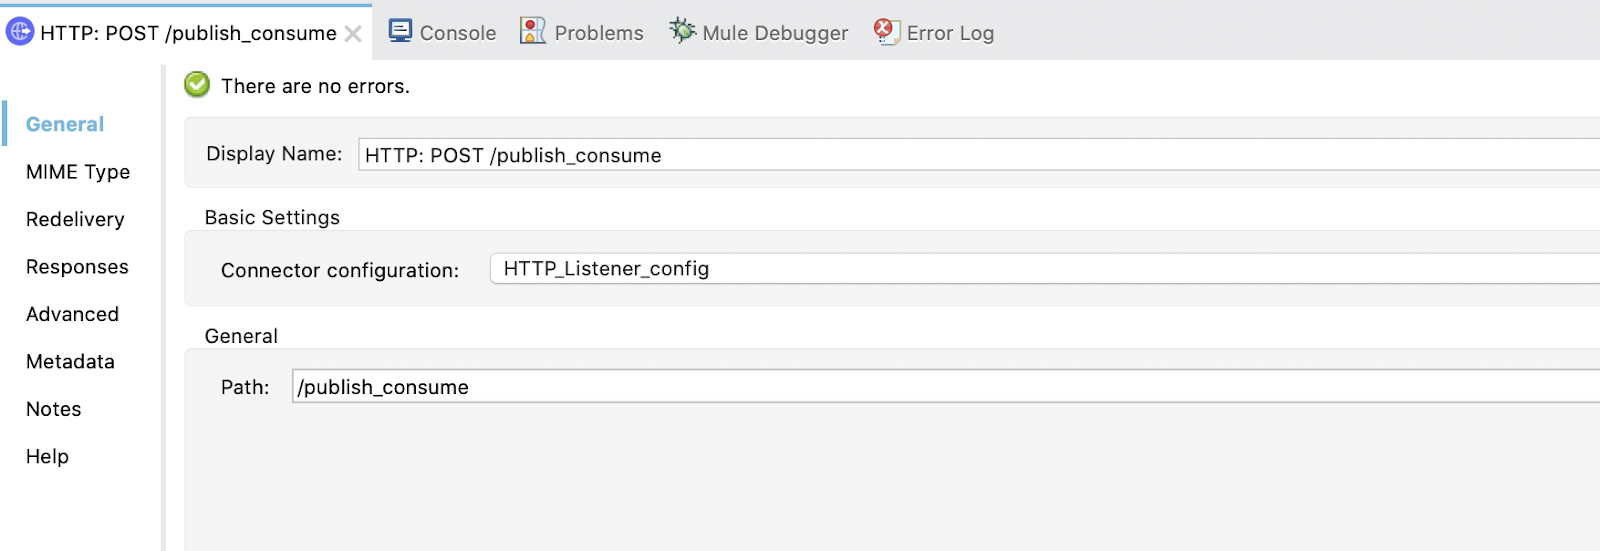
3. Configure the Listener. Use the created listener config and set the display name to HTTP: POST /publish_consume and the path /publish_consume:
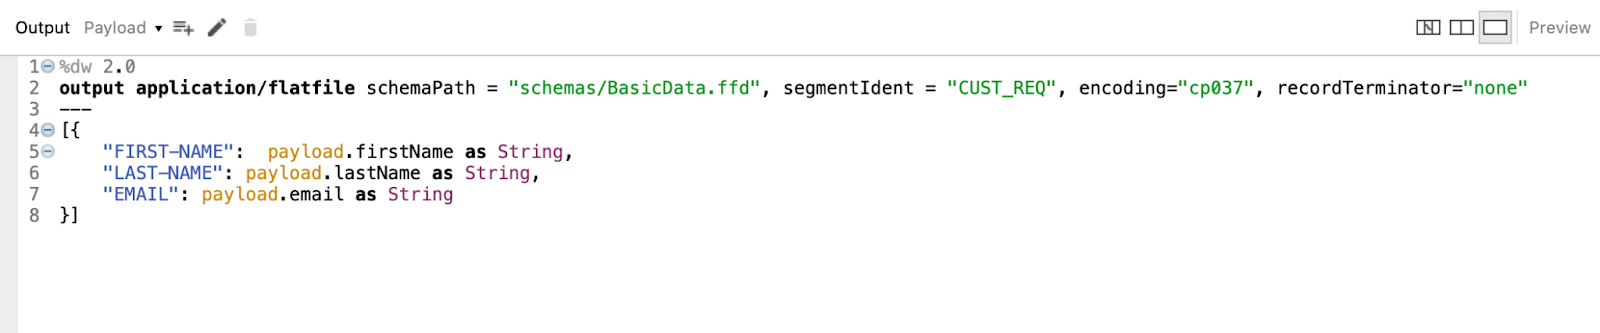
4. Configure the Transform Message. Set Display Name to JSON to Copybook and write this dataweave code:
%dw 2.0
output application/flatfile schemaPath = "schemas/BasicData.ffd", segmentIdent = "CUST_REQ", encoding="cp037", recordTerminator="none"
---
[{
        "FIRST-NAME":  payload.firstName as String,
        "LAST-NAME": payload.lastName as String,
        "EMAIL": payload.email as String
}]
5. Configure the Publish Consume and use the configuration already created in Global Elements.
The destination will be the Encoding_Queue we created in IBM MQ Console:
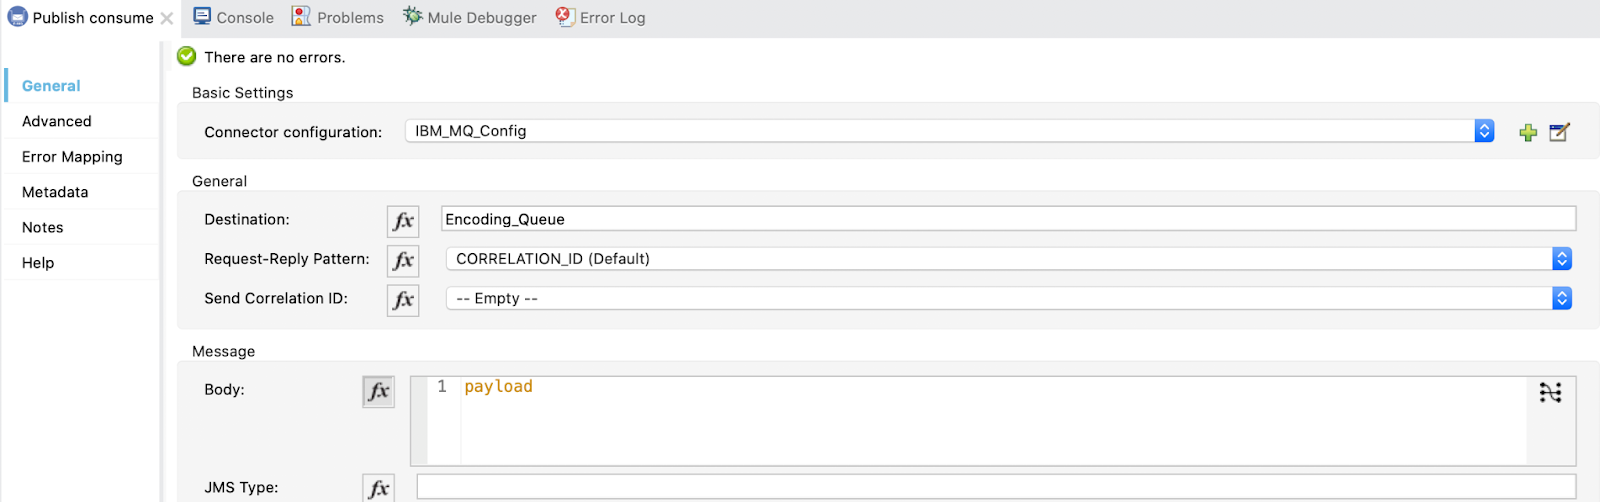
We also need to add the response queue. Select Reply to Edit inline, set the Destination Name to Encoding_Queue_Response and the Destination Type to Queue:
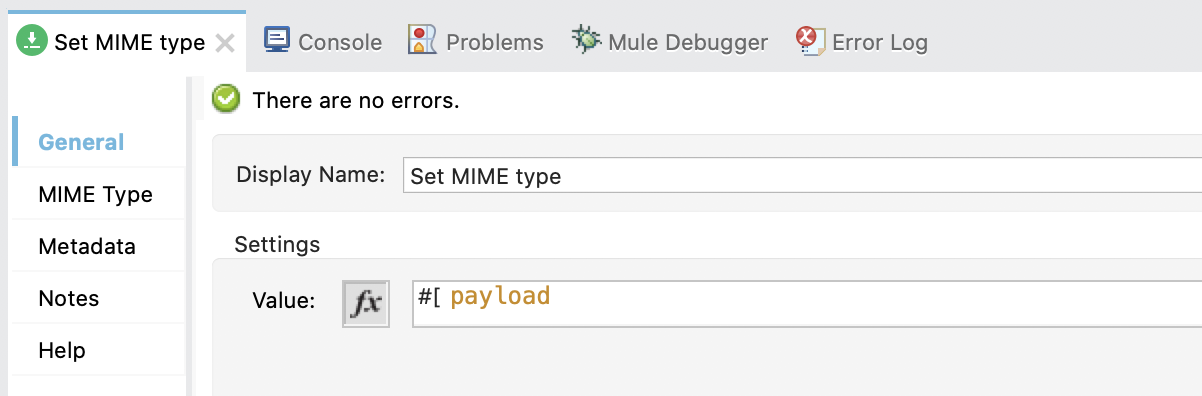
6. Configure the Set Payload. Set the Display name to Set MIME type and the Value to payload.
In the MIME Type tab, add a new MIME Type and two parameters. Also, set the encoding.
MIME Type: application/flatfile
Parameter 1: schemaPath   | Value: schemas/BasicData.ffd
Parameter 2: segmentIdent | Value: CUST_RES
Encoding: cp037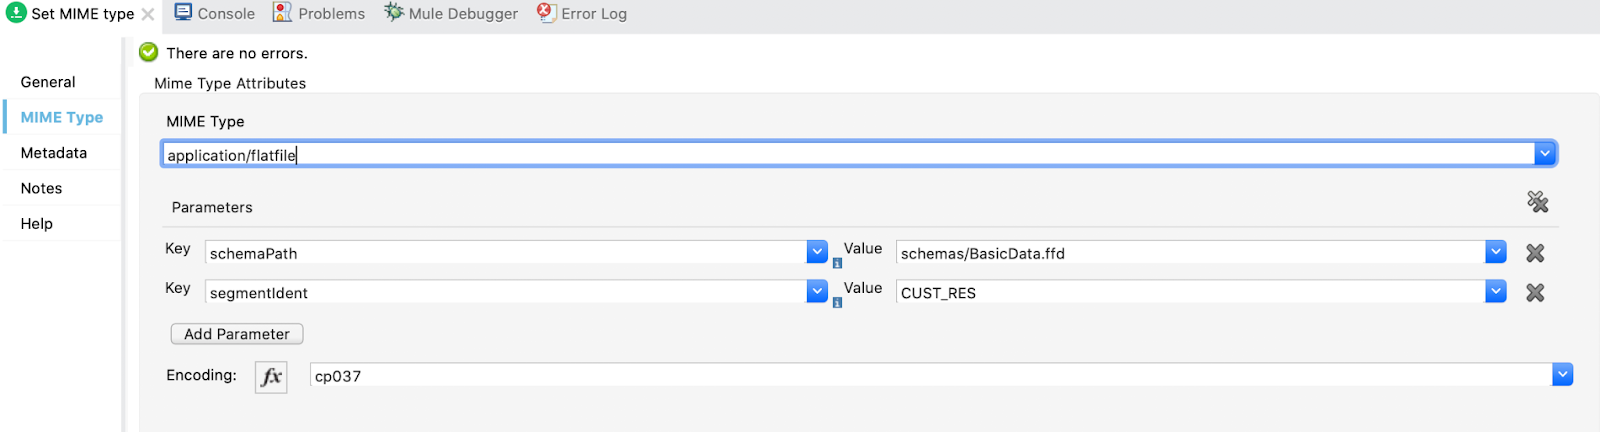
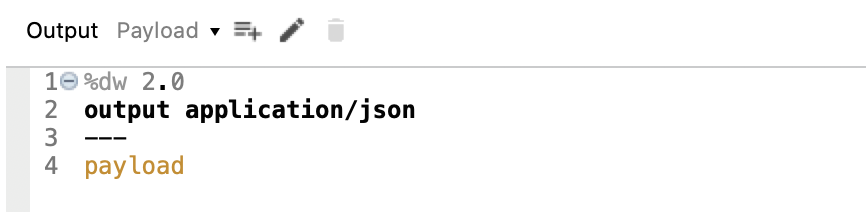
7. Configure the second Transform Message. Set Display Name to Copybook to JSON and in the output write payload:
8. Configure a Logger. Set the Display Name to Check Publish Consume is Working and in Message write:
The publish consume is working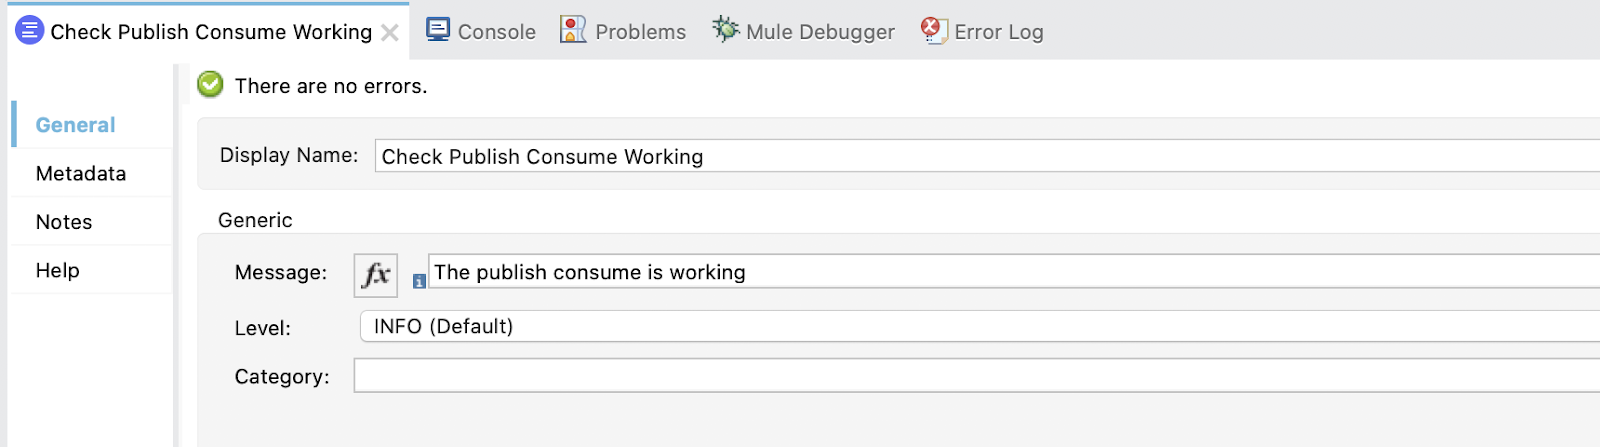
We are going to implement the listener (On New Message) for the publish consume method and use encoding.
1. Create a new flow with the name listener-publish-consume:
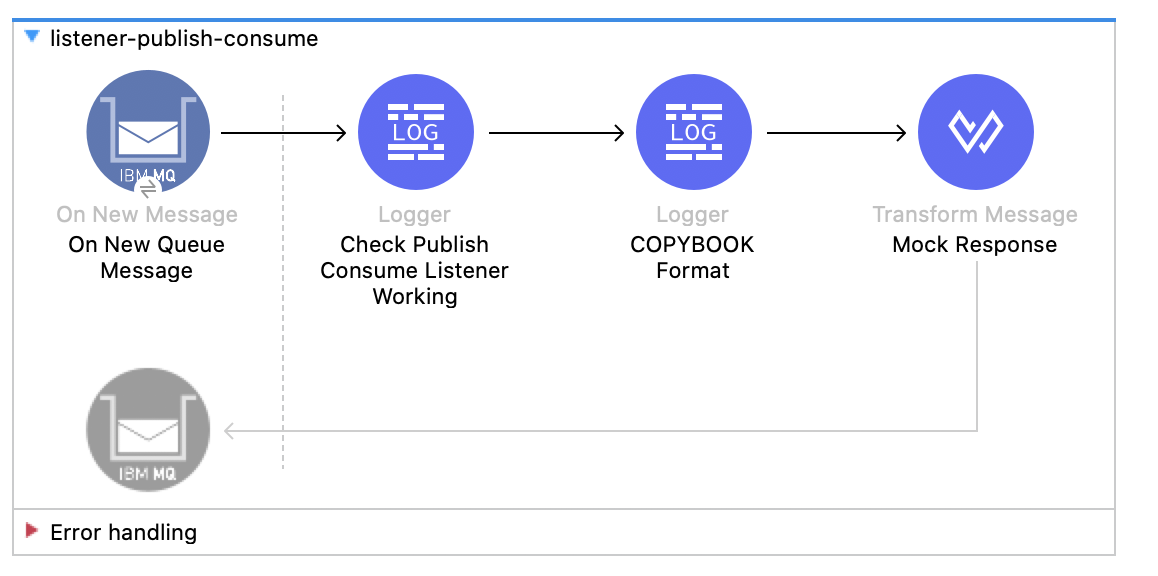
2. Configure the On New Message. Set the Display Name to On New Queue Message and add some configurations.
In Destination add Encoding_Queue and Consumer type Queue:

We also need to add the response queue. Select Reply to Edit inline, set the Destination Name to Encoding_Queue_Response and the Destination Type to Queue:

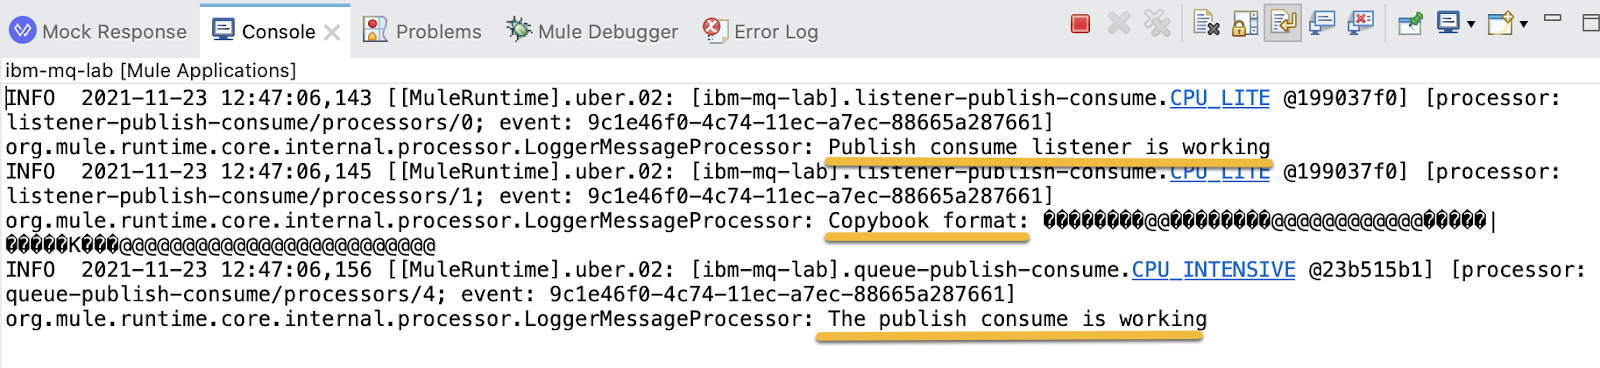
3. Configure the first Logger. Set the Display Name to Check Publish Consume Listener Working and in Message write:
"Publish consume listener is working"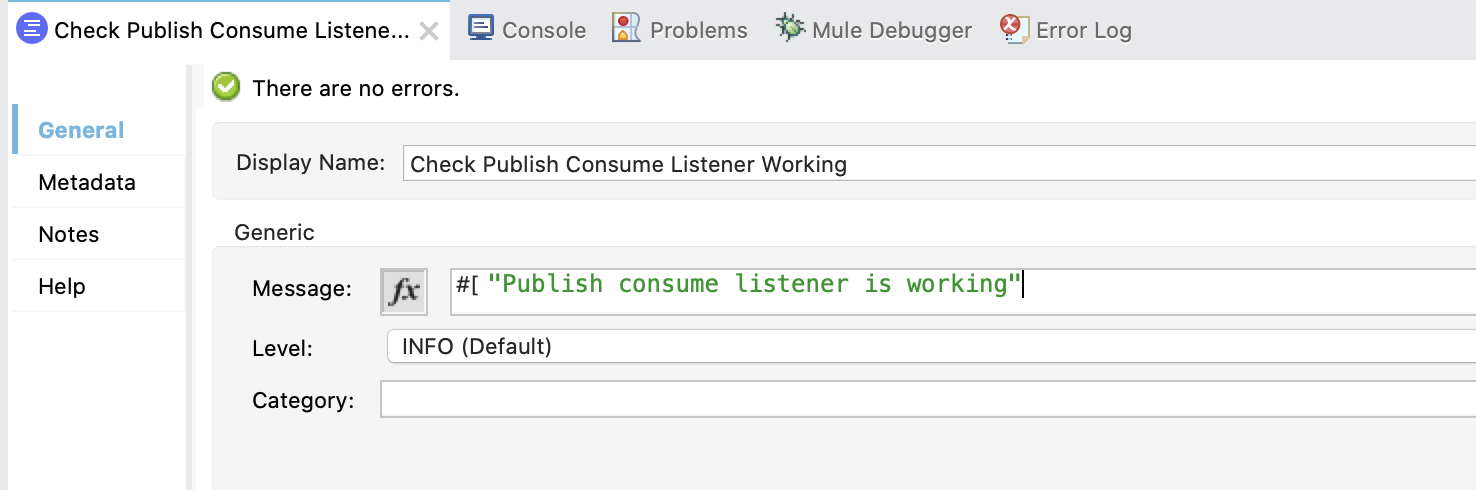
4. Configure the second Logger. Set the Display Name to COPYBOOK Format and in Message write:
Copybook format: #[payload]5. Configure the Transform Message. Set Display Name to Mock Response and in the output write:
%dw 2.0
output application/flatfile schemaPath = "schemas/BasicData.ffd", segmentIdent = "CUST_RES", encoding="cp037", recordTerminator="none"
---
[{
        "CUST-ID": "1234",
        "MSG": "OK"
}]
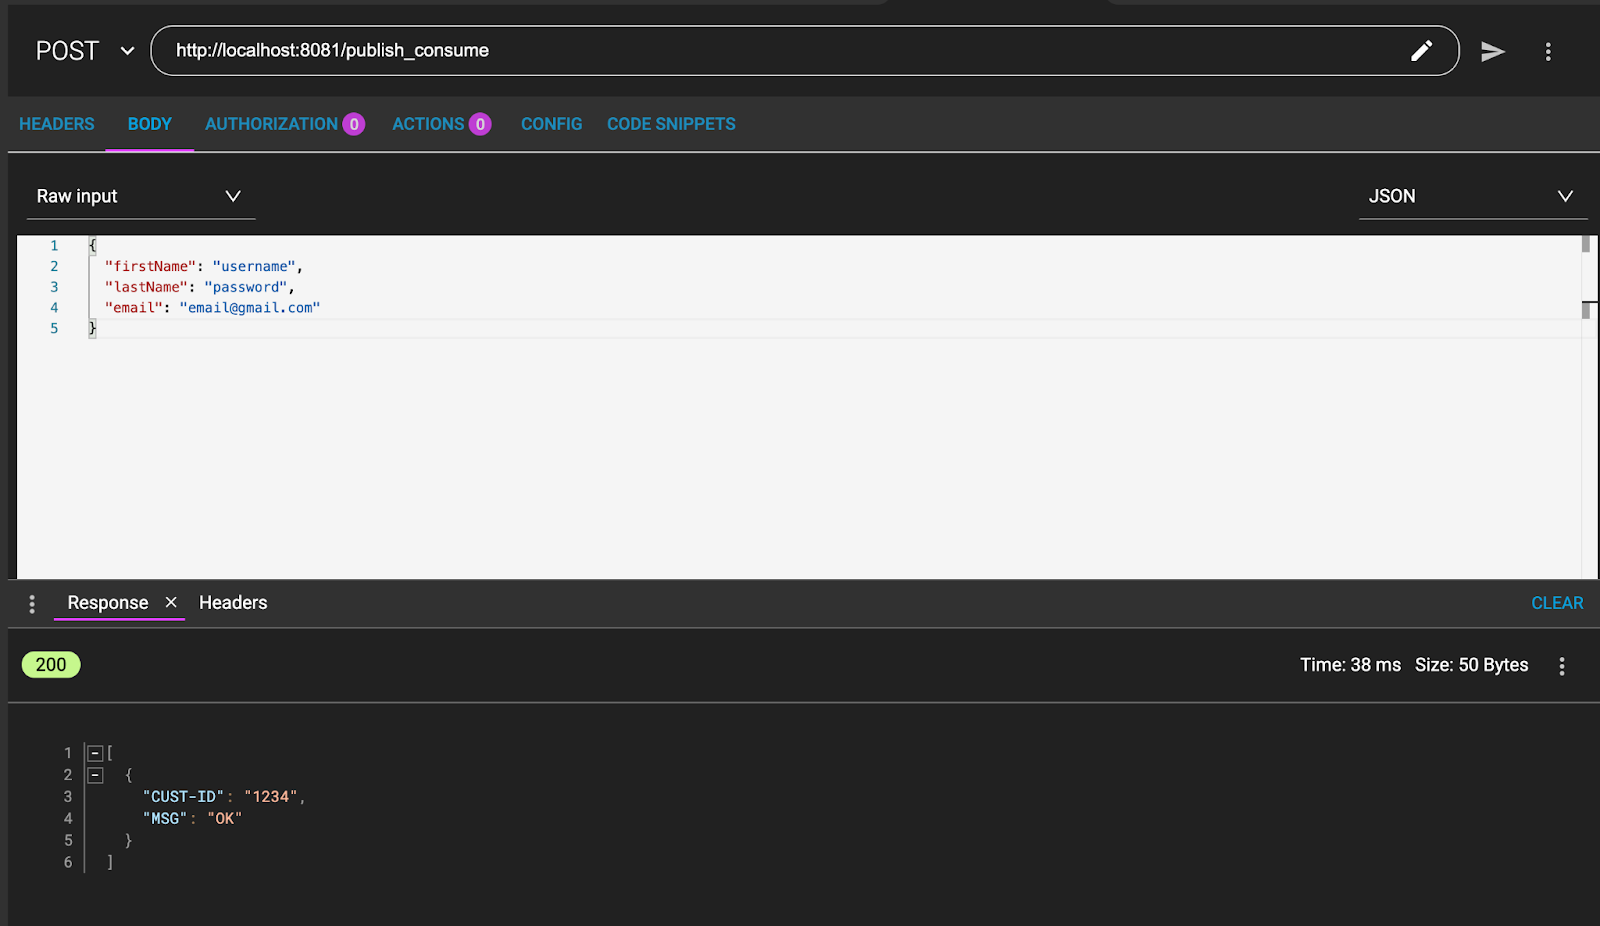
Test the publish consume method for encoding. From ARC and Studio.
1. Go to ARC / Postman and send a POST to:
http://localhost:8081/publish_consumeSending this message:
{
 "firstName": "username",
 "lastName": "password",
 "email": "email@gmail.com"
}
And this should be the result:
2. From Studio you are able to see the logs:
In the same way we already created Topics and Queues (see IBM MQ Lab: Basic Level ) create two new ones. Name them Extra_Queue and Extra_Topic. Adding in both the permissions for the user app.


We are going to see the behavior of topics and queues when we send a message to many listeners.
We know that topics are from one to many and queues from one to one. So, both topic subscribers should consume the same message and both queues consumers should not consume the same message.
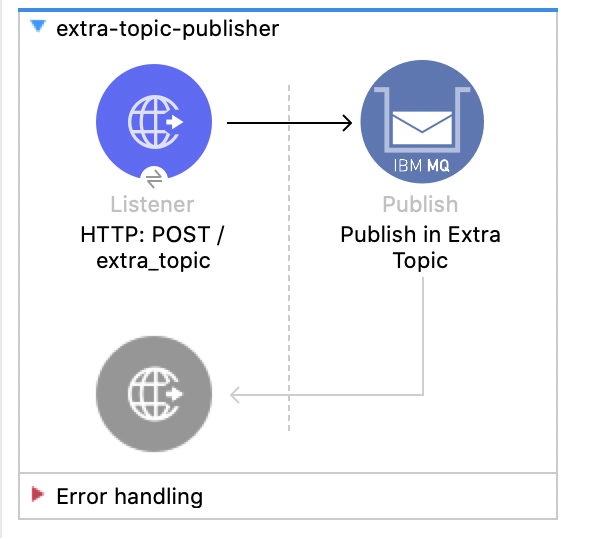
1. Create a new flow named extra-topic-publisher. In the listener set the path to /extra_topic and in the publisher set the destination name to Extra_Topic.
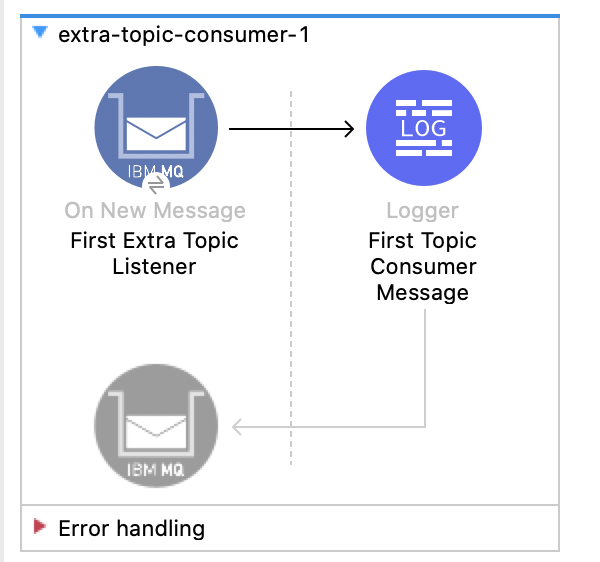
2. Create two new flows extra-topic-consumer-1 and extra-topic-consumer-2. Set the destination to Extra_Topic in both.
Also, in both of them, set a different shared consumer subscription name:
first_extra_topic_consumers and second_extra_topic_consumers.

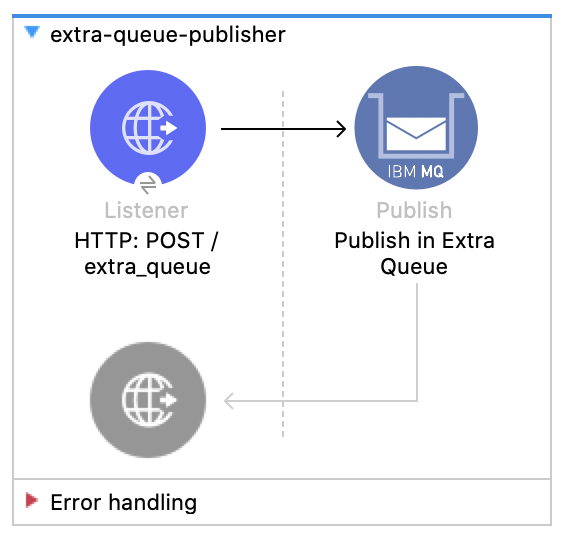
3. Create a new flow named extra-queue-publisher. In the listener set the path to /extra_queue and in the publisher set the destination name to Extra_Queue.
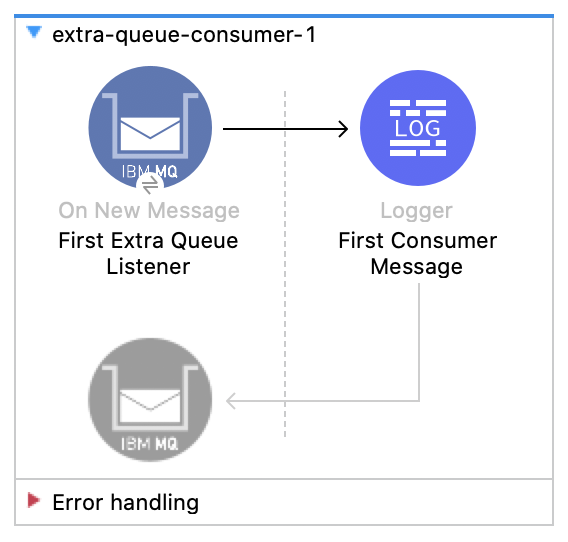
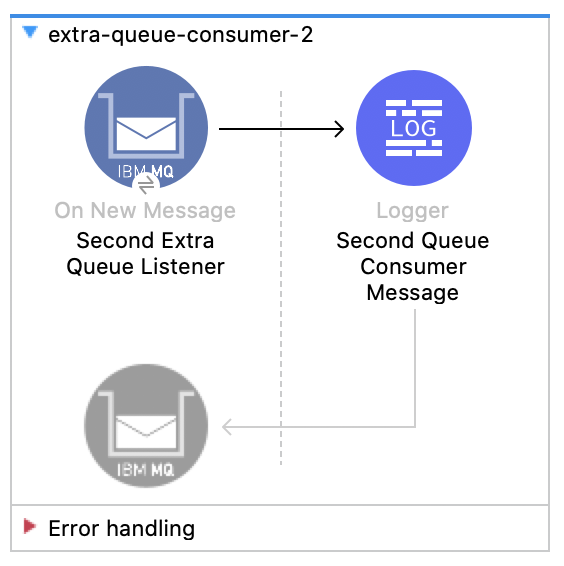
4. Create two new flows extra-queue-consumer-1 and extra-queue-consumer-2. Set the destination to Extra_Queue in both.
We are testing that only different topic subscribers can consume a same message while different consumer queues cannot.
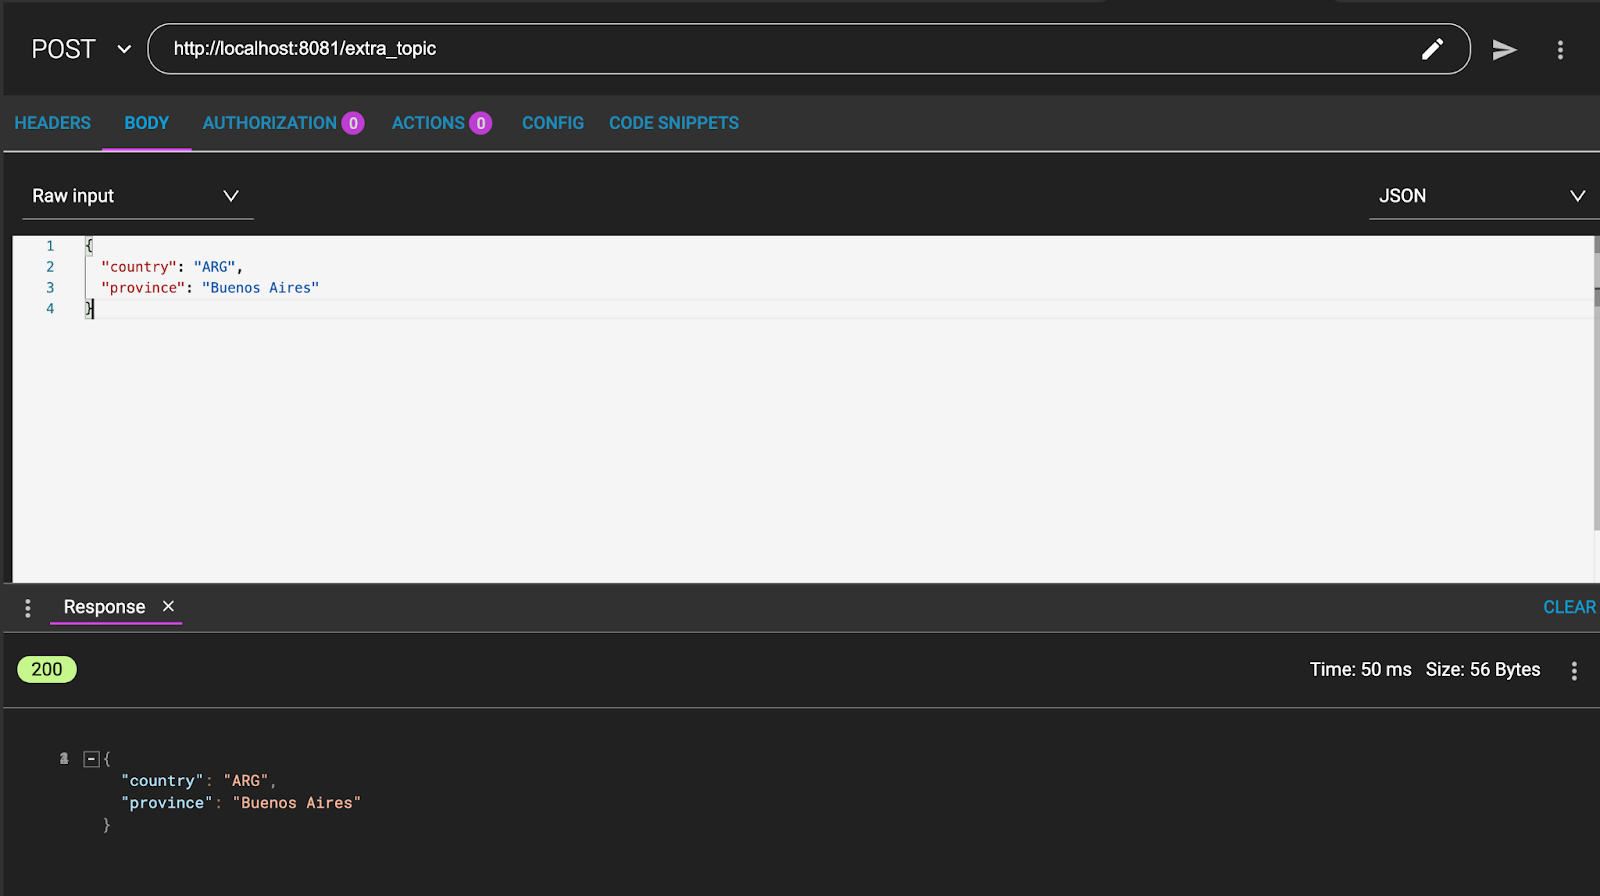
1. From ARC / Postman send a POST to:
http://localhost:8081/extra_topicWith a message like:
{
 "country": "ARG",
 "province": "Buenos Aires"
}
And the message will be consumed and returned:
2. In Studio take a look at the logs. The message is effectively consumed by both topic subscribers:

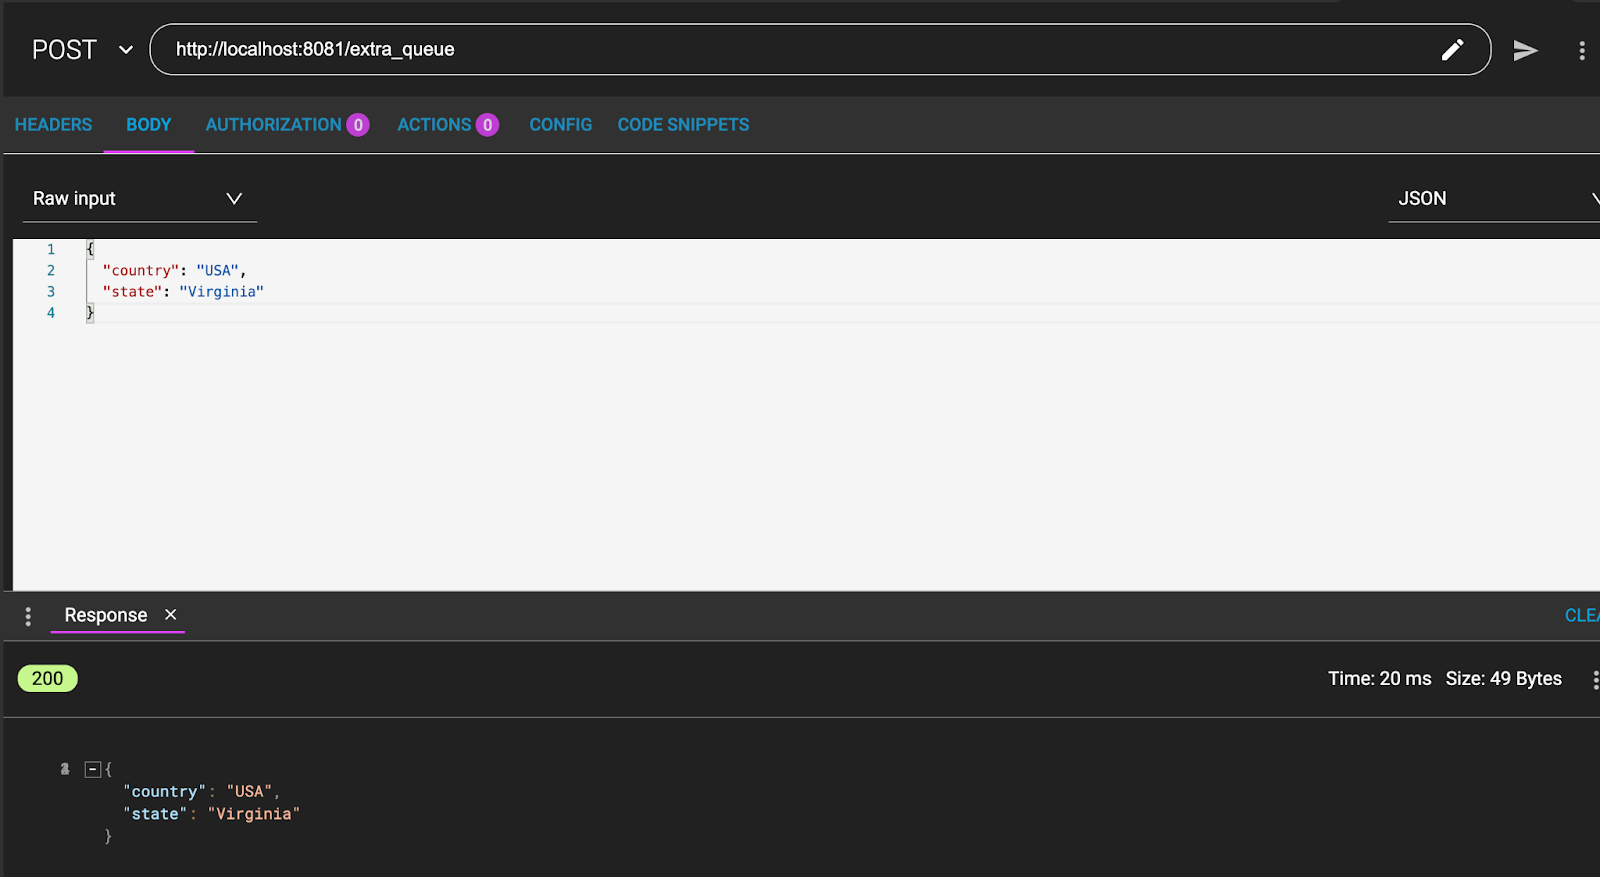
3. Now, test the queue consumers. From ARC / Postman send a POST to:
http://localhost:8081/extra_queueWith a message like:
{
 "country": "USA",
 "state": "Virginia"
}
And the message is returned:
4. From Studio see the logs. The message is only consumed by one of the queues consumers:
