What you'll learn to do:
- Create and manage an application in Okta using OIDC.
- Set up Okta to act as an OIDC Client for MuleSoft's Anypoint Platform.
- Create an API in Design Center and then secure it using the OIDC token enforcement policy.
- Create an application from Anypoint Platform to interact with our secured API.
- Test the authorization code and implicit flow (from Okta) to obtain an access token. Then, call the API and get some information.
What you'll need:
- Anypoint Platform account
- Postman (or another API Testing app)
- Okta Developer account
Anypoint Platform supports the below OAuth providers to act as External Identity to manage and authenticate Client applications that access your APIs secured via OAuth policies:
- OpenAM
- PingFederate
- Any provider which supports Dynamic Client Registration via OpenID Connect (OIDC)Client Registration 1.0 errata set 1.
This setup guide will show you how to integrate with Okta for Client Management with OIDC and showcase a demo of the setup and flow. Before we begin, here's a high-level overview of how a typical OIDC enabled API access flow would work in Anypoint Platform, with Okta doing the Client Management.
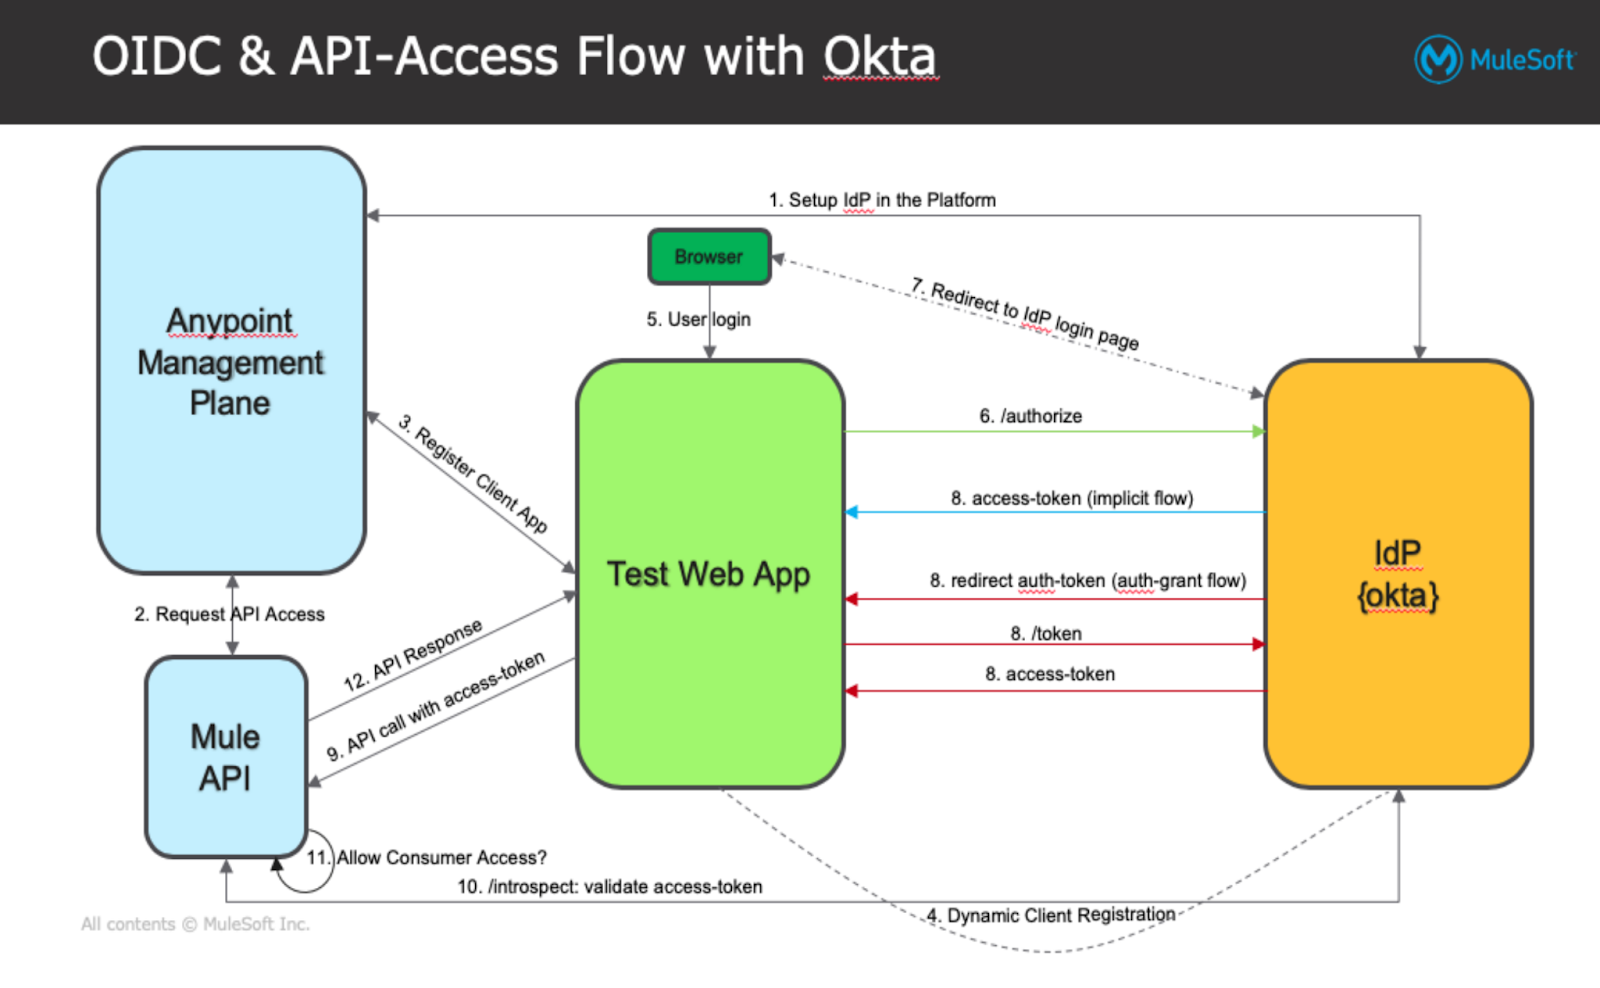
Let's go ahead and start setting up Okta and Anypoint platform to realize the flow above.
1. First, we will set up Okta to act as OIDC client for MuleSoft's Anypoint platform. For the purposes of this guide, we'll be using a Developer Okta org instance. Please replace accordingly, the details with your own Okta instance details. If you don't have an Okta instance, you can create a free, developer account:
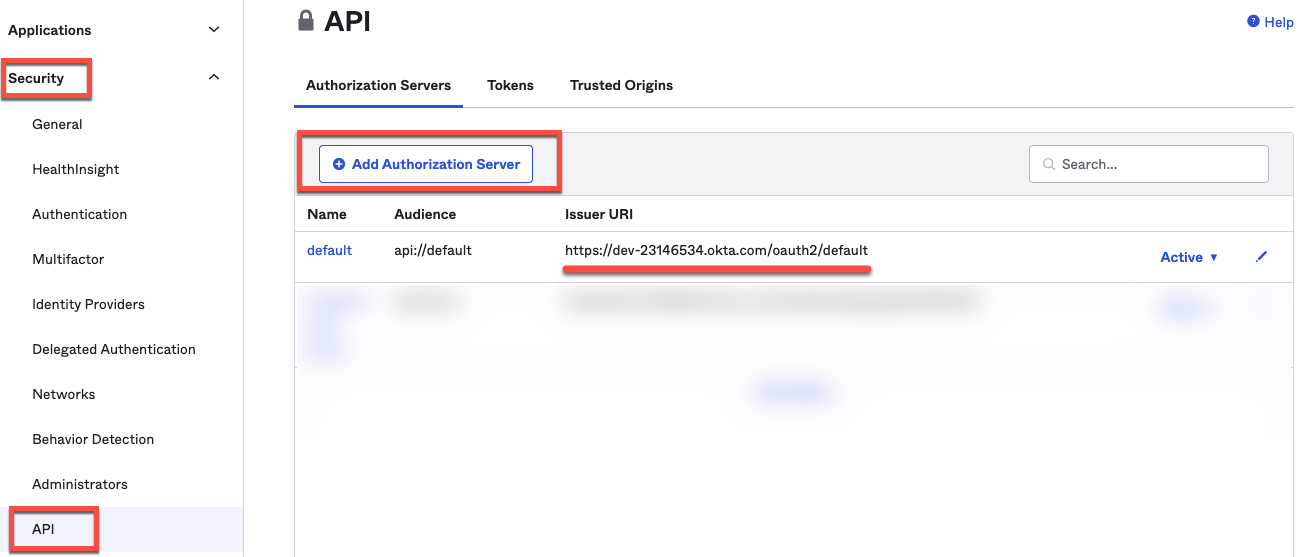
2. Login to your Okta instance and setup an Authorization server as below; Authorization Servers generate OAuth 2.0 and OpenID Connect tokens, including access tokens and ID tokens.
Security → API → Add Authorization Server
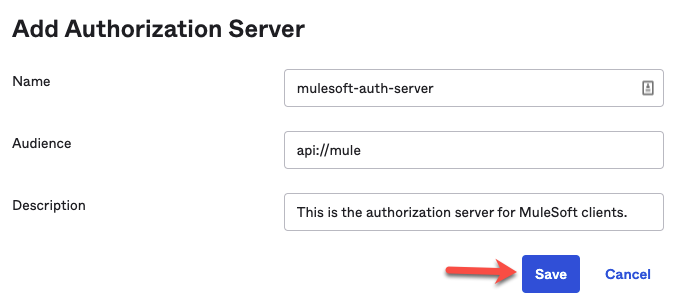
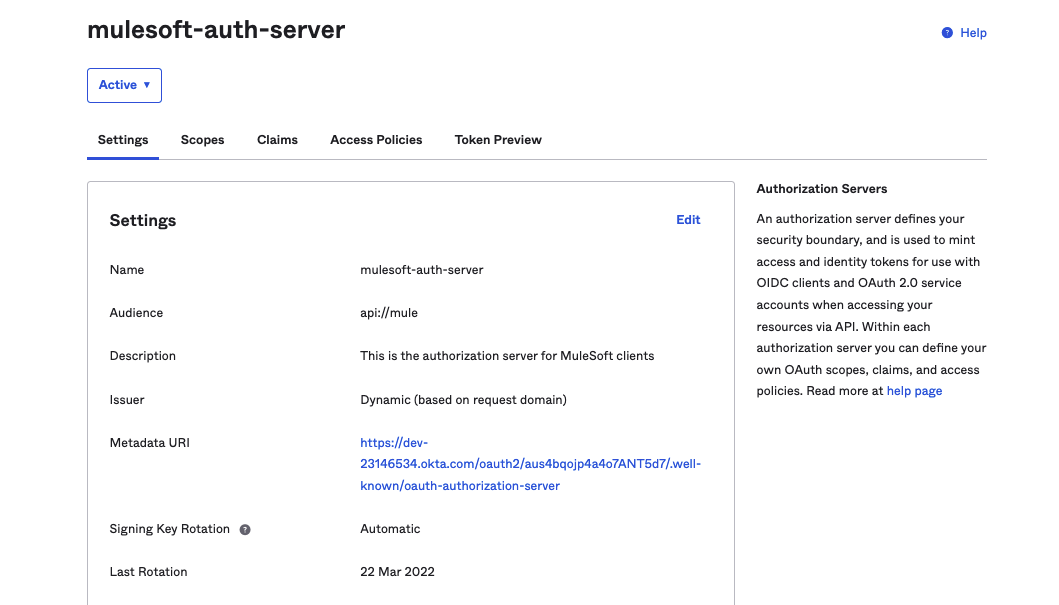
3. To add additional auth-server, click on ‘Add Authorization Server' button and add required auth-server details and click Save as below:
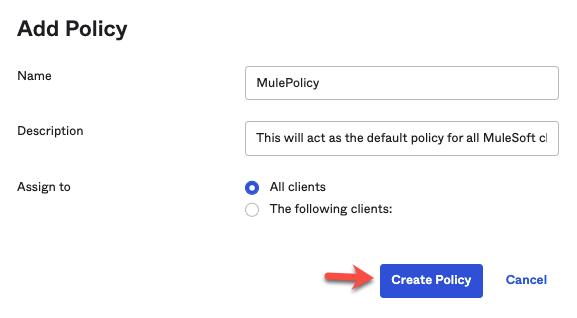
4. Click on Access Policies → Add New Access Policy to create a Policy and assign it to ‘All Clients' or any specific clients you wish to authorize.
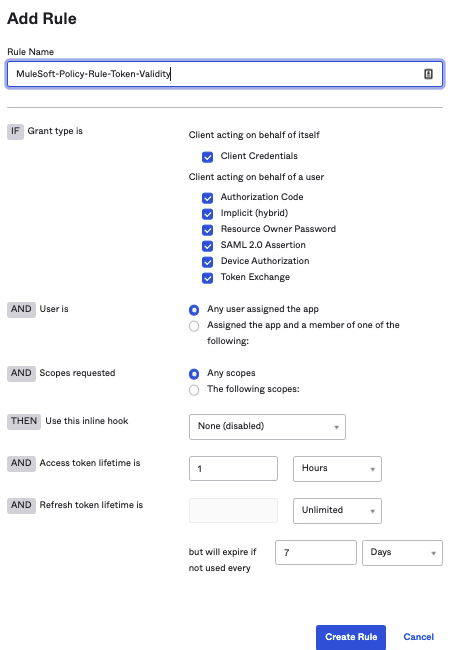
Click on ‘Add Rule' to set the token validity rules as below; Change the values as needed.
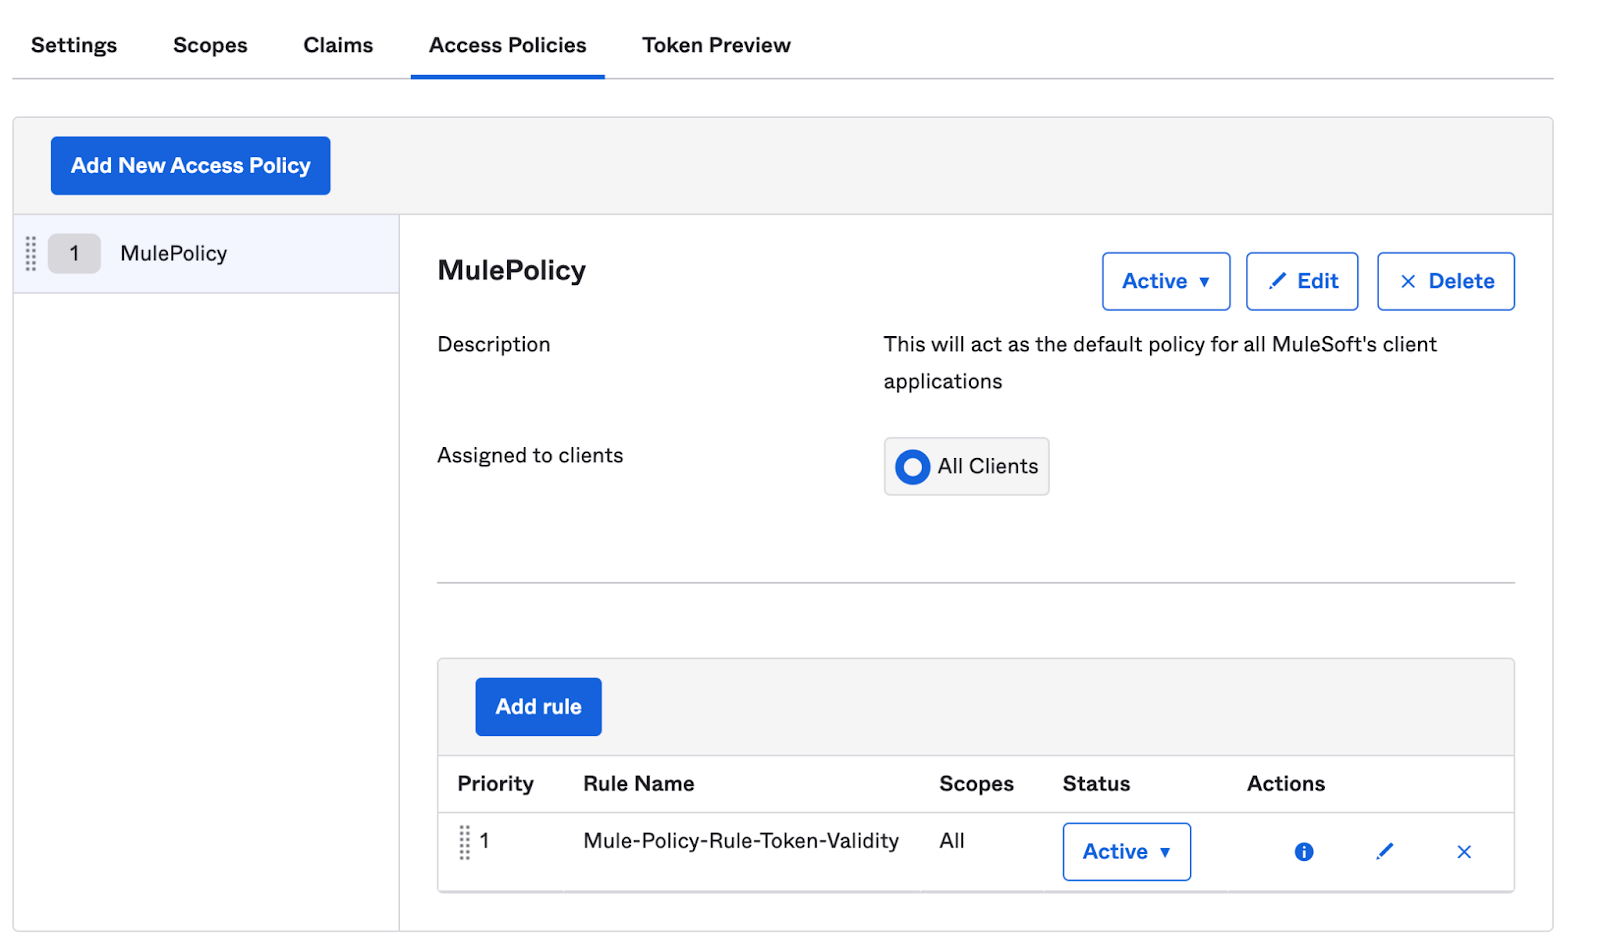
Once complete, your Access Policy would look like below:
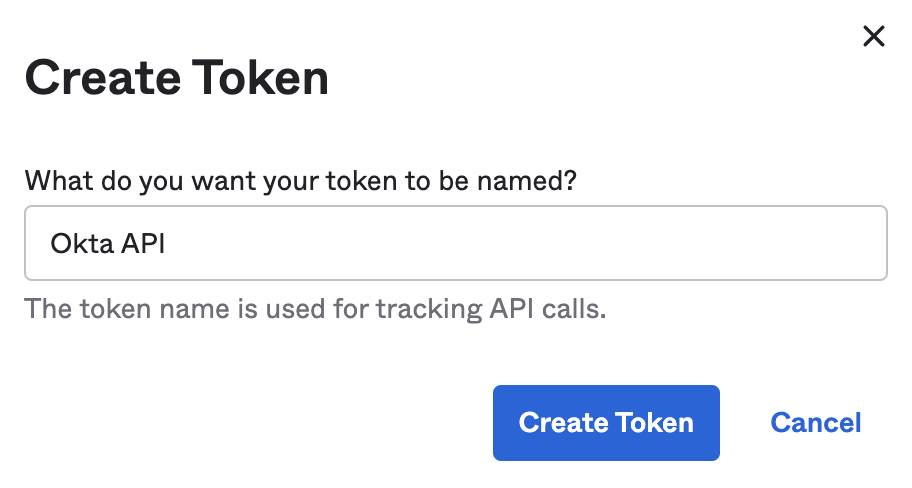
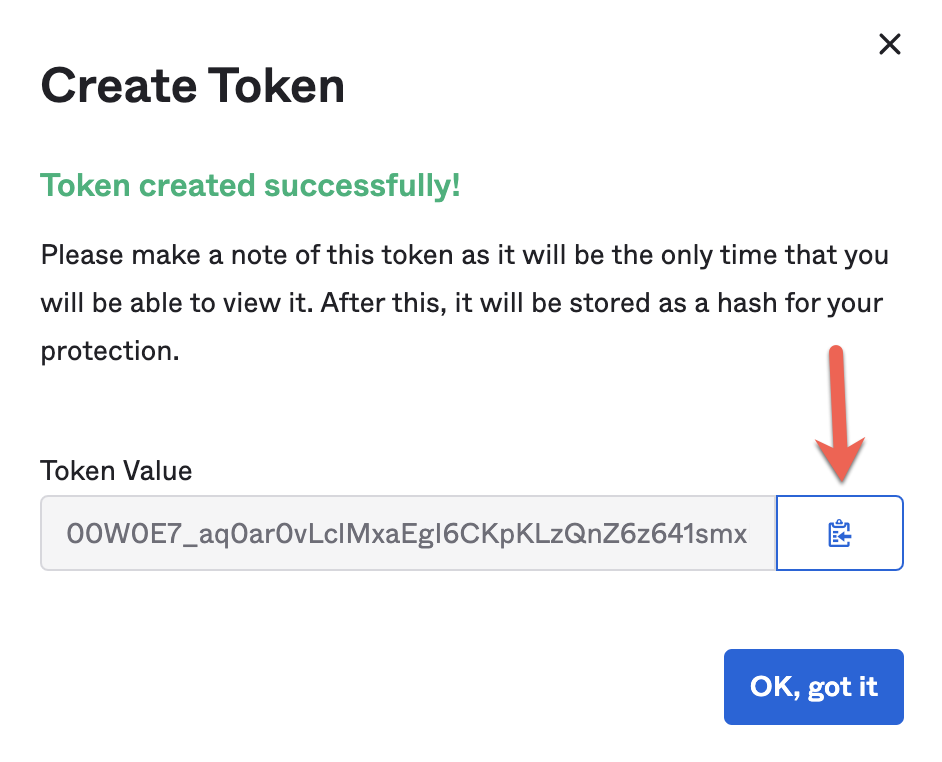
5. Next, create a Single Sign-On Web System (SSWS) token (API key) as below;
Security → API → Tokens → Create Token and copy the token value.
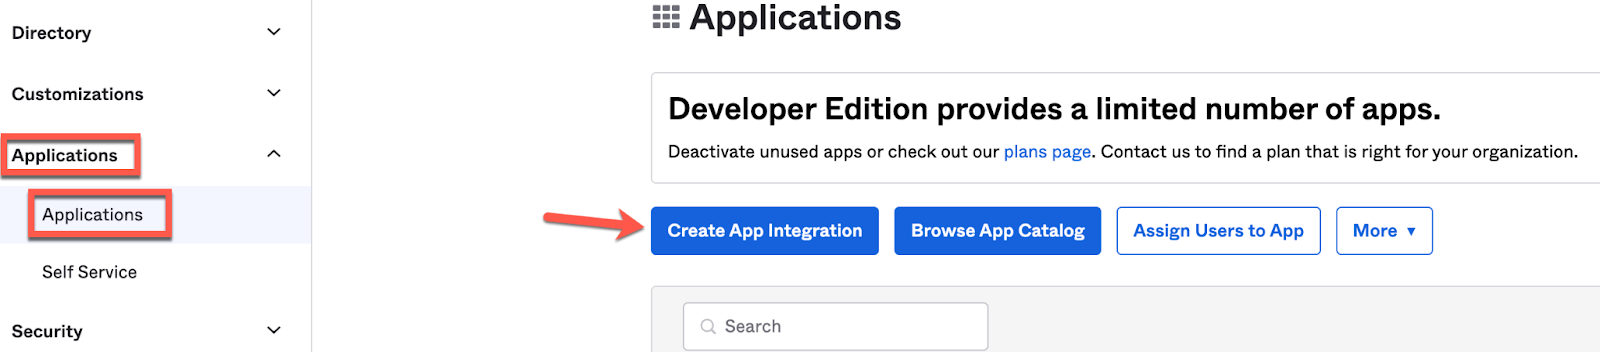
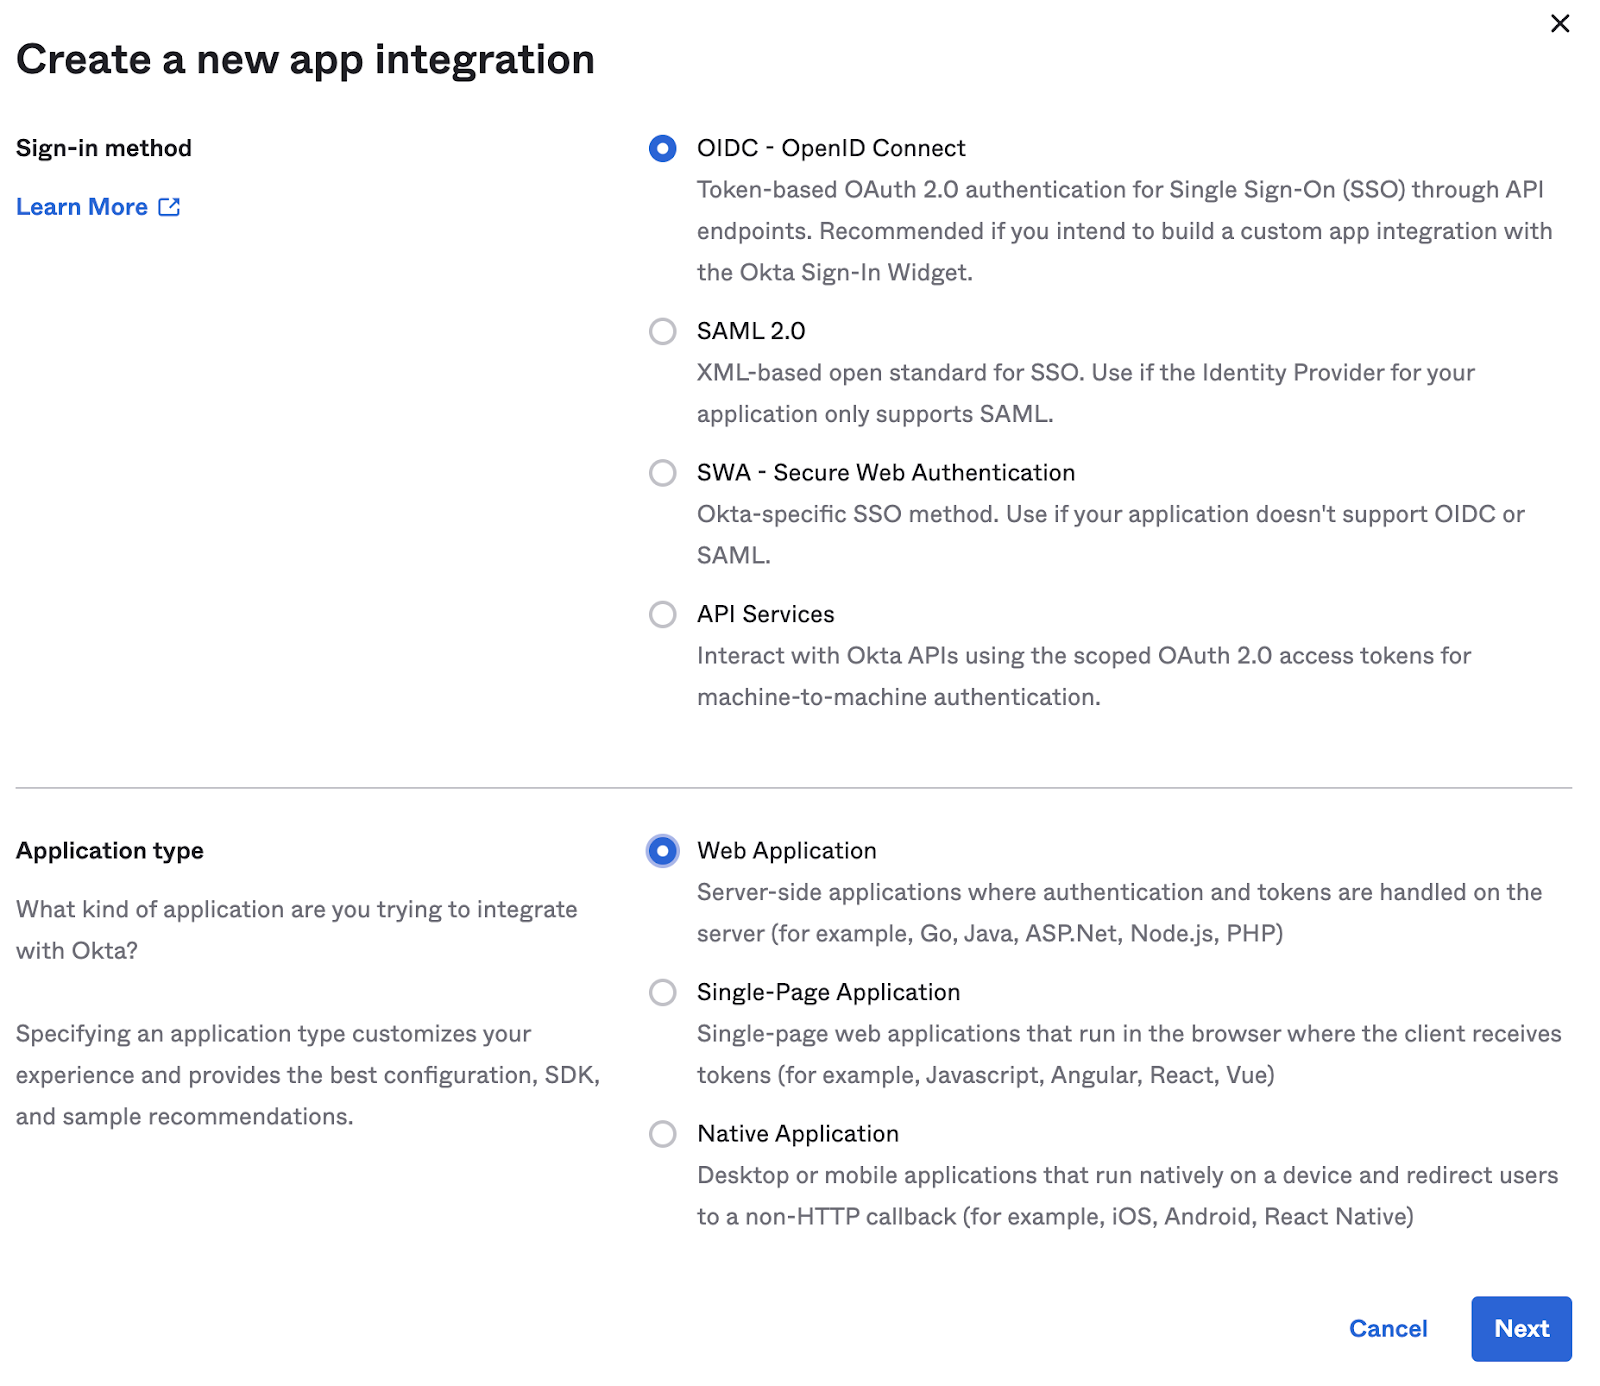
6. Now, add a new Okta client application as below. This application will act as the OIDC Token Introspection client. We'll name this application MuleSoft Introspection Client.
Applications → Applications → Create App Integration and setup a Web Application with the details as below:
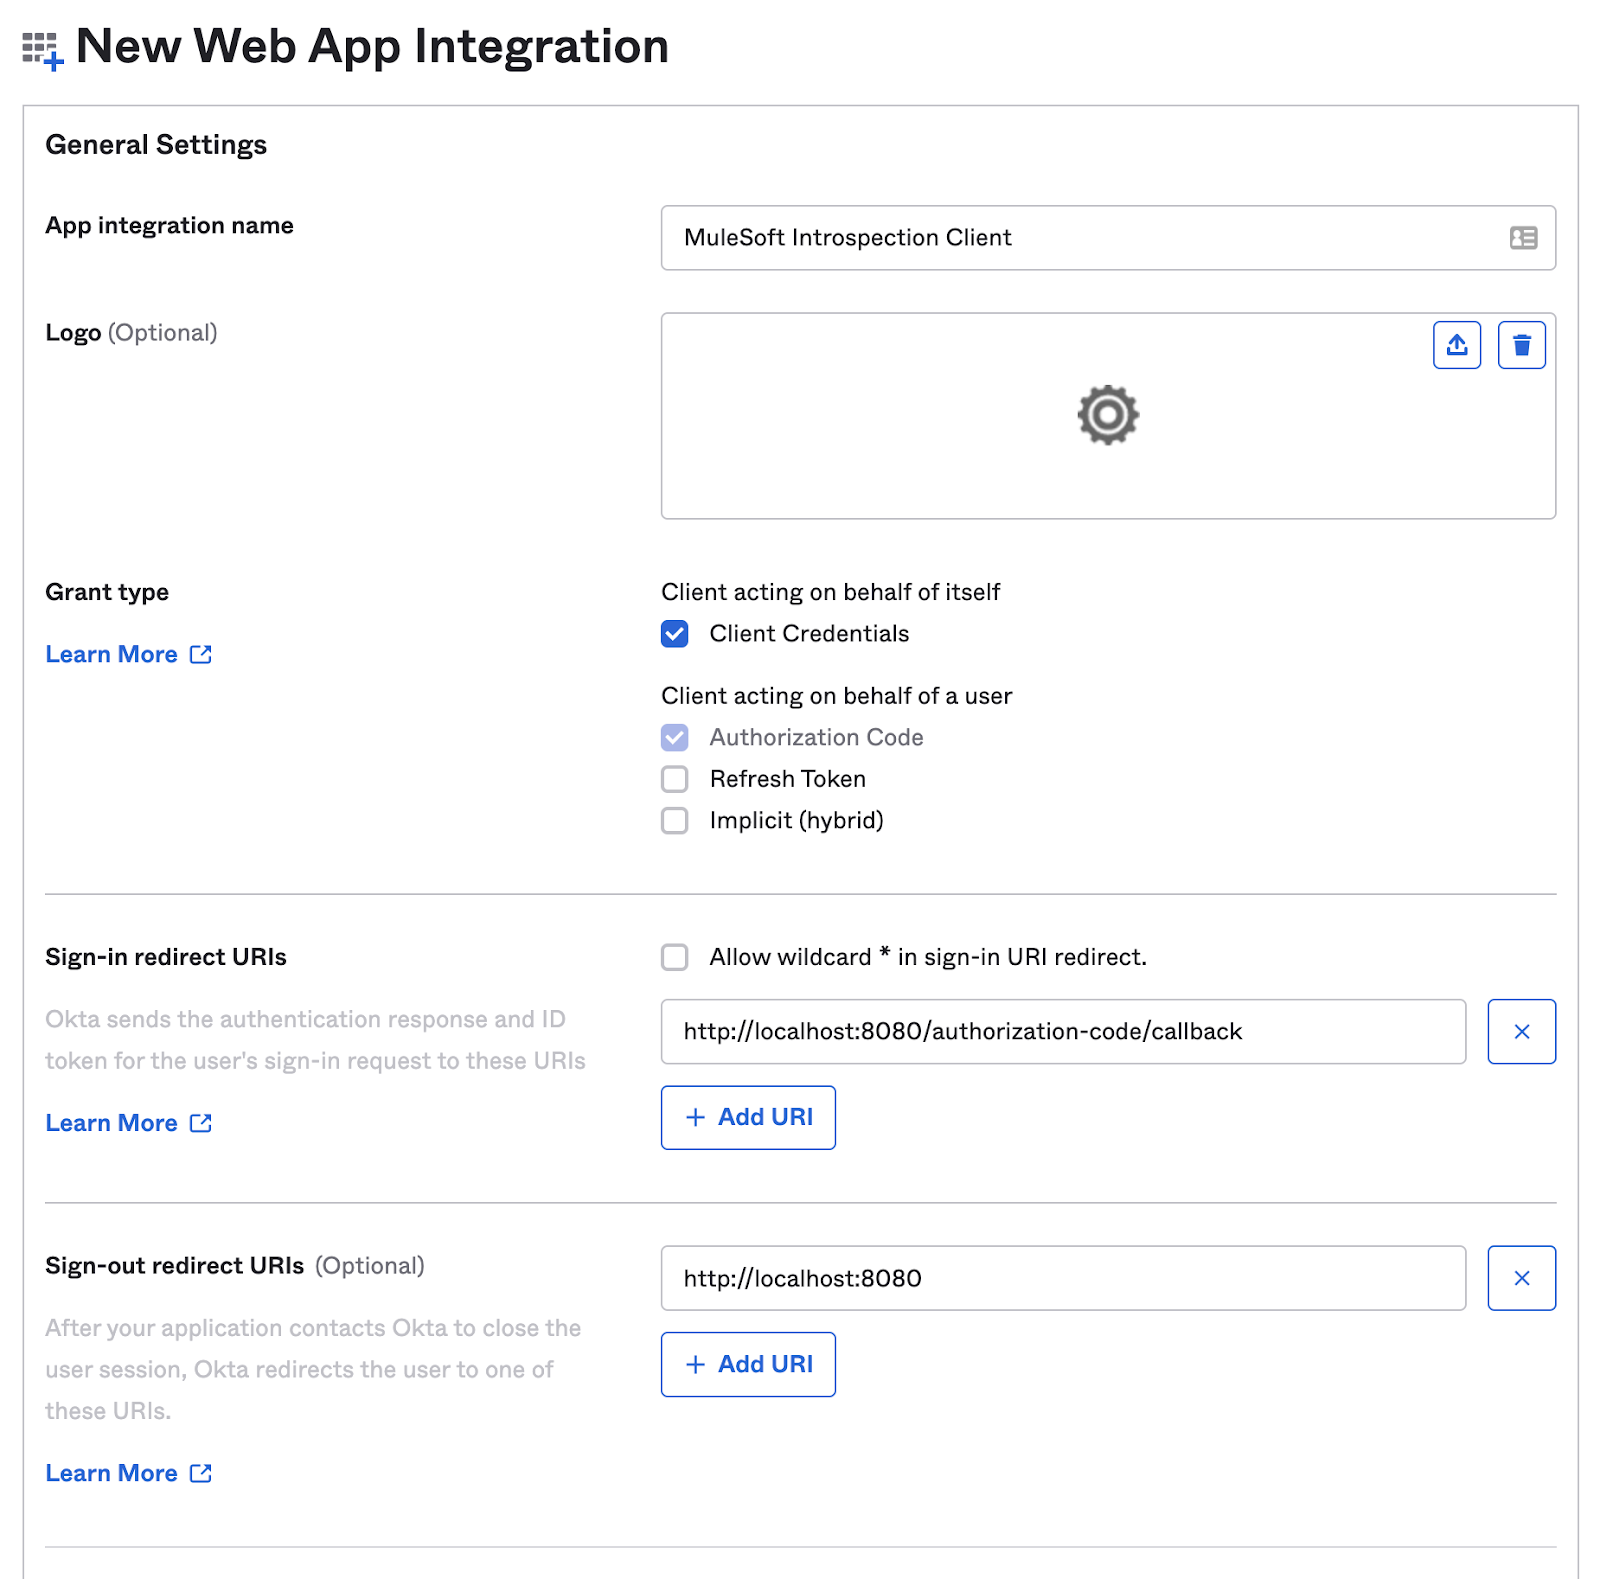
Click Save when finished.
As you can see from the screenshot above, we have set this client application for both Client Credentials as well as for Authorization Code OAuth 2.0 grants and have assigned this app to ‘Everyone'.
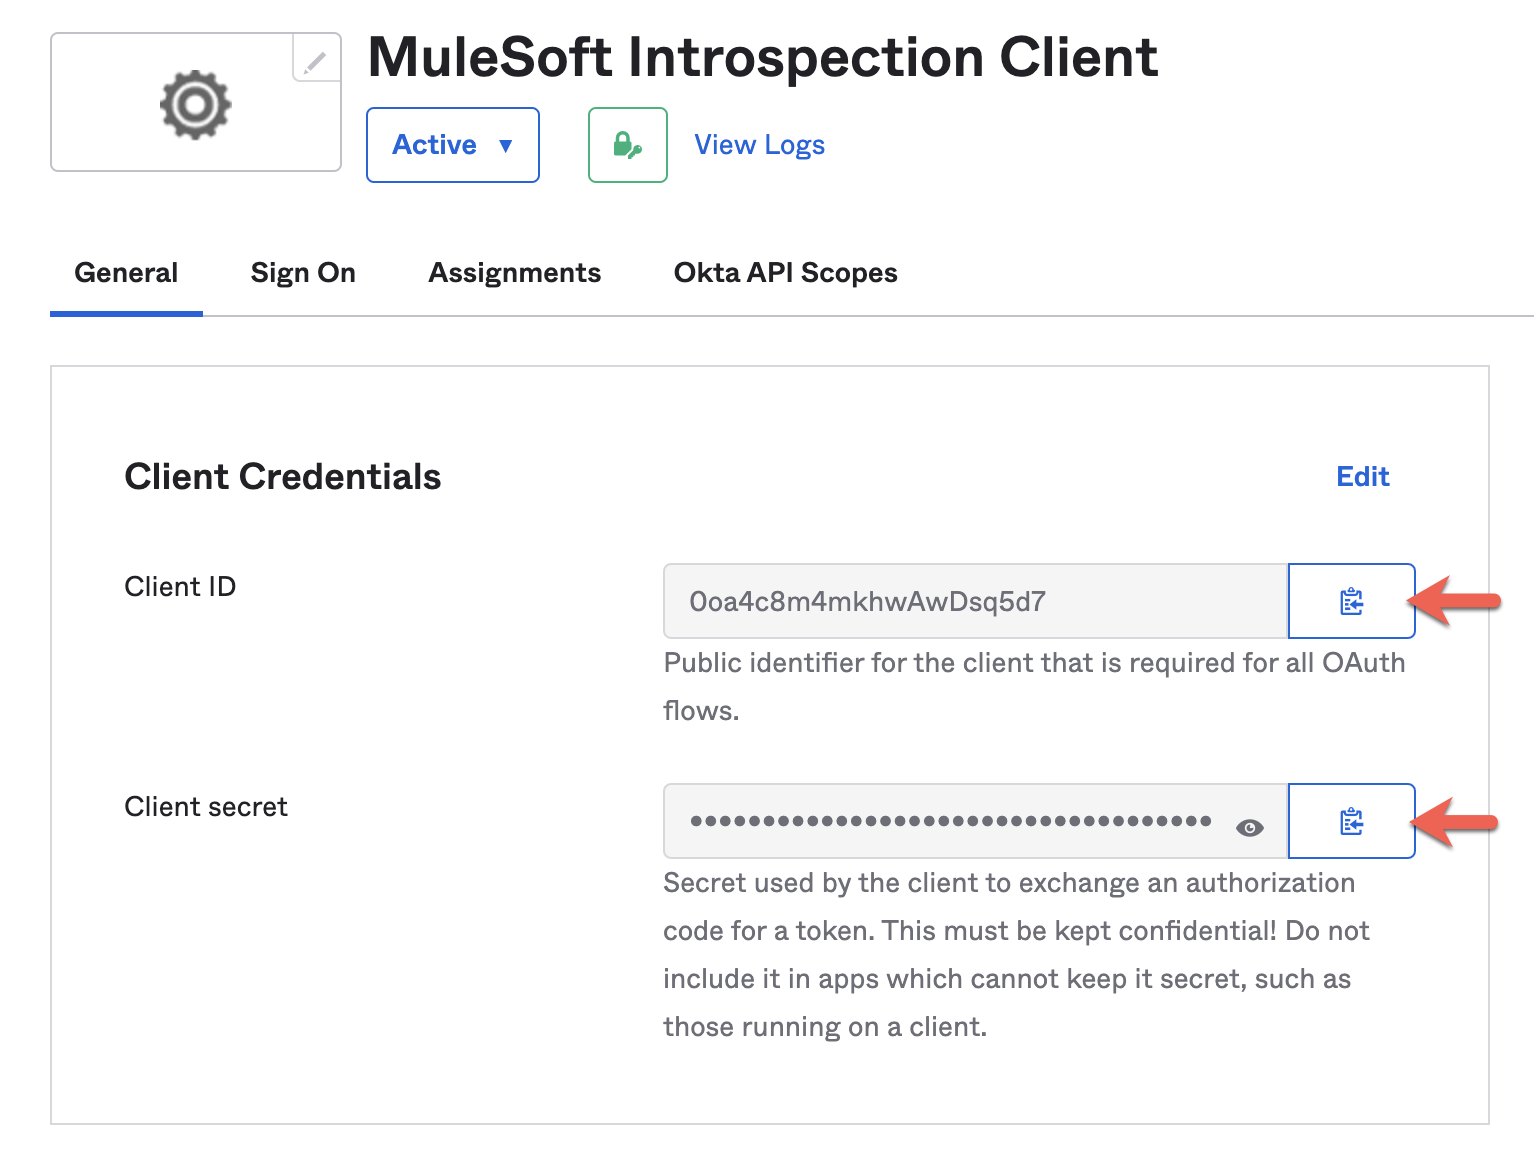
7. You will land in the General tab of your application. From here, take a note of the Client ID and Client Secret generated. We will use them later.
This completes the Okta setup. Let's setup Anypoint Platform for External Client Management as below.
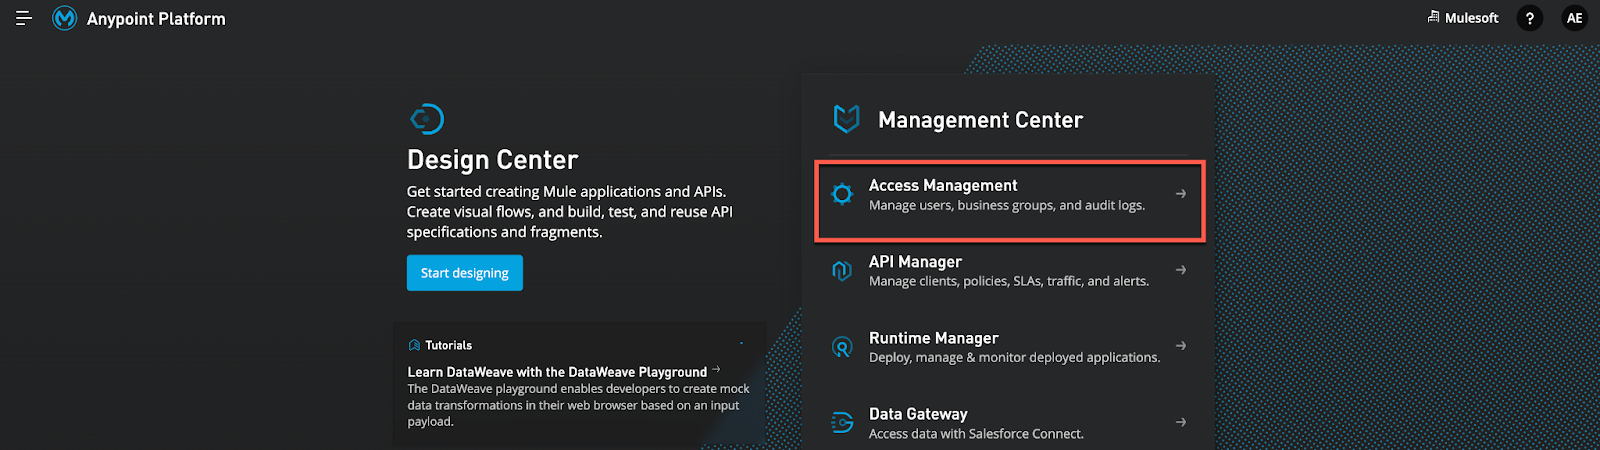
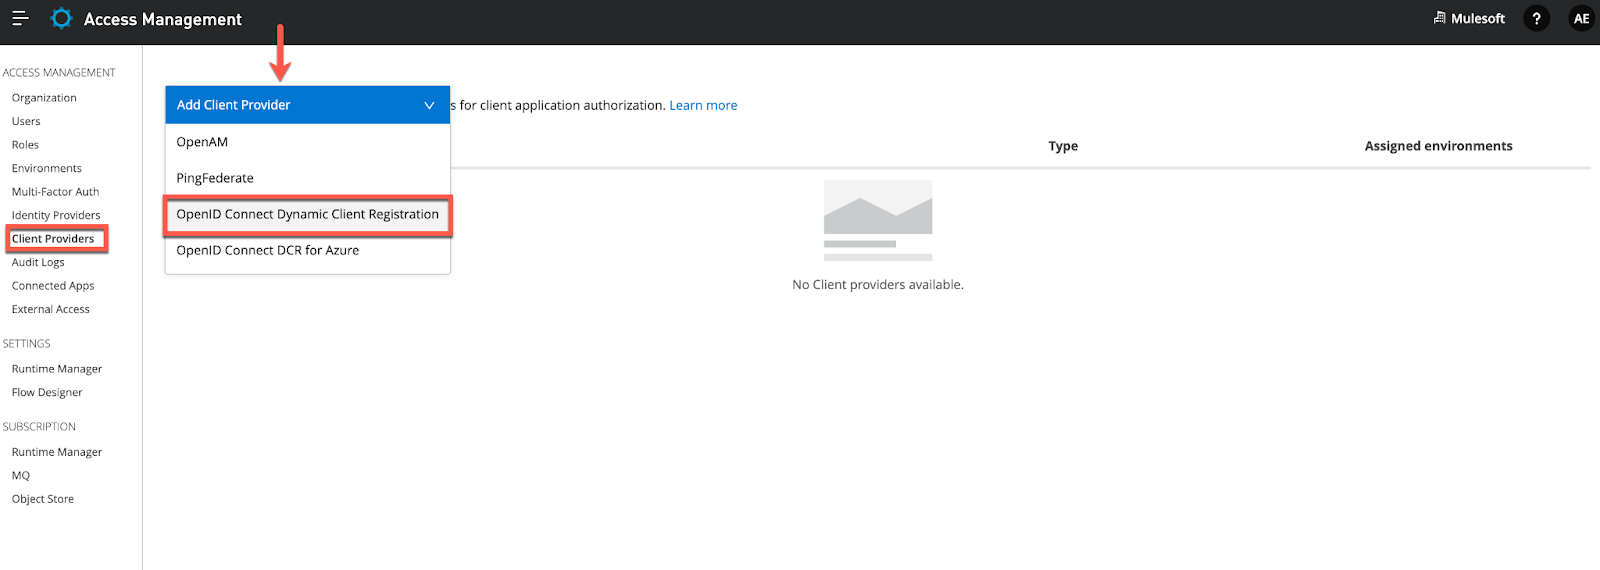
8. Go to Access Management → Client Providers→ Add Client Provide and select OpenID Connect Dynamic Client Registration as your management option.
9. Anypoint platform will now prompt for OIDC and Authorization details. We will complete this with our Okta instance details we created above.
To get the URL details go to the OKTA developer page. Then, go to Security → API → Click on the default Authorization Server and then click on the Metadata URI. A new tab will open where all the URL details are specified.
Now we're able to fill out all the blanks:
Name: OIDC Client Provider
Issuer: https://dev-********.okta.com/oauth2/default
Client Registration URL: https://dev-********.okta.com/oauth2/v1/clients
Authorization Header: SSWS *****kFTdH79iYCAR54Rd5vuV1ve6************
Client ID: 0oajj6a3b3idBUANB0h7
Client Secret: *******m6njv752LHVz6vEPNQ5FP6A********
Authorize URL: https://dev-********.okta.com/oauth2/default/v1/authorize
Token URL: https://dev-********.okta.com/oauth2/default/v1/token
Token Introspection URL: https://dev-********.okta.com/oauth2/default/v1/introspect
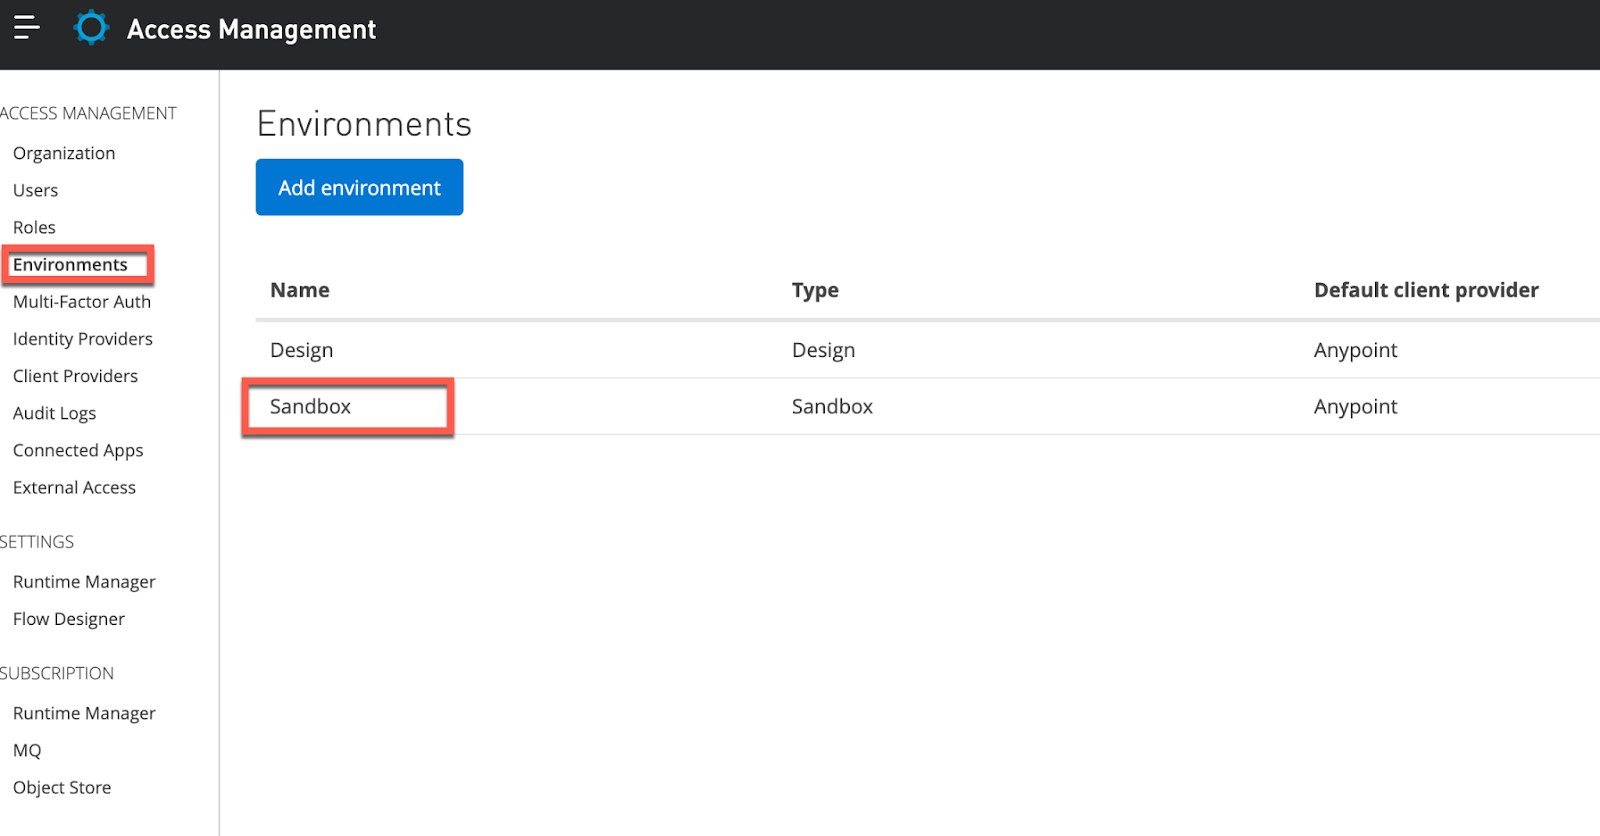
10. Once the above is saved, go to Environments and add the created OIDC Client Provider to the Sandbox environment.

Now, anytime a client requests access to a ‘secured' API, Anypoint platform will perform Dynamic Client Registration ‘behind the scenes' to register this client with Okta which in turn will provide the Client ID and Secret to be communicated back to the Client for subsequent API calls.
This completes the Anypoint platform setup for OIDC. We'll now leverage this and start securing an API with OIDC and OAuth as below;
11. Now that we have completed the setup for both Okta and Anypoint platform, let's see how an API can be secured via OIDC.
12. Let's create a simple API spec in Design Center which has one resource ‘/employees' whose GET returns a list of employees as below (you can copy the code below to move on faster).
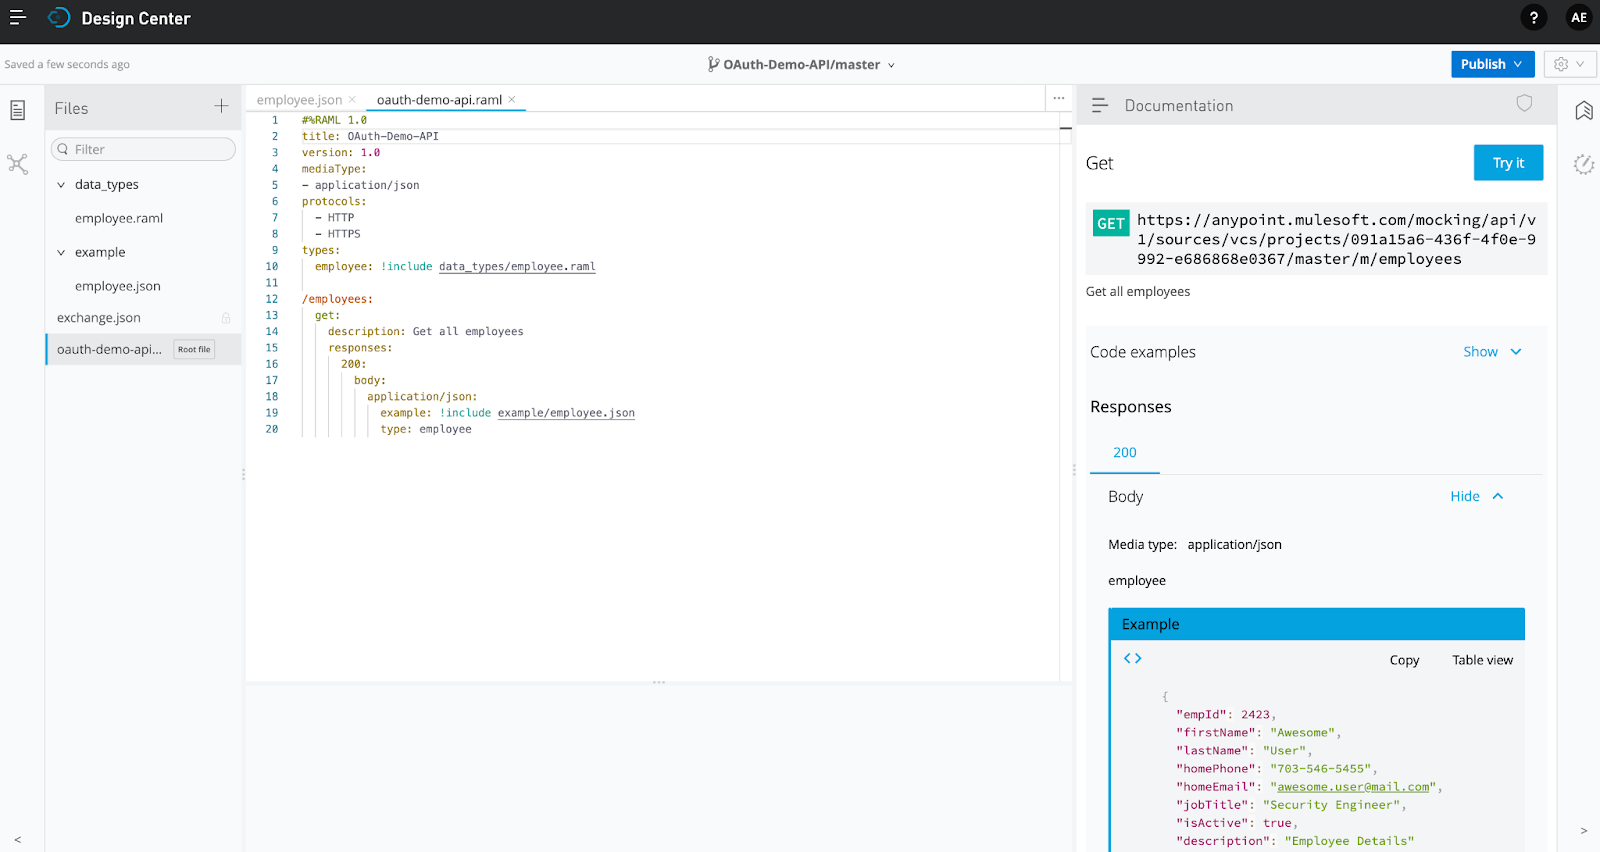
Here is the code to copy:
oauth-demo-api.raml
:
#%RAML 1.0
title: OAuth-Demo-API
version: 1.0
mediaType:
- application/json
protocols:
 - HTTP
 - HTTPS
baseUri:
types:
 employee: !include data_types/employee.raml

/employees:
 get:
   description: Get all employees
   responses:
     200:
       body:
         application/json:
           example: !include example/employee.json
           type: employee
employee.raml
:
#%RAML 1.0 DataType
type: object
properties:
 empId: integer
 firstName: string
 lastName: string
 homePhone: string
 homeEmail: string
 jobTitle: string
 isActive: boolean
 description: string
employee.json
:
{
 "empId": 2423,
 "firstName": "Awesome",
 "lastName": "User",
 "homePhone": "703-546-5455",
 "homeEmail": "awesome.user@mail.com",
 "jobTitle": "Security Engineer",
 "isActive": true,
 "description": "Employee Details"
}
Be sure the GET method is working (by using the moking service right there in Desing Center) and then publish this API to Exchange for later applying some policy to secure it.
13. Go to API Manager and select Manage API from Exchange:
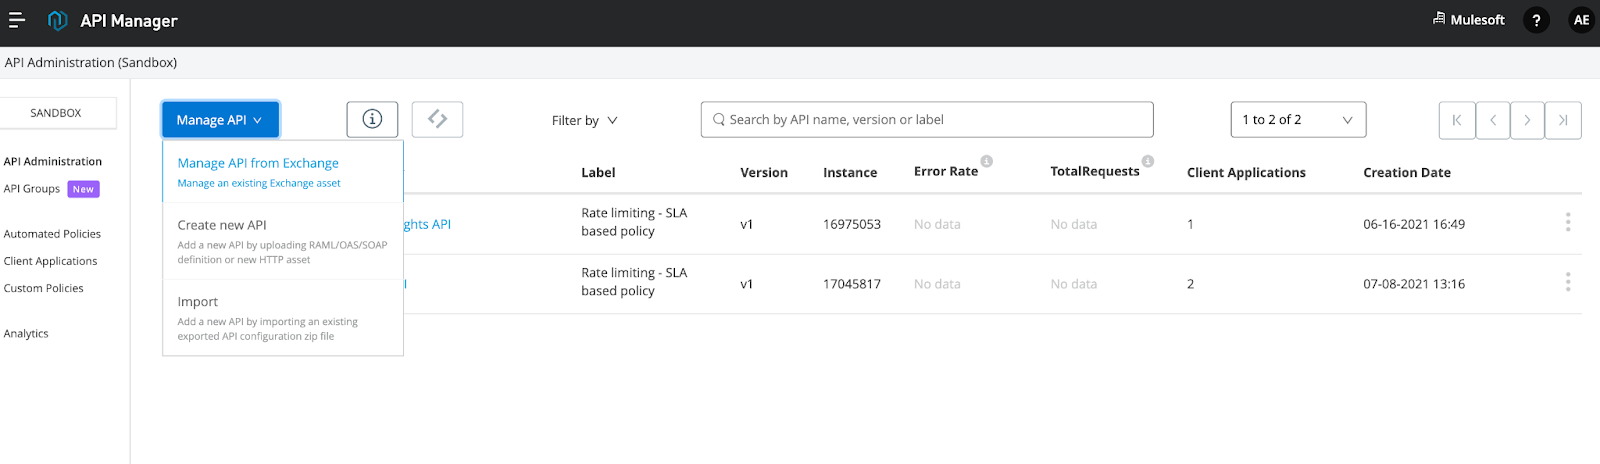
Now you have to create and deploy an API proxy in API Manager. For demo purposes, the implementation endpoint of this proxy simply refers to the API mocking service URL, please change this accordingly.
The URL I'm using is (without /employees):
https://anypoint.mulesoft.com/mocking/api/v1/links/fca72401-8555-484e-8e67-4a9bdc76716f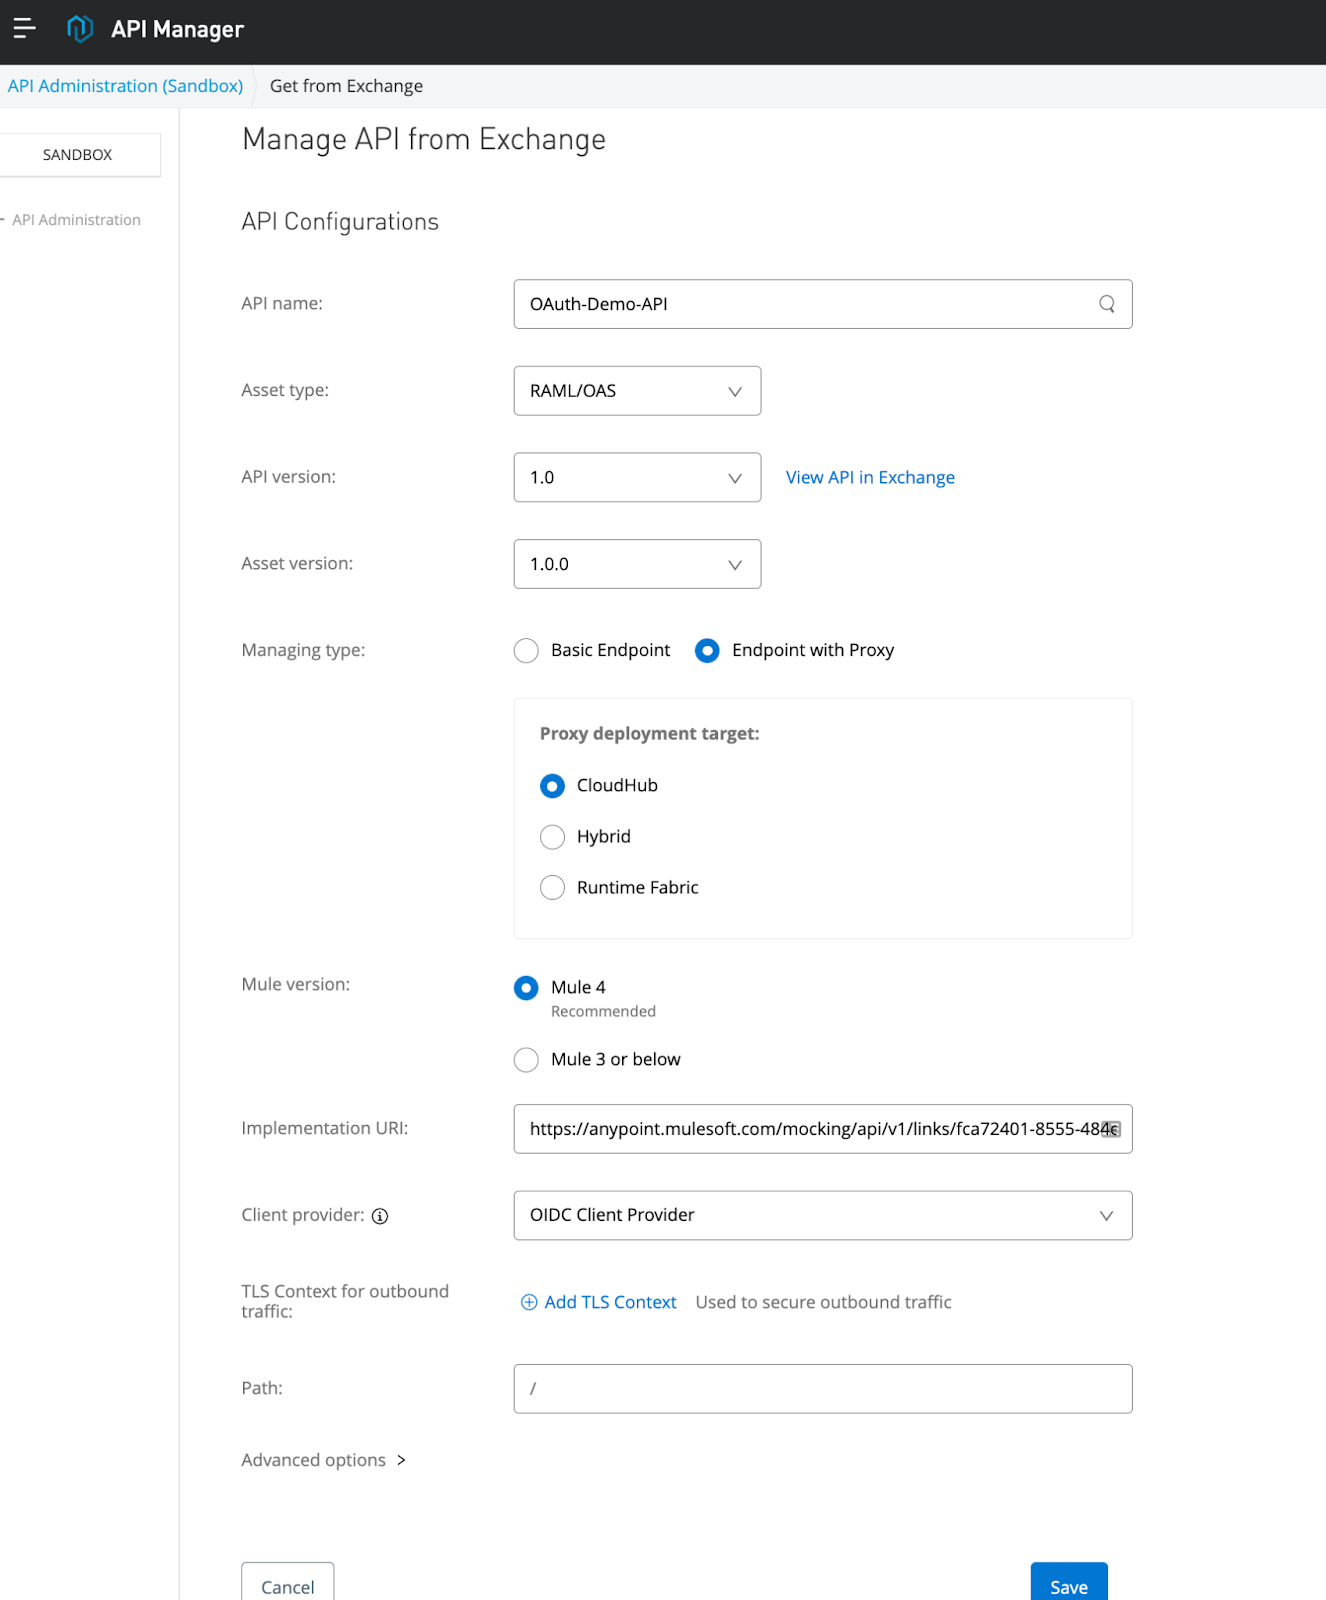
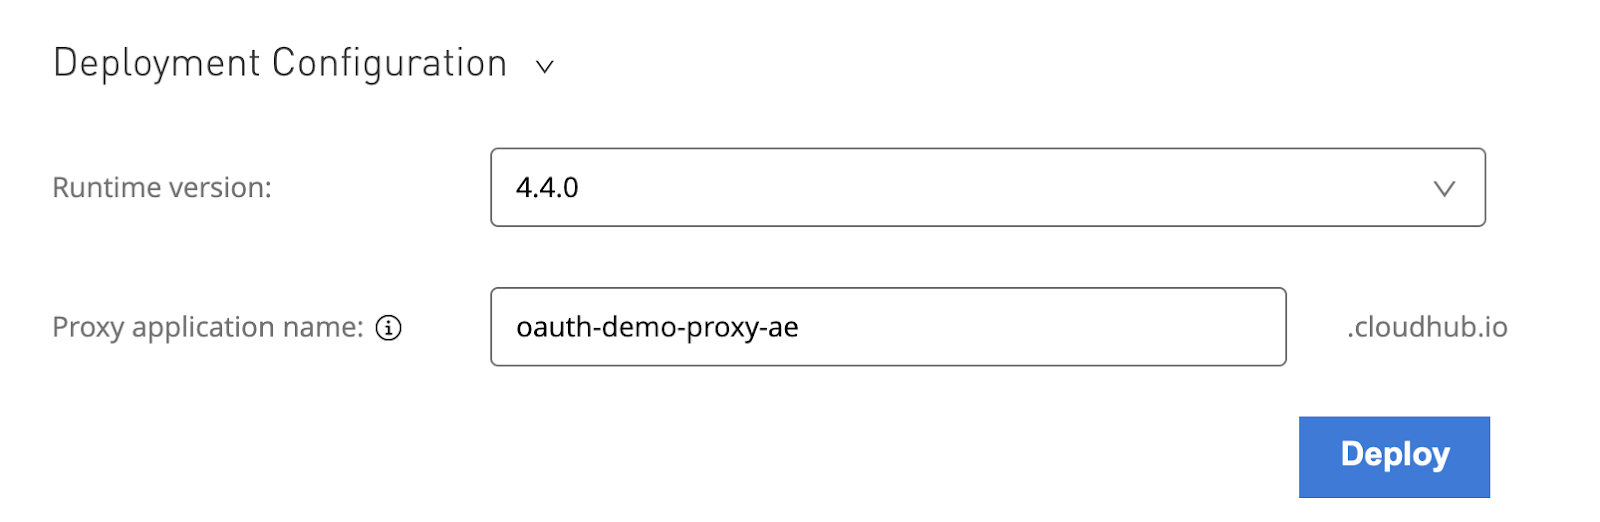
Now, deploy it to CloudHub. You can choose any name you want. I used "oauth-demo-proxy" and my initials.
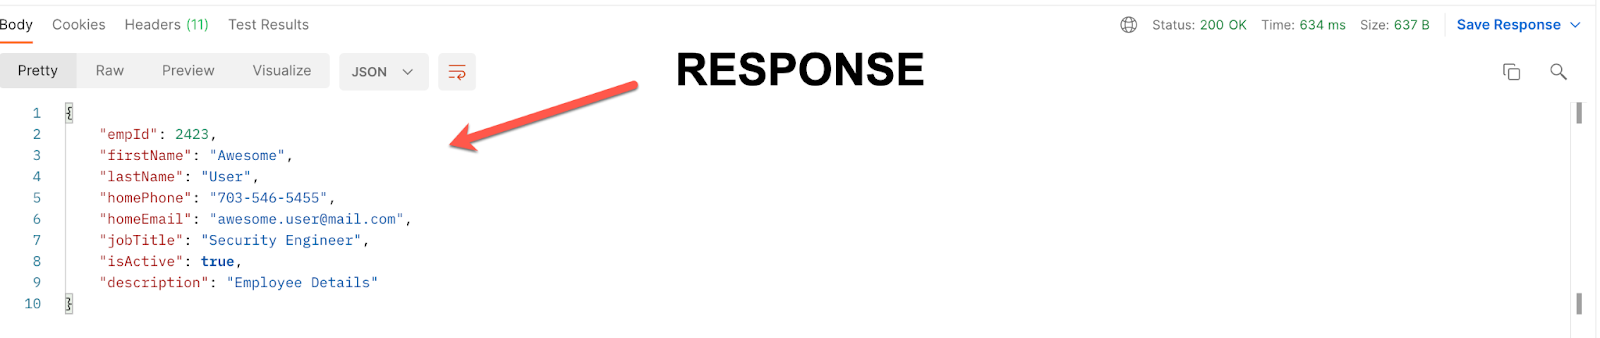
14. Make a call to this ‘yet to be secured' API and you will see it returns our sample response.
http://oauth-demo-proxy-ae.us-e2.cloudhub.io/employees
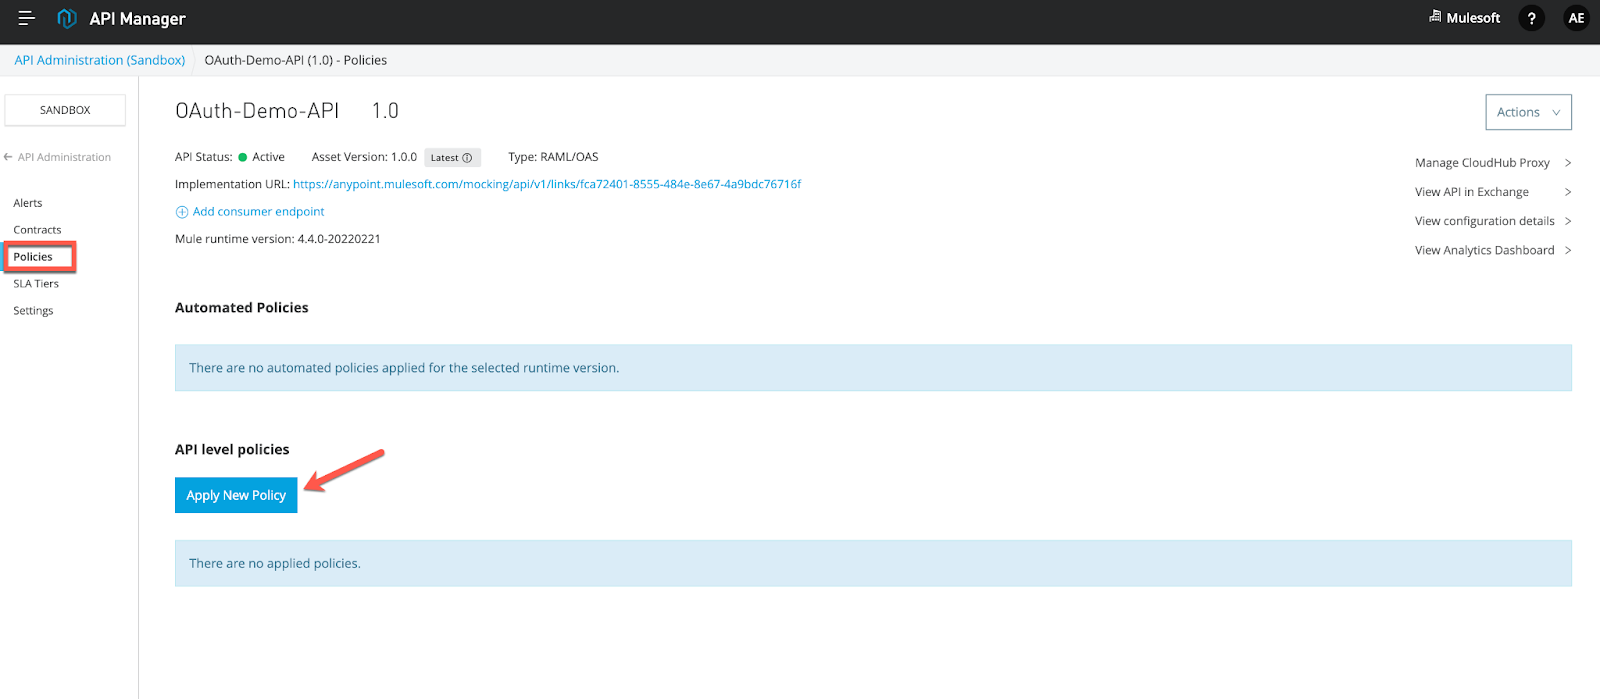
15. Now, apply the OIDC token enforcement policy on it:
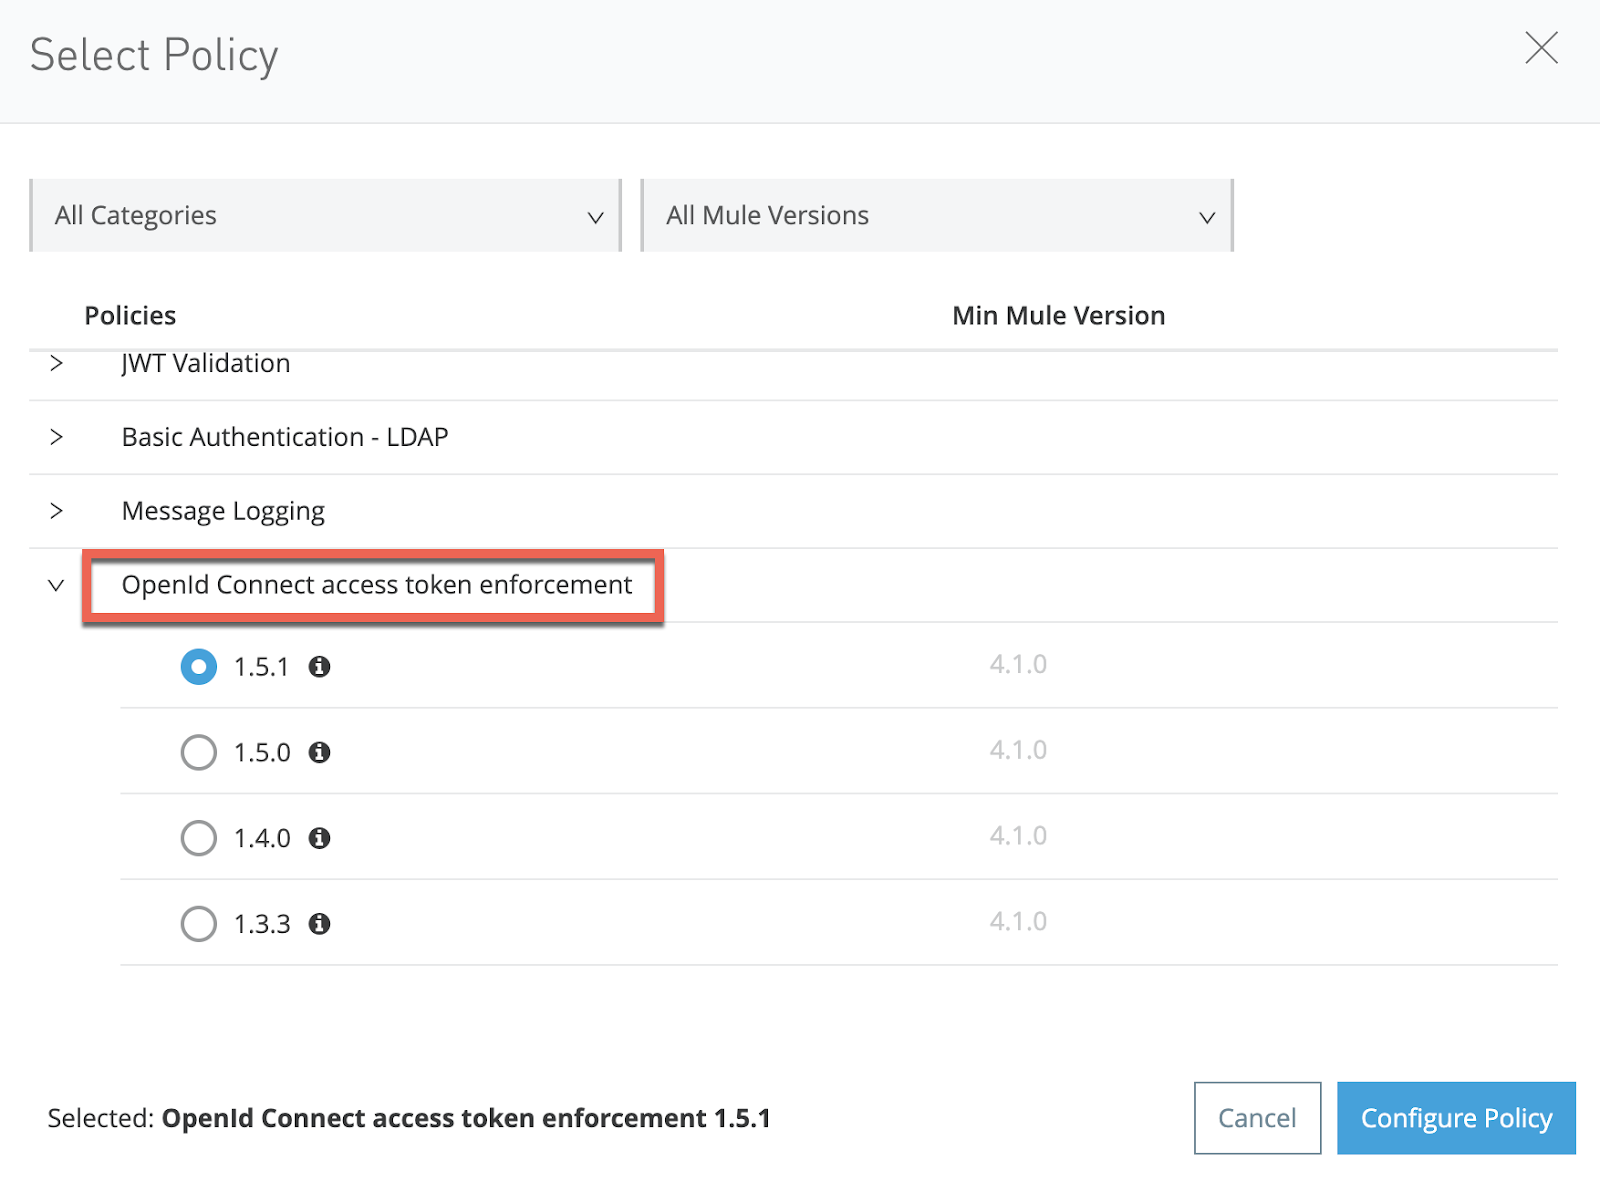
16. Accept the default configuration (for now, we will leave the scope as empty).
17.
[OPTIONAL] Apply the auto-generated API spec security snippet for OIDC to your API spec and update the API Asset Version in API Manager appropriately.
18. When you retry calling this API without any security credentials, you will now see appropriate security error as below.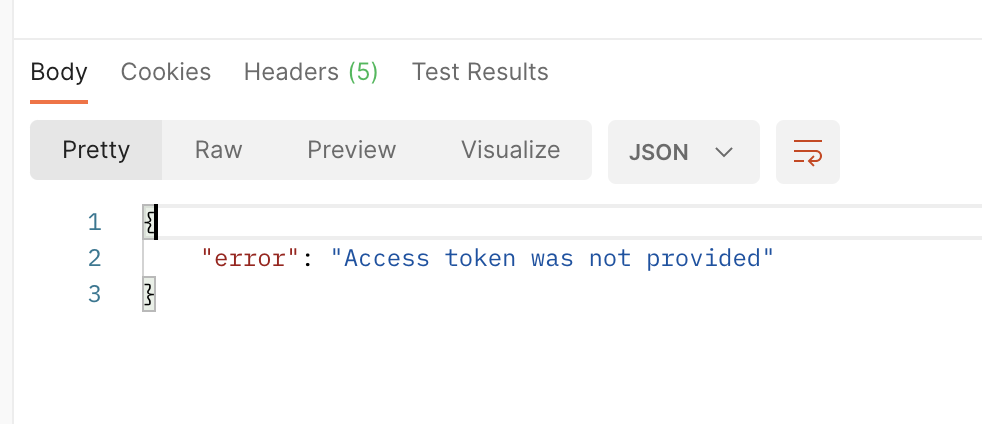
Now that we have secured our API with OIDC with Okta, let's see how we can get the appropriate security tokens to make a successful API test call.
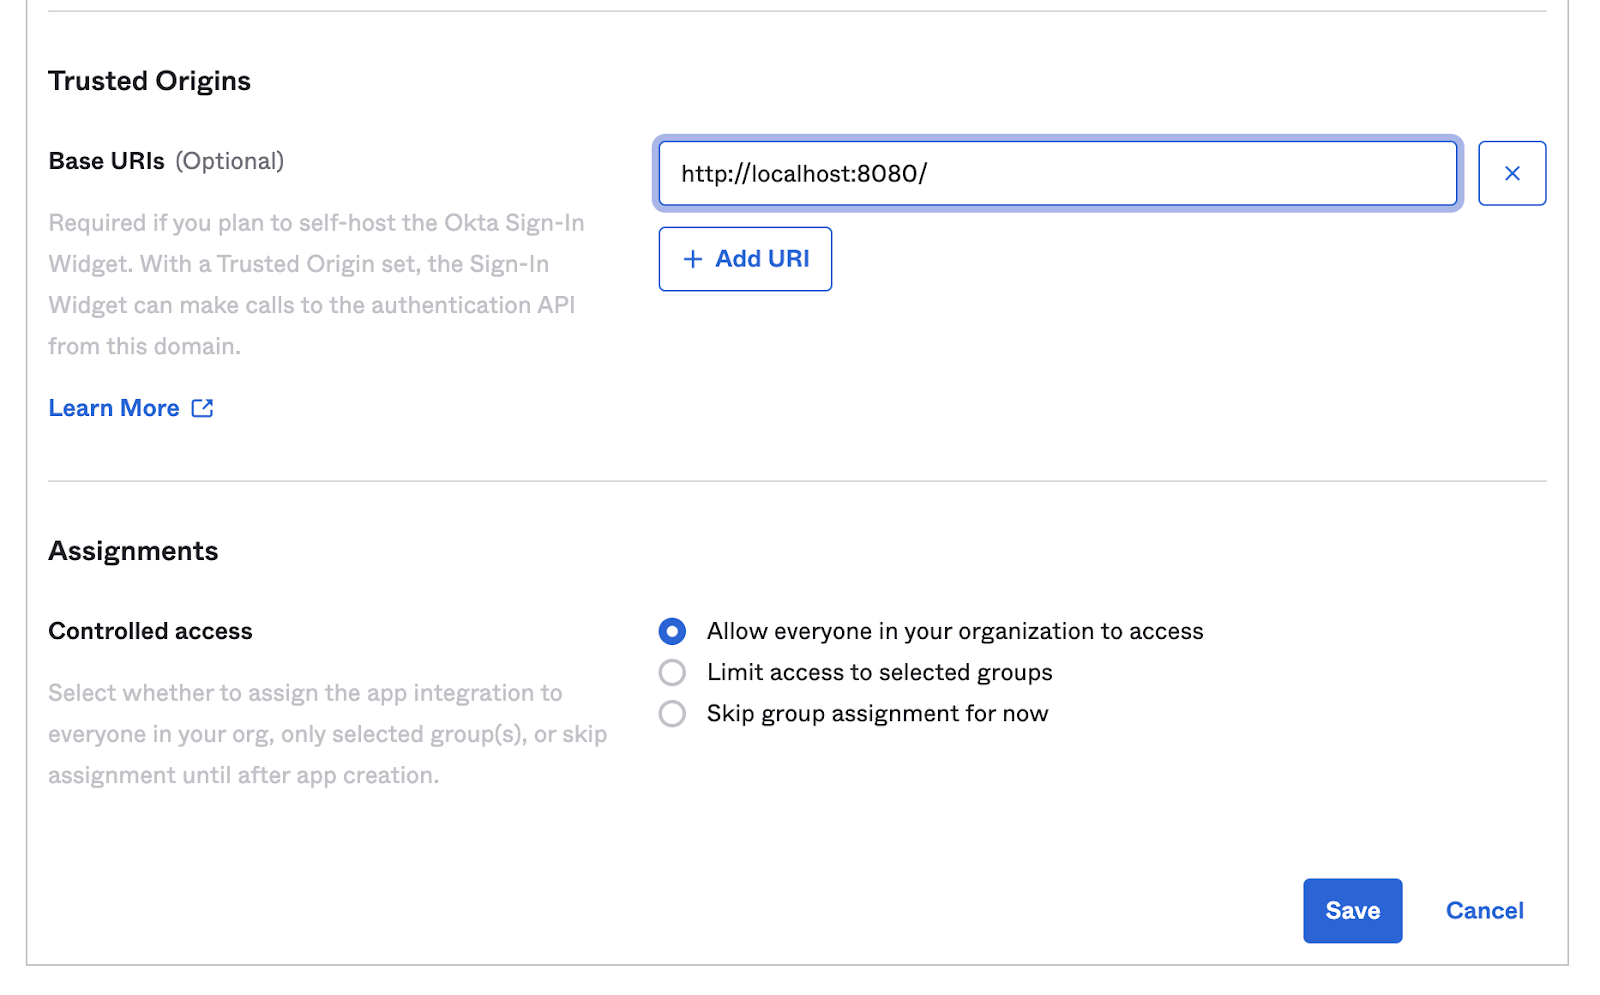
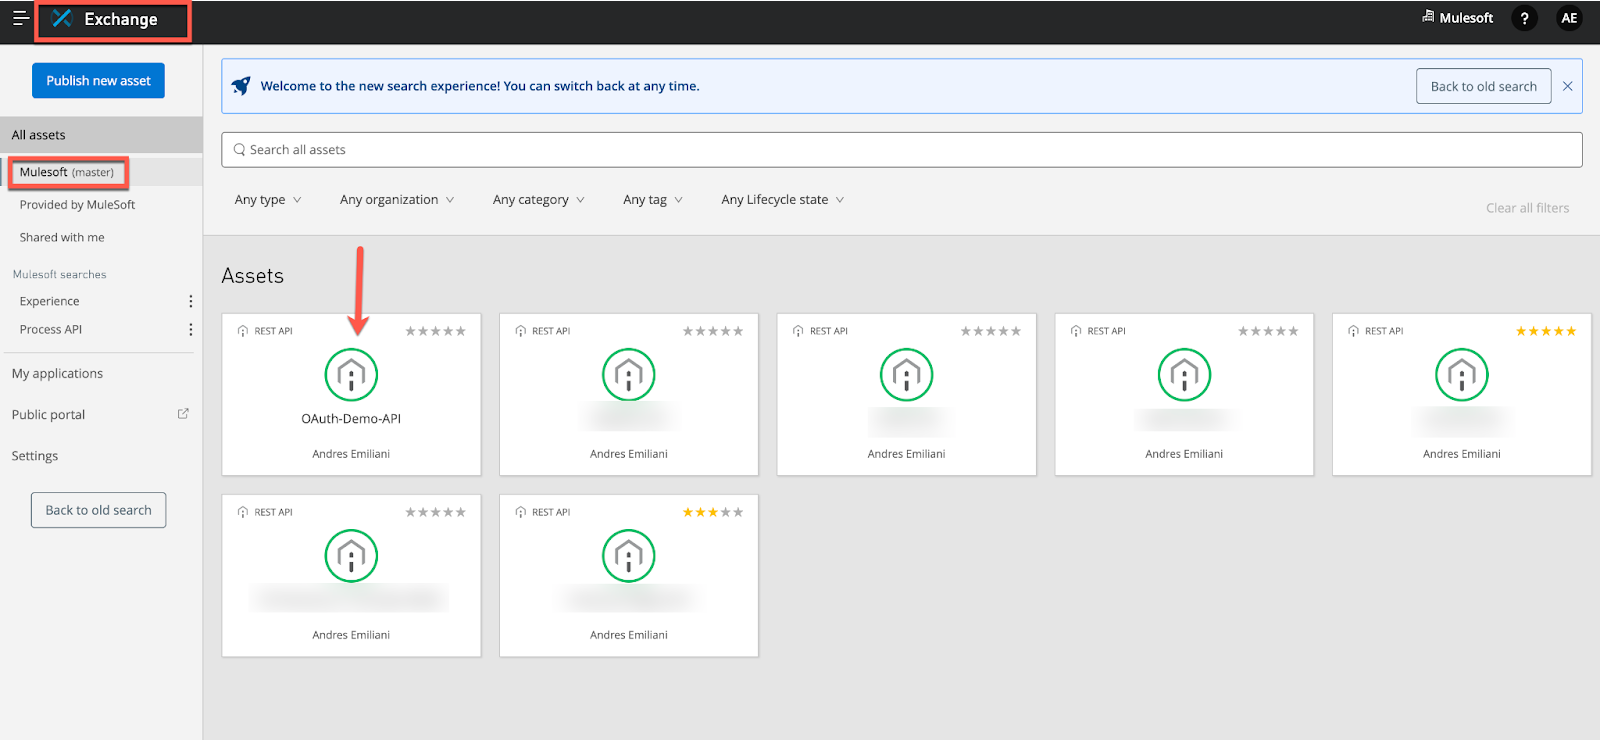
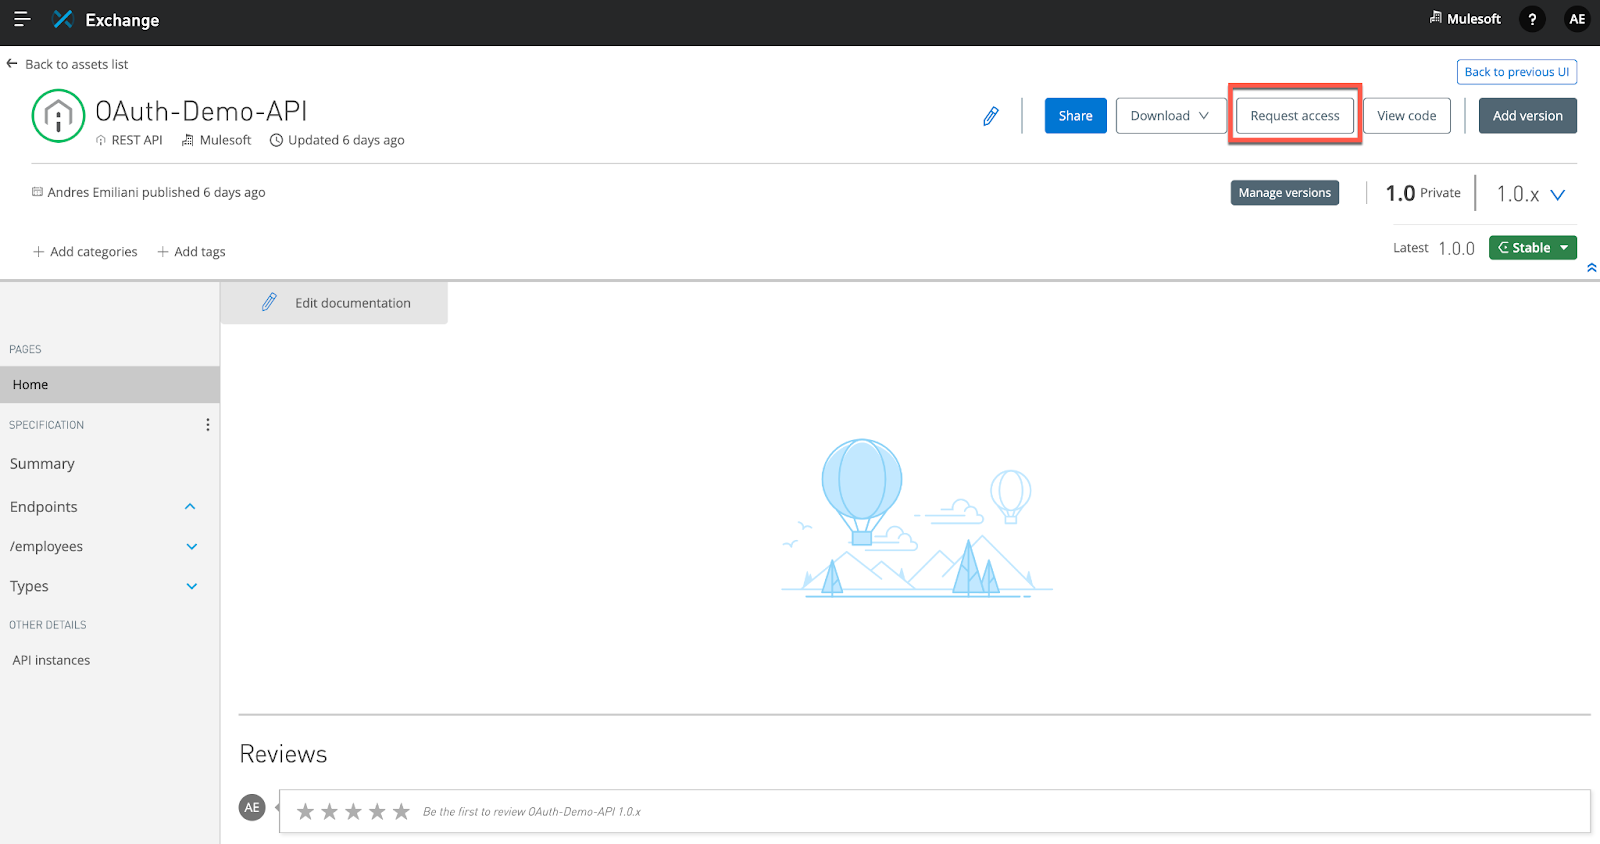
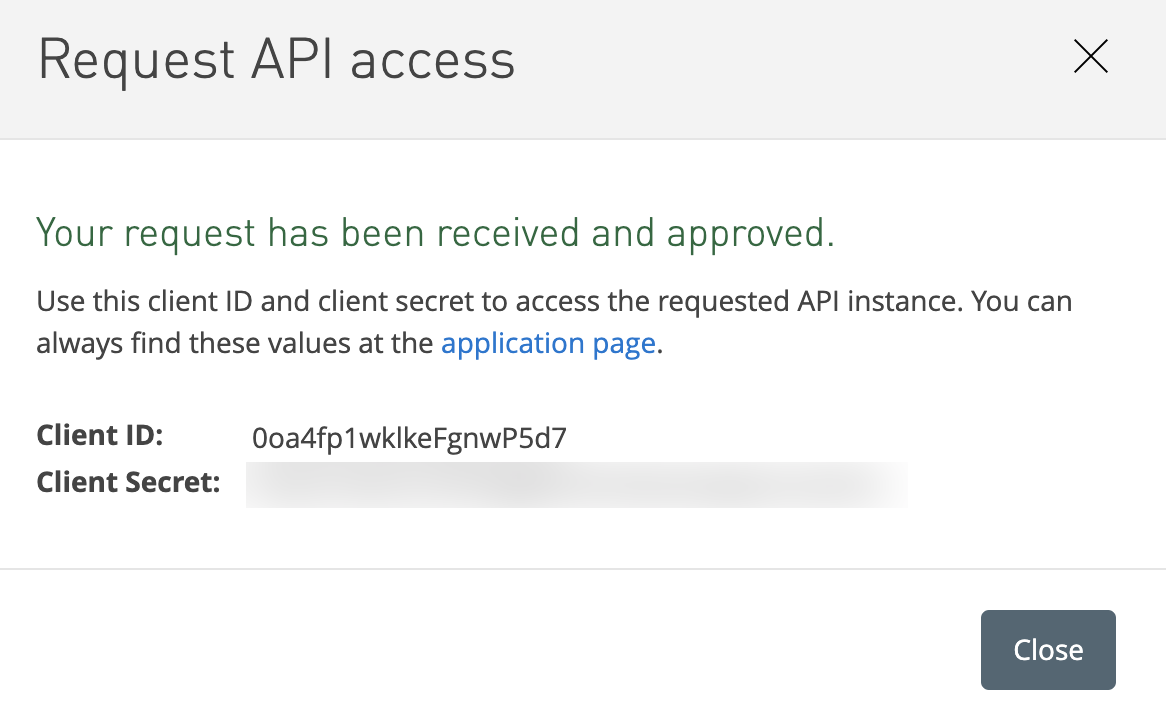
19. Go to the OAuth-Demo-API we just secured above (secured via OAuth/OIDC/Okta) in Exchange and ‘Request Access'. Create a ‘new application' as below. We will select both AuthCode as well as Implicit grant types.

For the redirect URI you can use the one that our app in Okta has. In my case it is:
http://localhost:8080/authorization-code/callback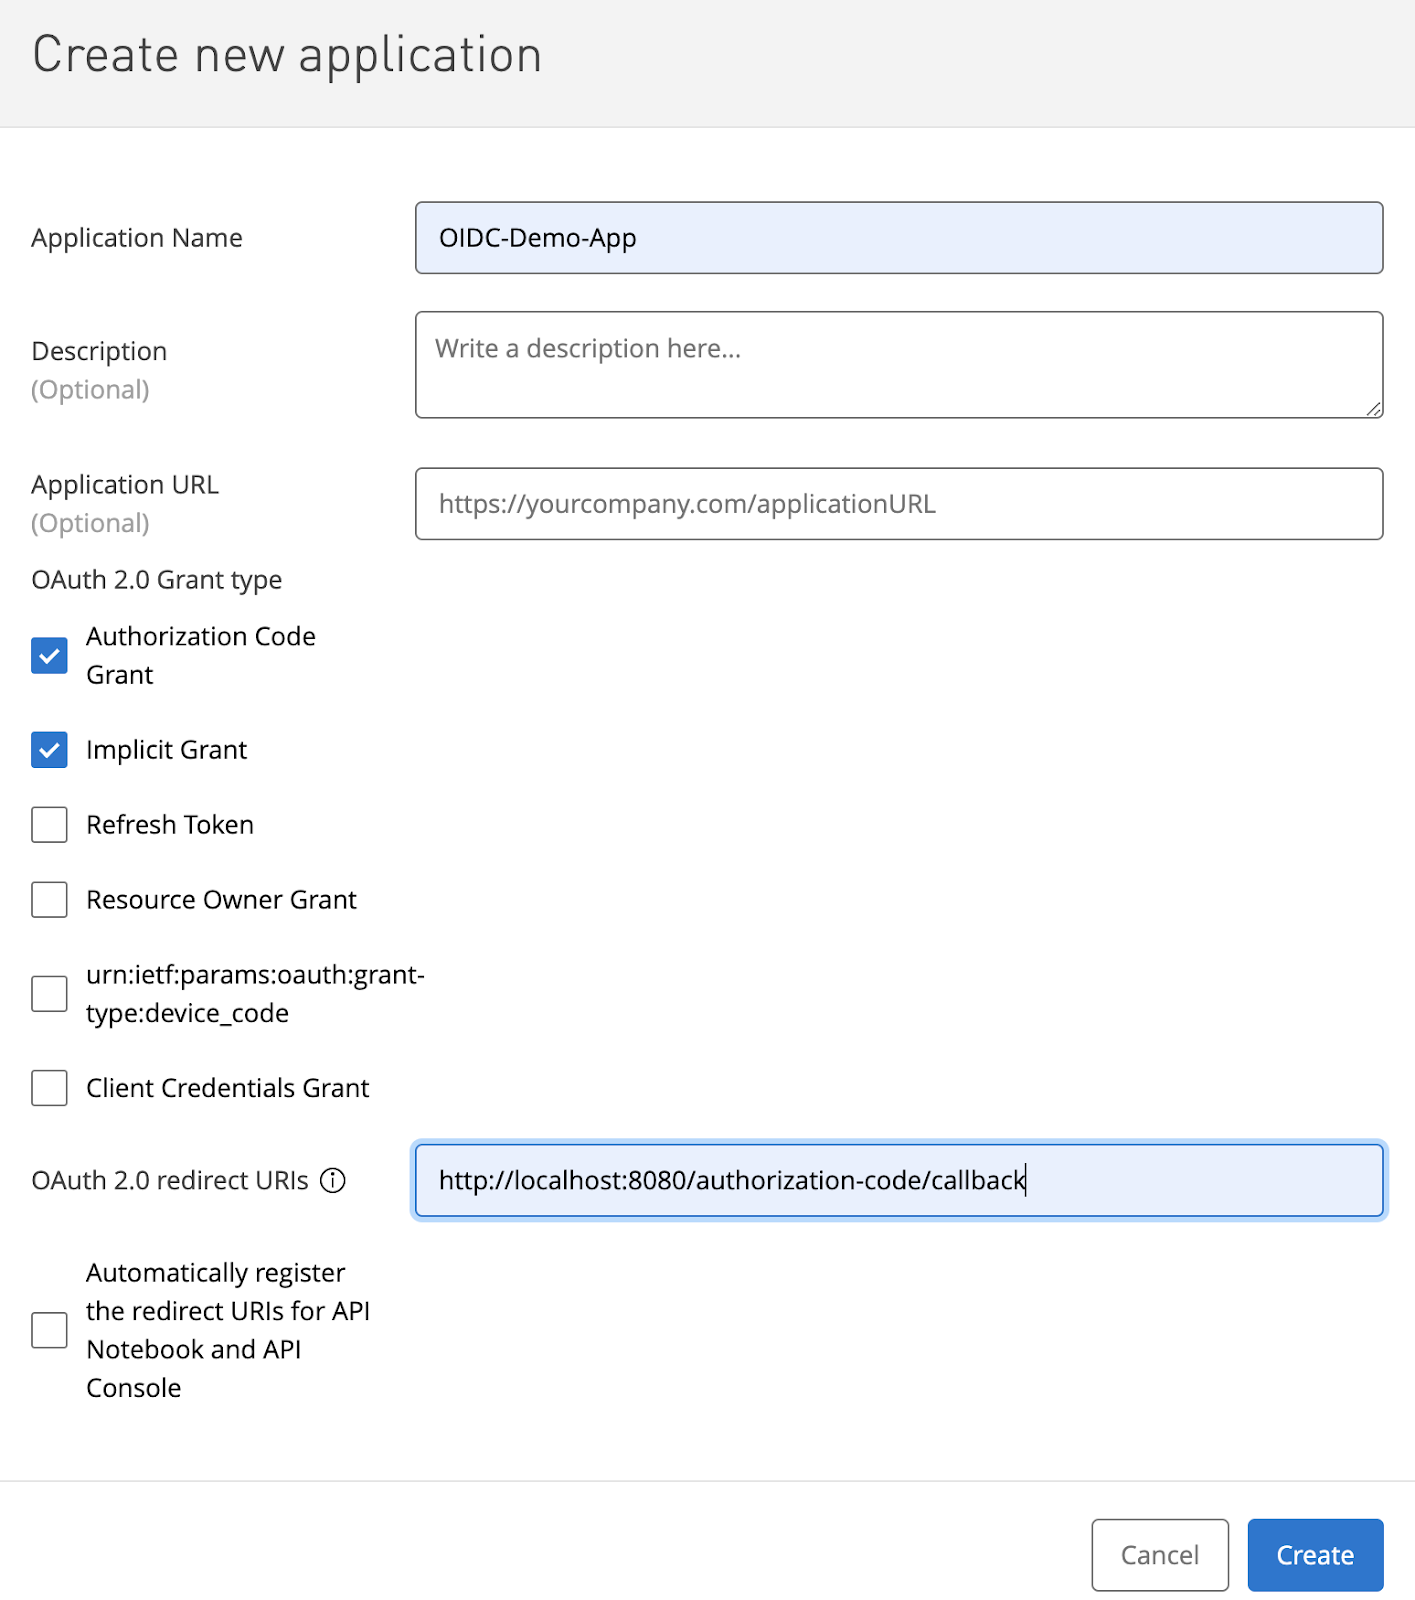
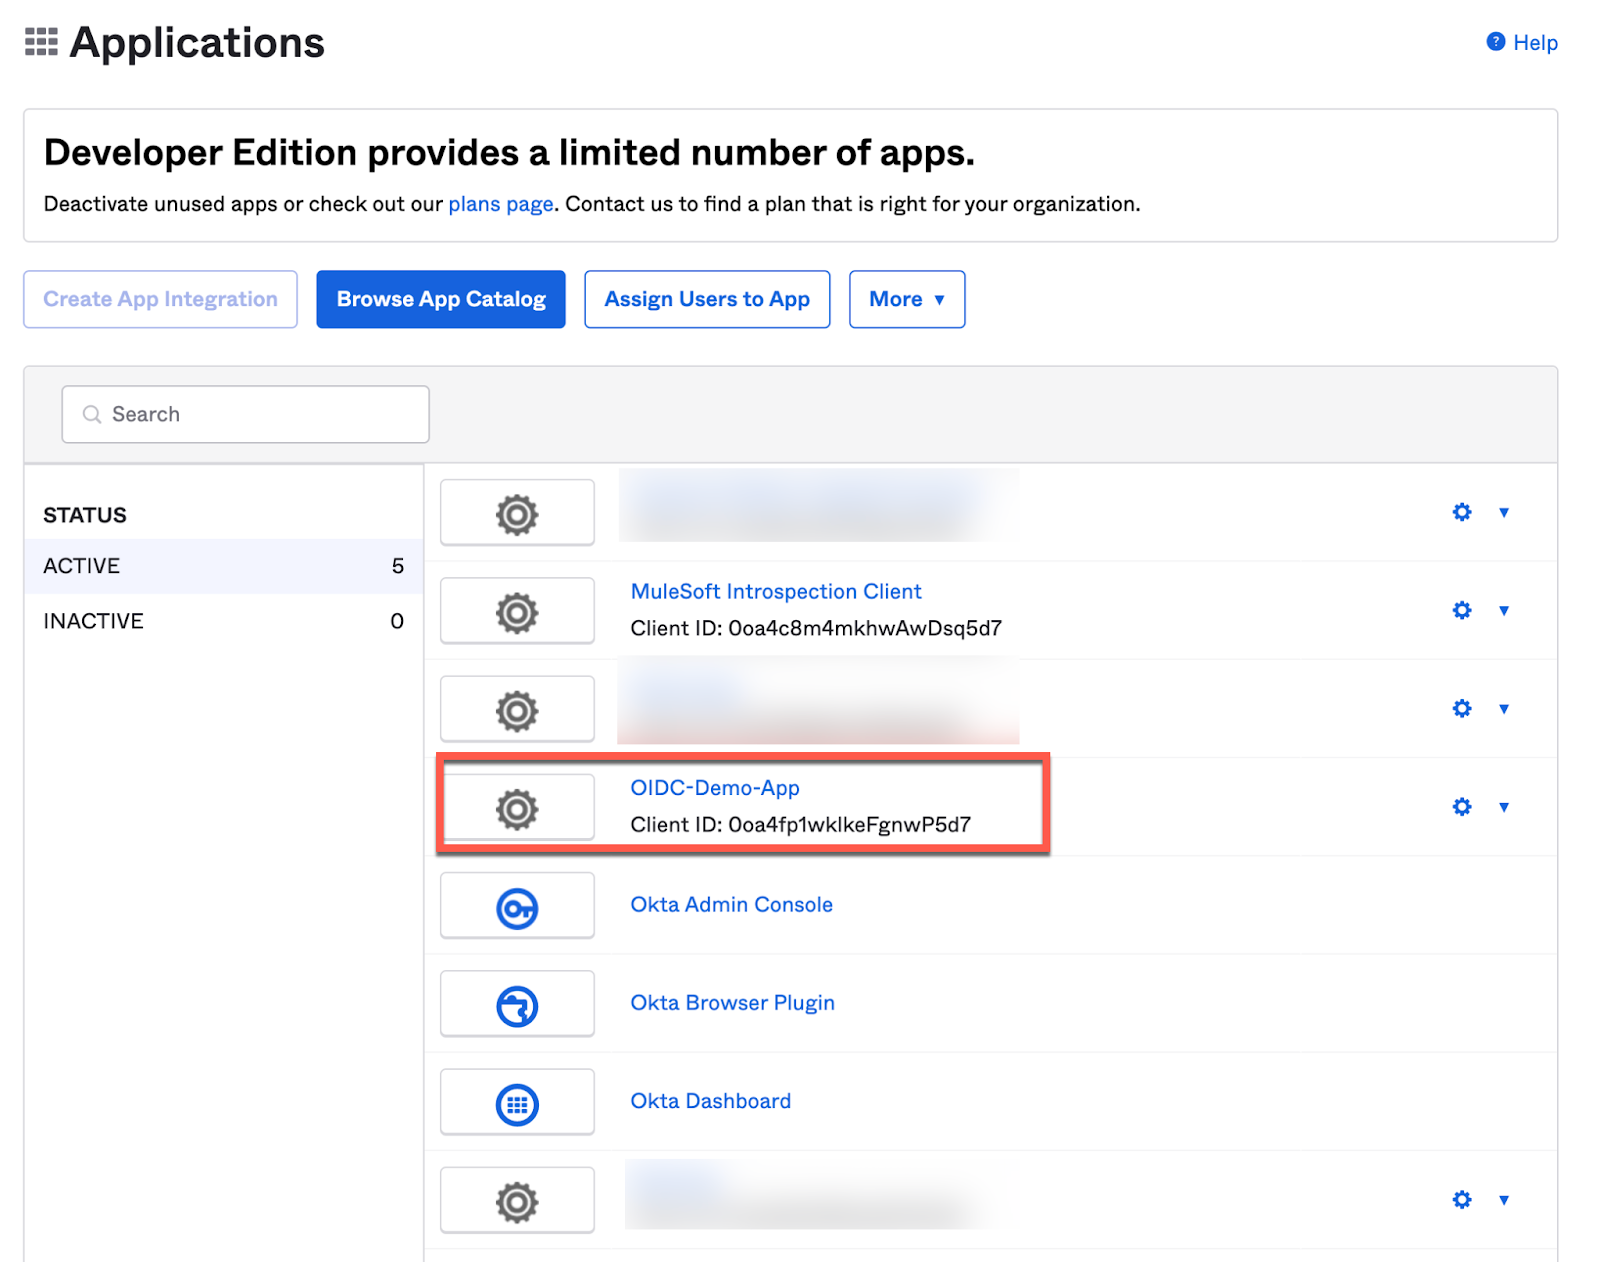
20. Now, go back to Okta and verify that the OIDC-Demo-App has been auto-created in Okta.
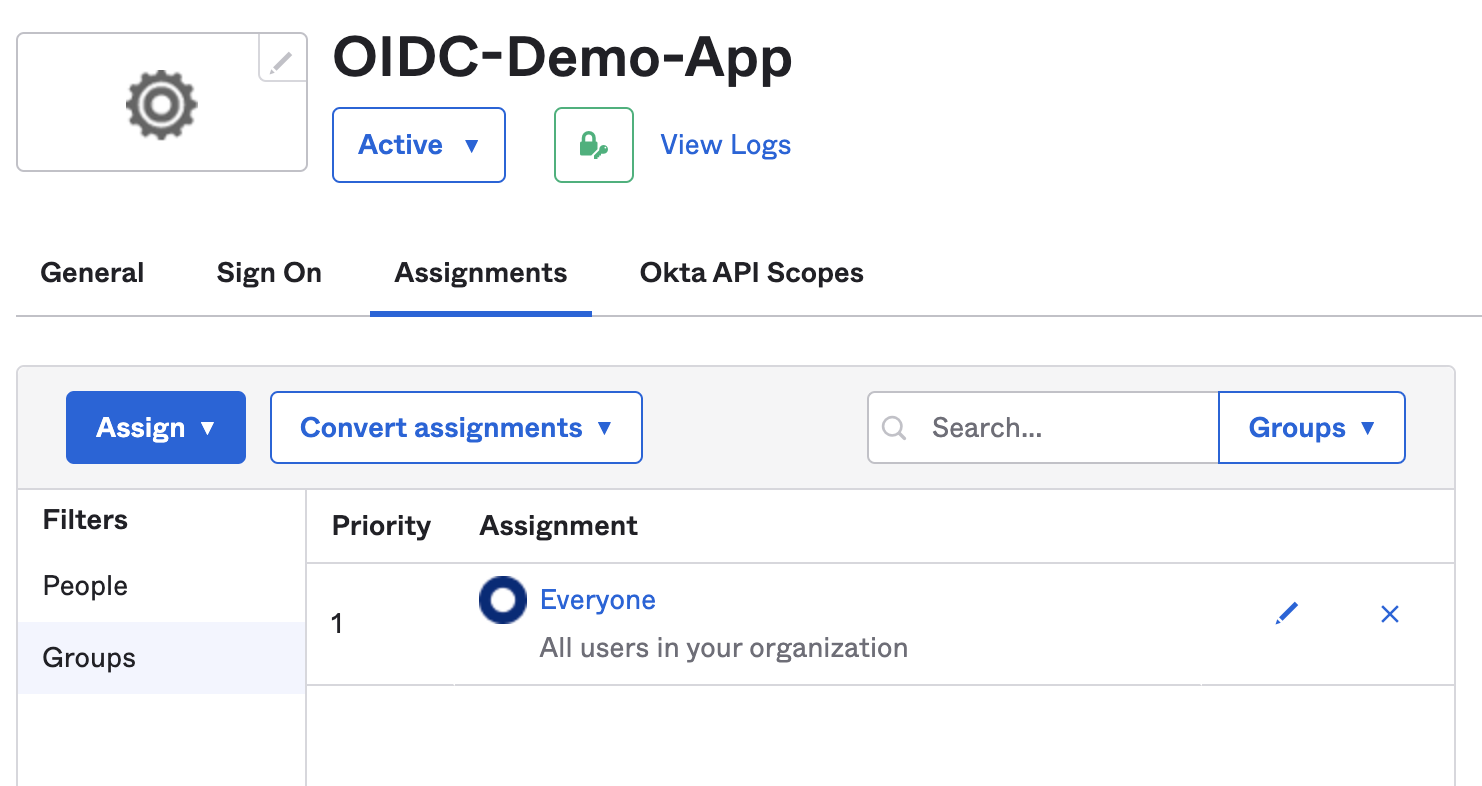
21. Click on ‘OIDC-Demo-App' and click Assignments →Assign → Assign to Groups → Everyone
22. Now, we will test the setup using both the grant types -- AuthCode and Implicit. We will use Postman to test the AuthCode grant and direct-urls to test the Implicit grant.
23. Authorization Code Grant Flow
23.1- Authorization Code grant type is typically used by confidential and public clients which can store the client-secret securely. This is a 2-step process with the auth-server returning an auth-code as a redirect in the first step. The client will then exchange this auth-code along with client id and secret for the access token in the second step.
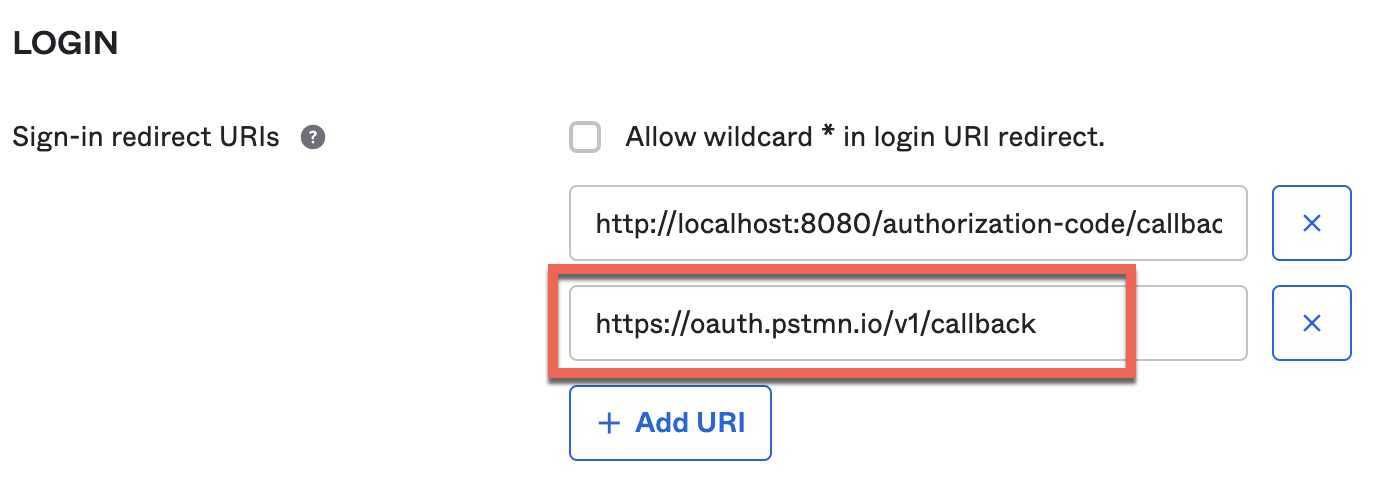
23.2 - To test using Postman, first add Postman's callback URL to Okta's OAuth-Demo-App by Applications → OIDC-Demo-App → General → Edit and adding the additional redirect-uris.
We are adding the redirect uri from postman:
https://oauth.pstmn.io/v1/callback
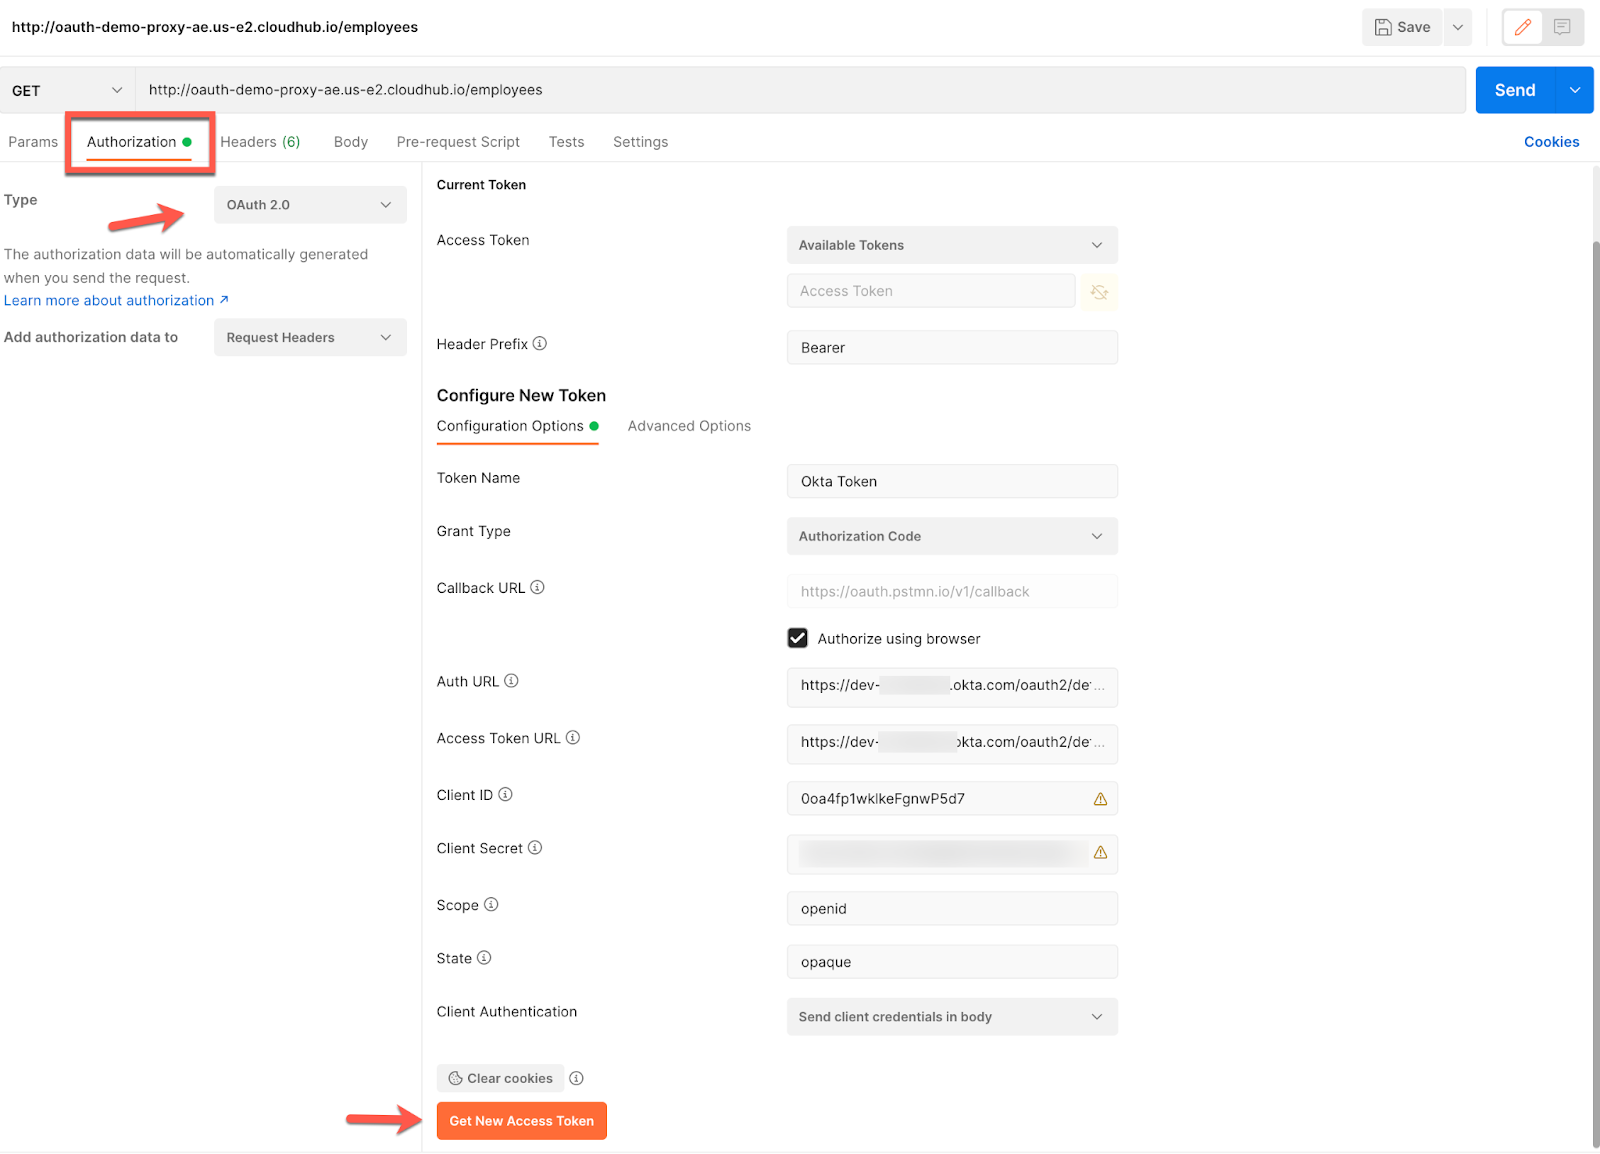
A. Get a New Access Token by configuring Postman as below.
The Auth URL will be:
https://dev-********.okta.com/oauth2/default/v1/authorize
And the Access Token URL:
https://dev-********.okta.com/oauth2/default/v1/token
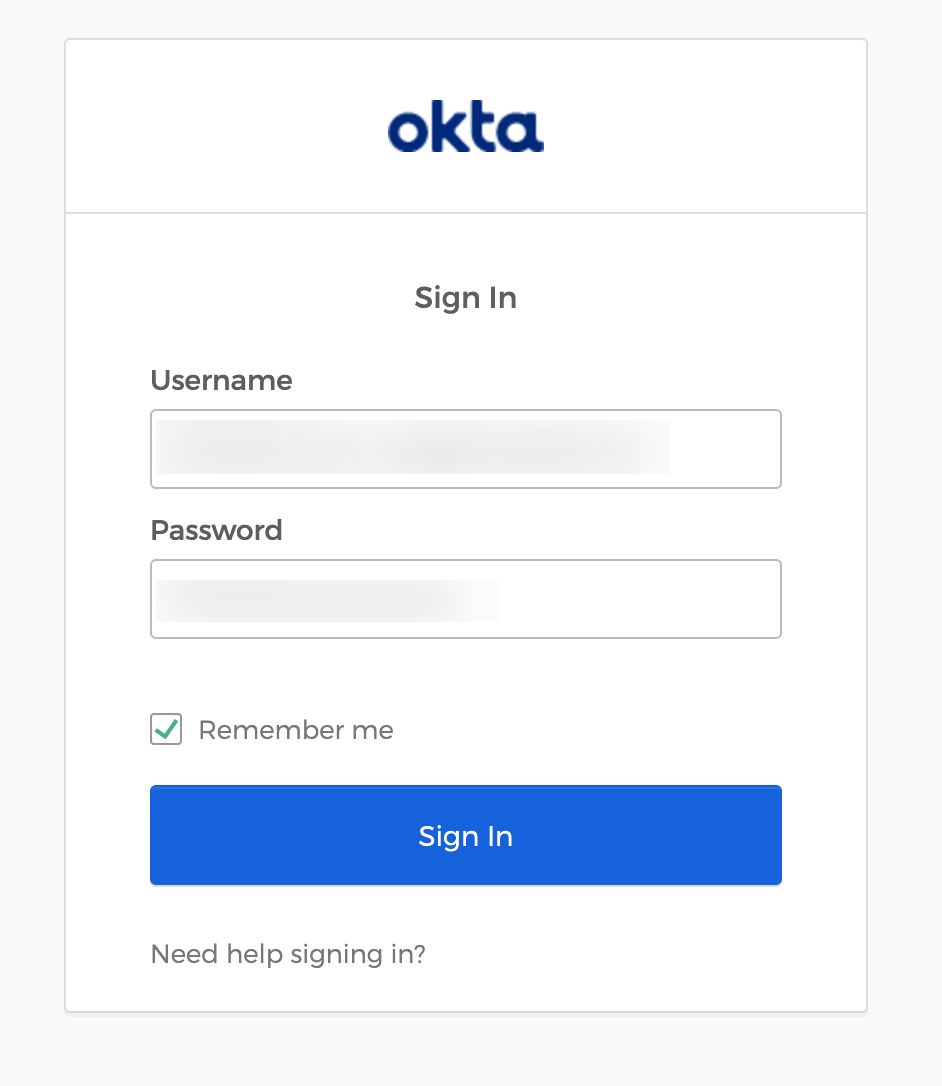
B. You will be prompted to authenticate to your Okta tenant.
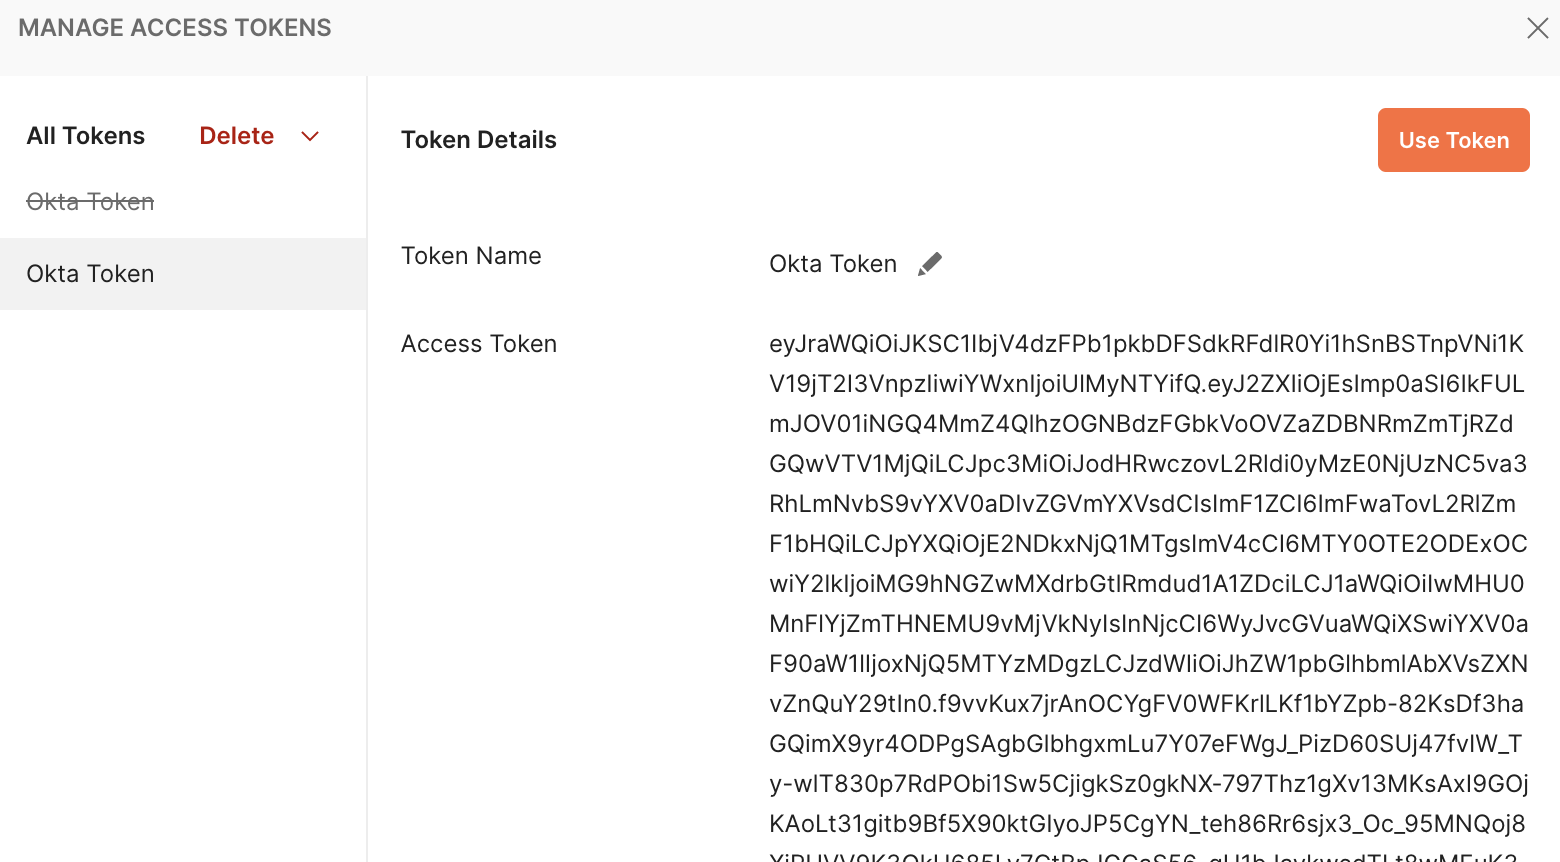
C. Use the returned access_token by clicking on the ‘Use Token' button
D. Now, call our secured API by passing this access_token. You will now see the authenticated response.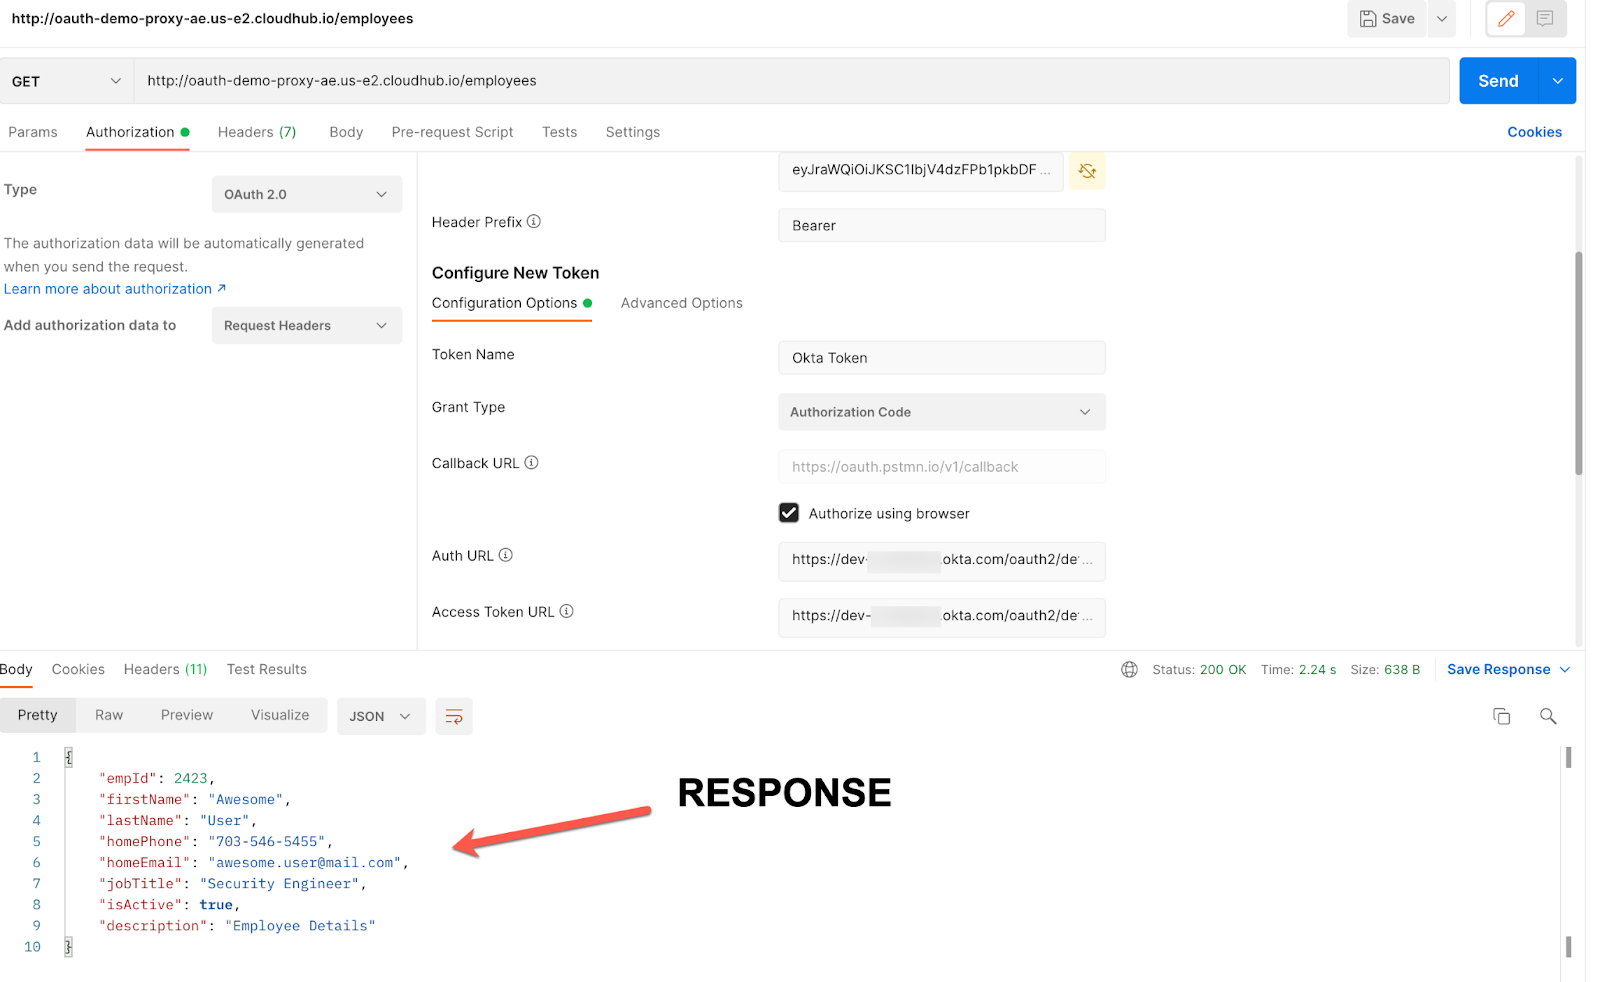
24. Implicit Flow
24.1 - Implicit grant type is typically used for user-agent-based clients (like single page web apps) where storing the client-secret cannot be securely stored. So, the auth-server won't return auth-code to be exchanged for access-token, but instead it will send the access-token directly.
24.2 - From Postman, get a new access token and configure as below:
The Auth URL will be:
https://dev-********.okta.com/oauth2/default/v1/authorize?nonce=foo
And the Access Token URL:
https://dev-********.okta.com/oauth2/default/v1/token

24.3 - You will be prompted to authenticate to your Okta tenant.
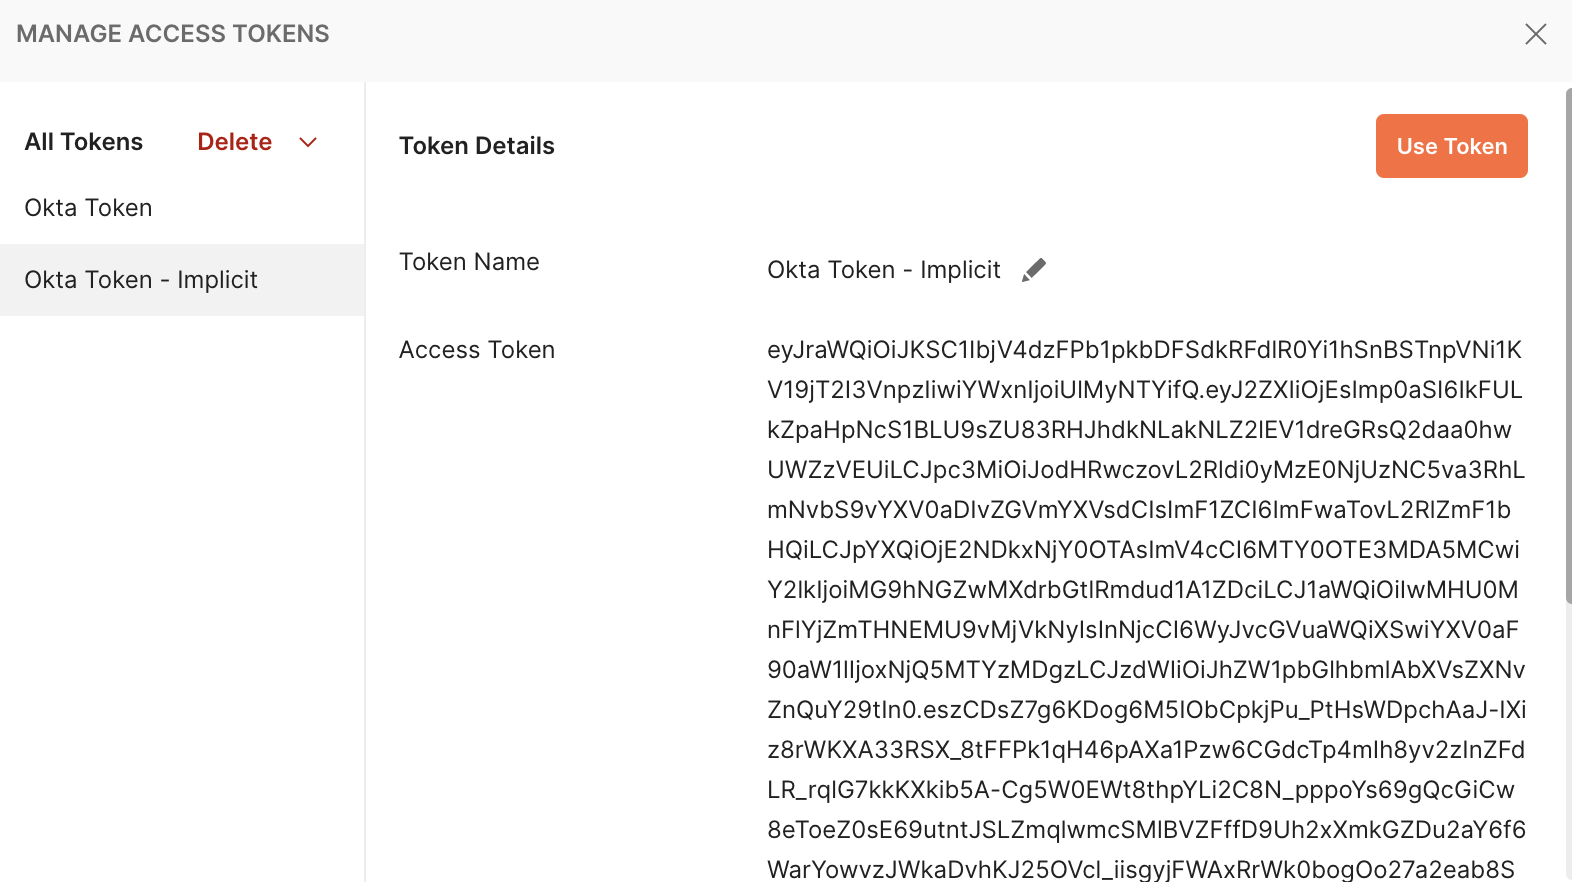
24.4 - Use the returned access_token by clicking on the ‘Use Token' button:
24.5 - Now, call our secured API by passing this access_token. You will now see the authenticated response.
