Last Updated: 2021-09-03
Author: dejim.juang@mulesoft.com
Overview
The Anypoint ObjectStore V2 provides a REST API that enables you to get and store key-value pairs. An object store works with a single application to temporarily store application data.
Generally you would interact with the object store from within the application using the Object Store connector but the REST API provides another point of interaction.
To authenticate access, you need the client ID and client secret for the application, which the Object Store displays in the Runtime Manager in Anypoint Platform for each application. In this codelab, you'll setup a test application in CloudHub and use another test application to interact with the object store for the CloudHub application using the REST API.
What you'll learn
- How to use the ObjectStore V2 REST API
What you'll need
- Anypoint Studio 7.10.x
- Mule EE 4.3.0
- Anypoint Platform
Before we can use the Object Store v2 REST API, we need to deploy a test app to CloudHub that uses Object Store V2. The test app will allow you to write key/value pairs to the Object Store and then retrieve them through the browser.
You have two options:
Object Store Test App Download the *.jar file and deploy the app directly into CloudHubObject Store Test App - Github Repo Download the Github repository, import the two projects into Anypoint Studio, and deploy the osv2-app1 to CloudHub
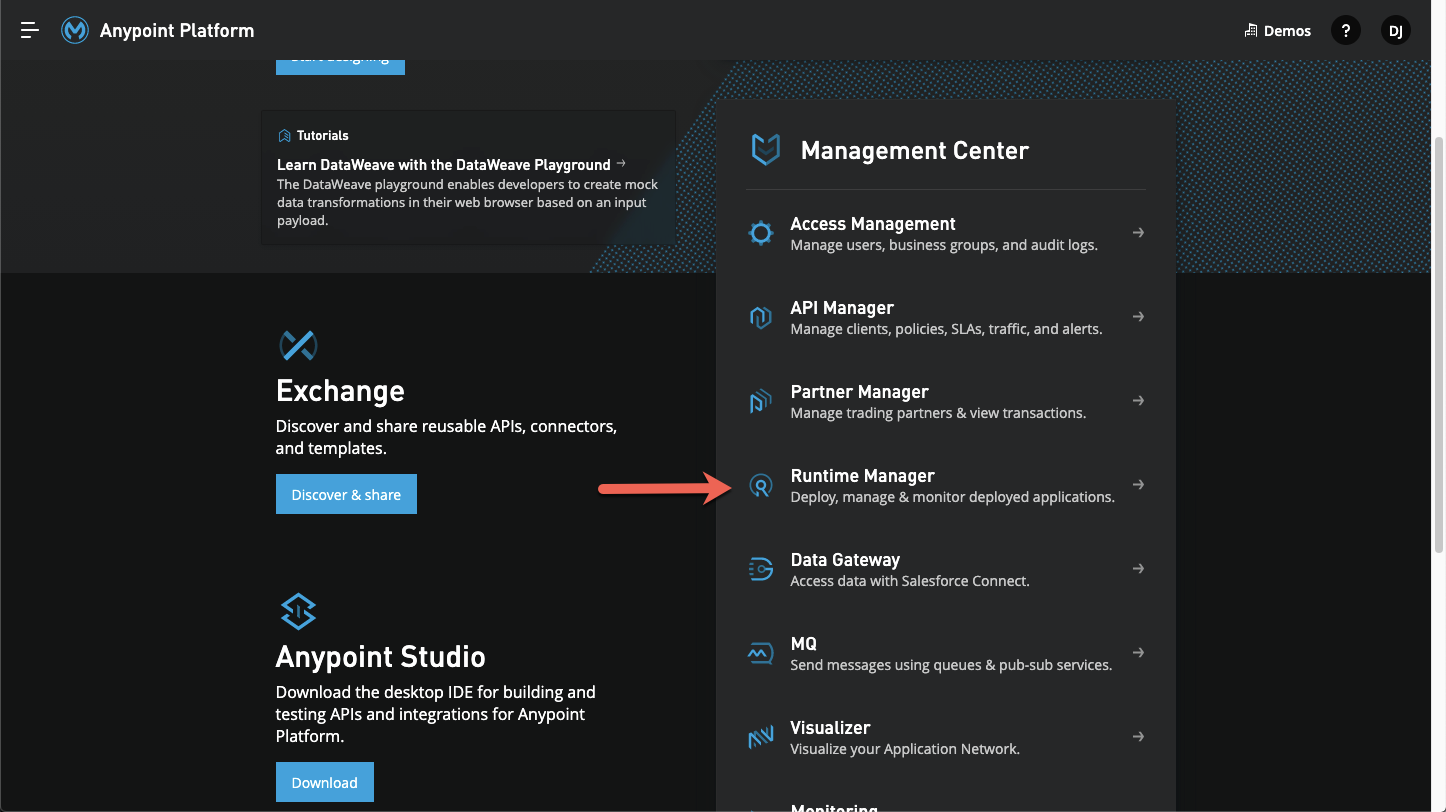
For the Codelab, we're going to download the *.jar file and deploy it to CloudHub from Runtime Manager. Go ahead and log in to Anypoint Platform and navigate to Runtime Manager.
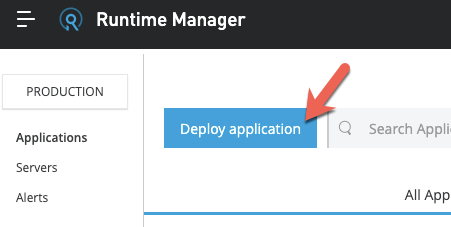
Click on Deploy Application
Give your application a name (e.g. osv2-app1) and click on Choose File > Upload File and select the osv2-app1.jar file that you downloaded above. Click on Deploy Application.
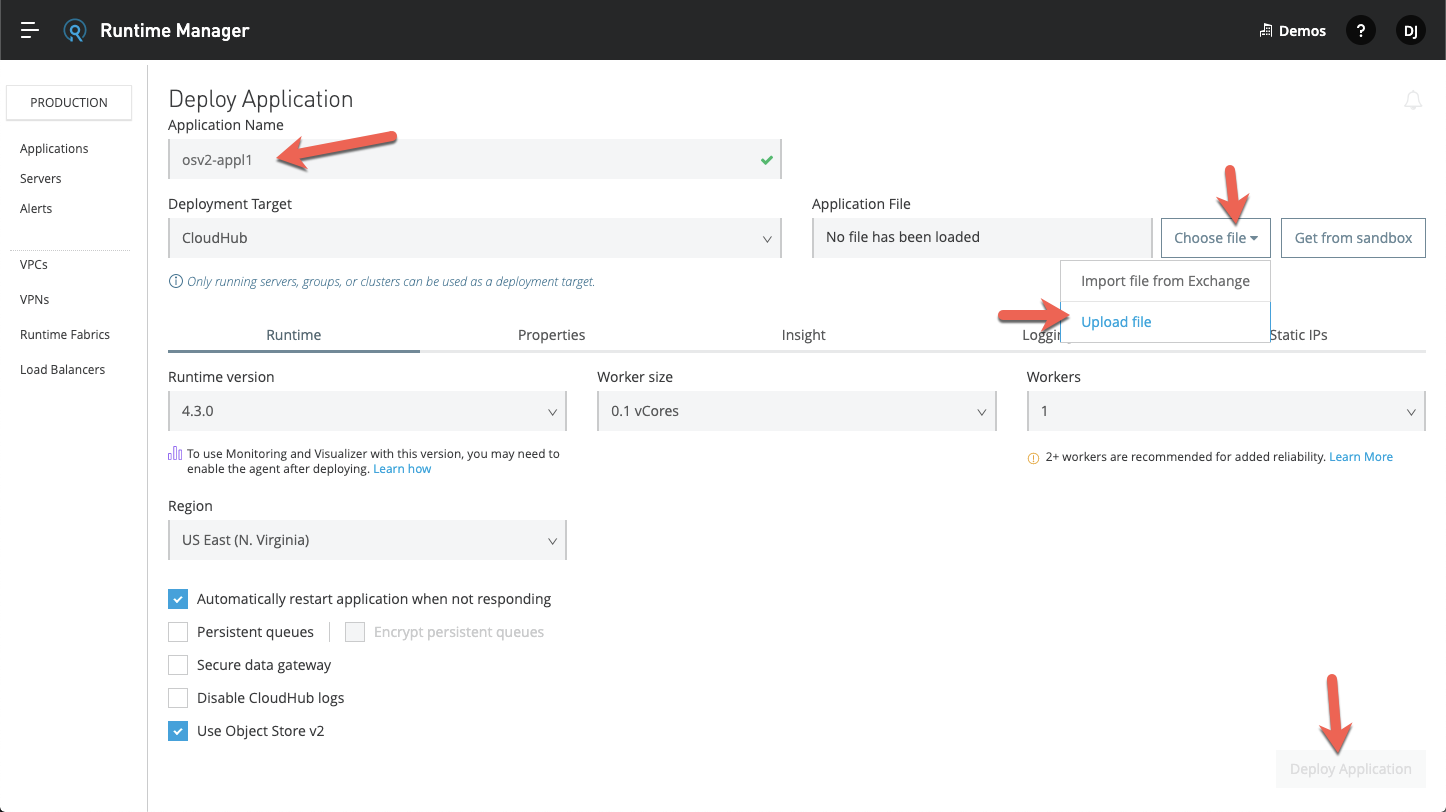
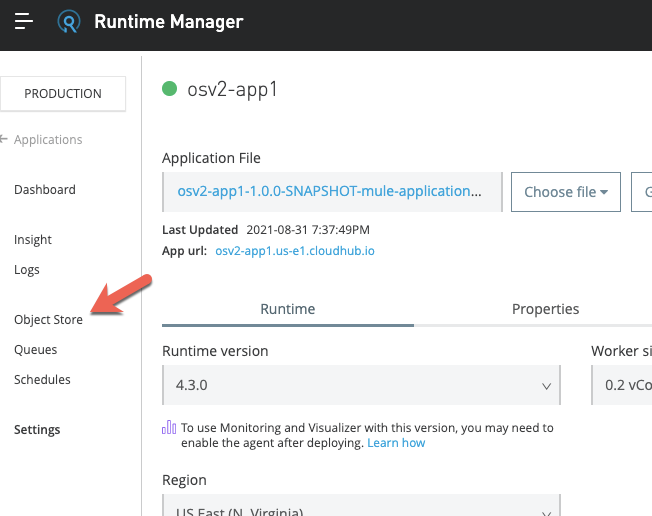
Once the application is deployed successfully, click on Object Store on the left-hand navigation.
Open a new tab in your browser and navigate to the following URL
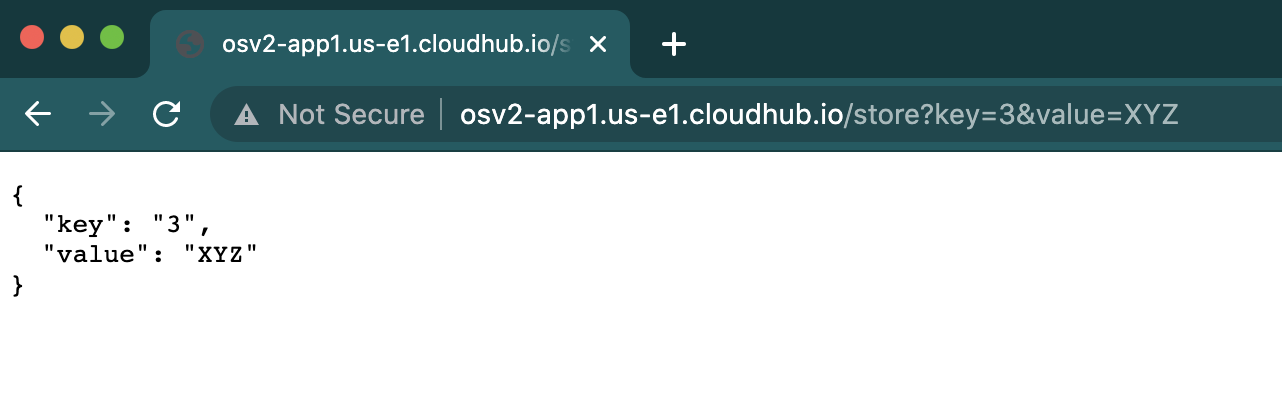
http://<app name>.<region>.cloudhub.io/store?key=3&value=XYZThis will store the key value pair into the Object Store V2 and the response will look like the following below.
In the same tab, change the URL to the one below.
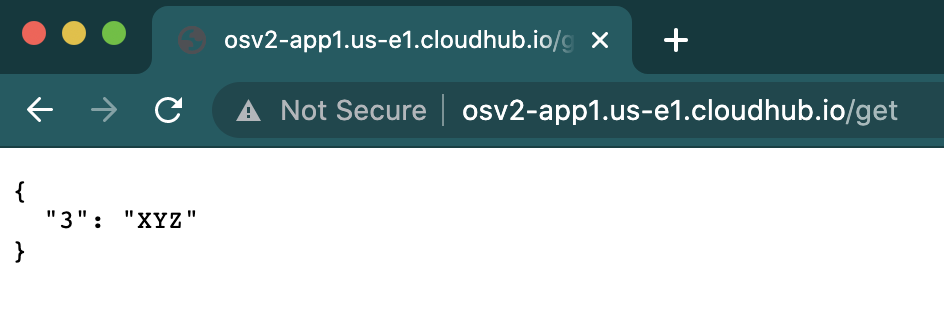
http://<app name>.<region>.cloudhub.io:8081/getThis will return the key and value that you just wrote to the object store in JSON format like the screenshot below.
Now, switch back to the browser tab with Runtime Manager where we navigated to the Object Store for the test application.
Click on the Object Store > Partitions > Key > Value radio buttons to see the value that was stored against the key 3.
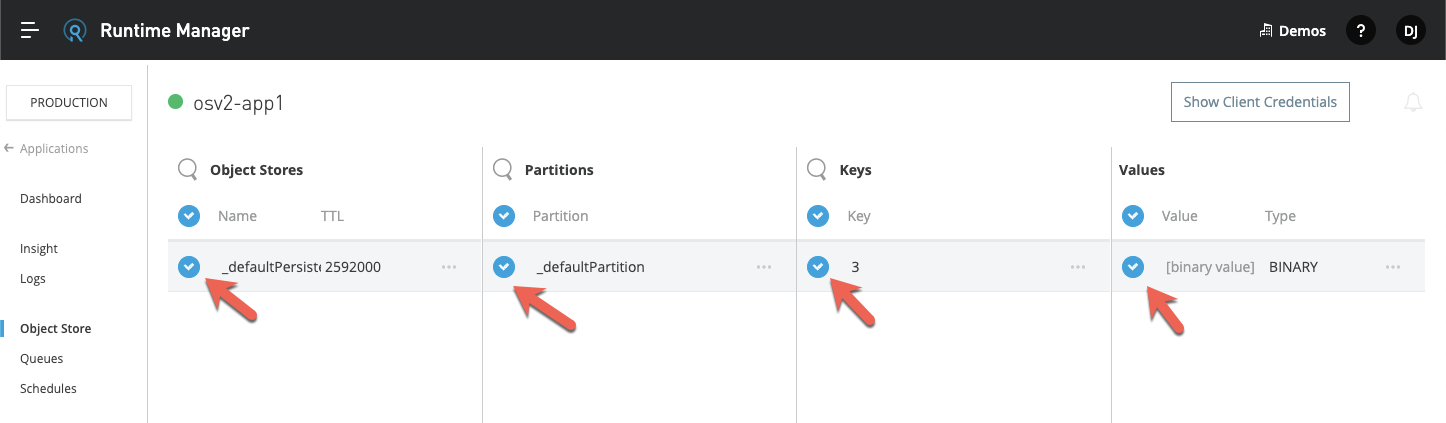
While you would expect to see "XYZ" as the value, when you view a value in Runtime Manager that was created from a Mule app, the value displays as [binary value] BINARY. Mule 4 wraps values into a Mule object that causes them to be only visible in binary through Anypoint Platform.
Behind the scenes, Mule 4 executes binary serialization with the Mule internal serializer. The user interface cannot deserialize the object, hence it can only tell you that the value is now binary in the user interface. To view the key value, you need to use the Object Store connector and use the retrieve operations.
Let's open Test App 1 in Anypoint Studio to see what is going on under the covers.
If you haven't downloaded the project from Github yet, click the button below:
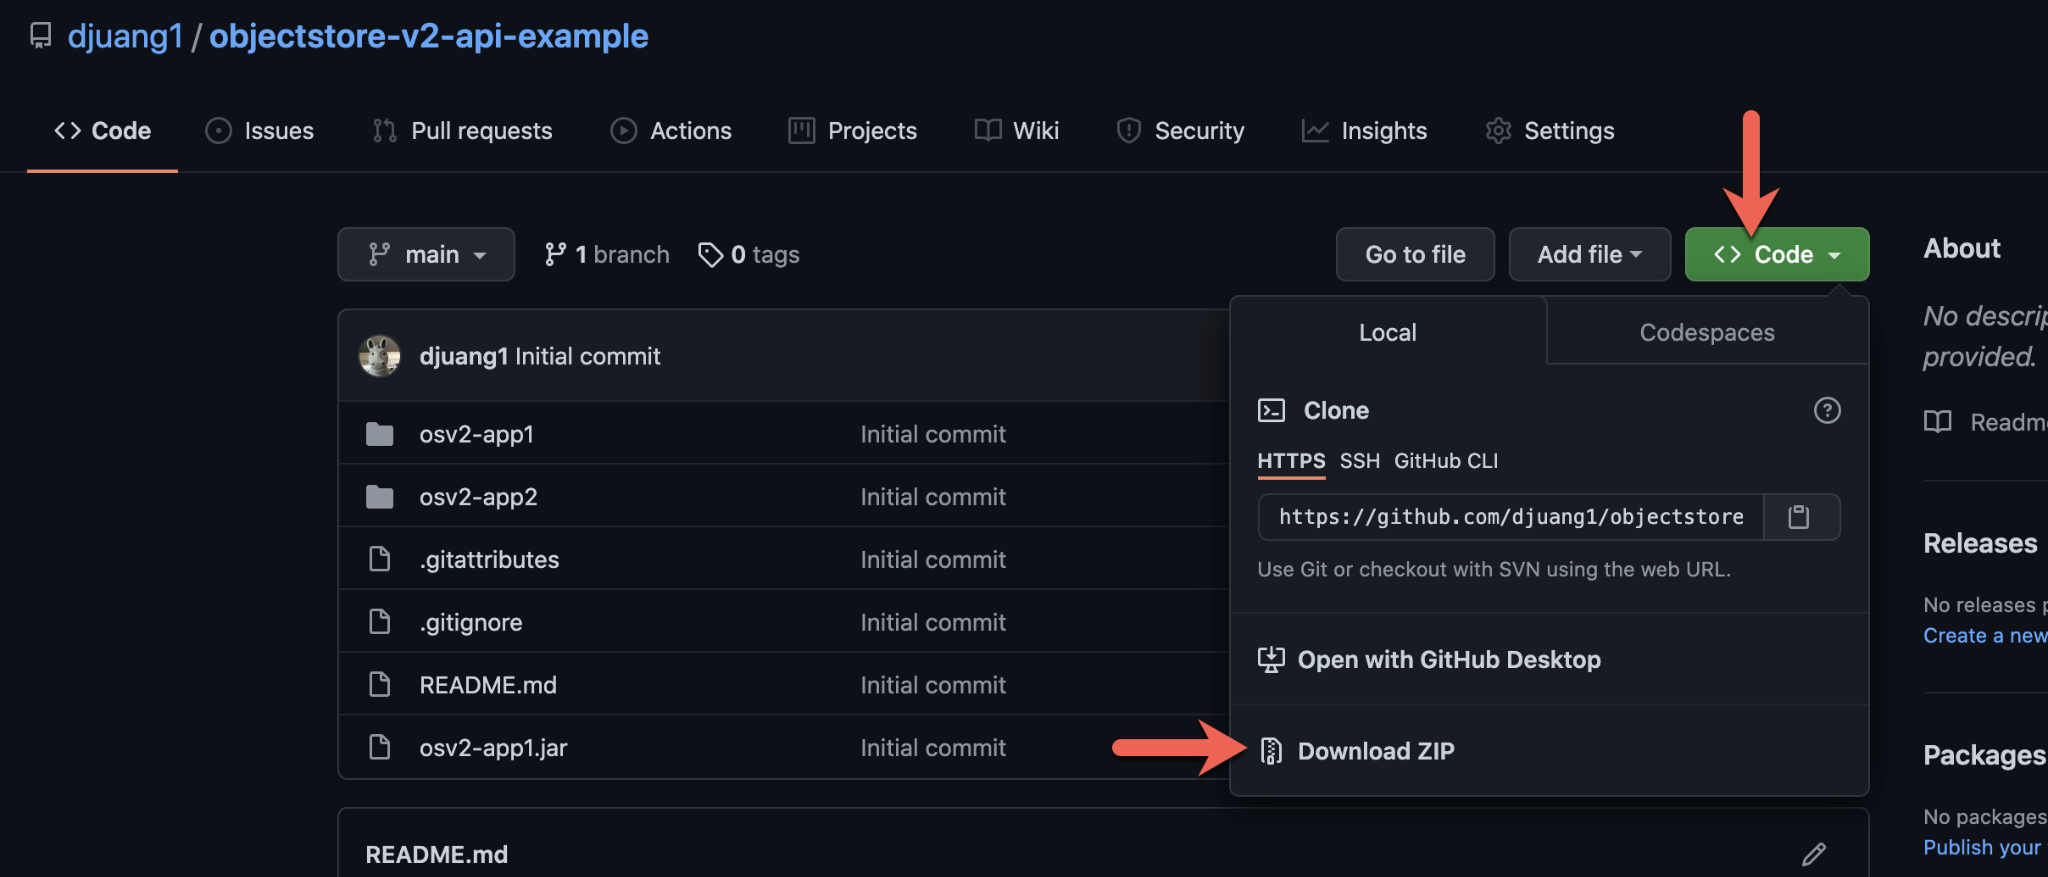
In Github, click on Code > Download ZIP to download the repository.
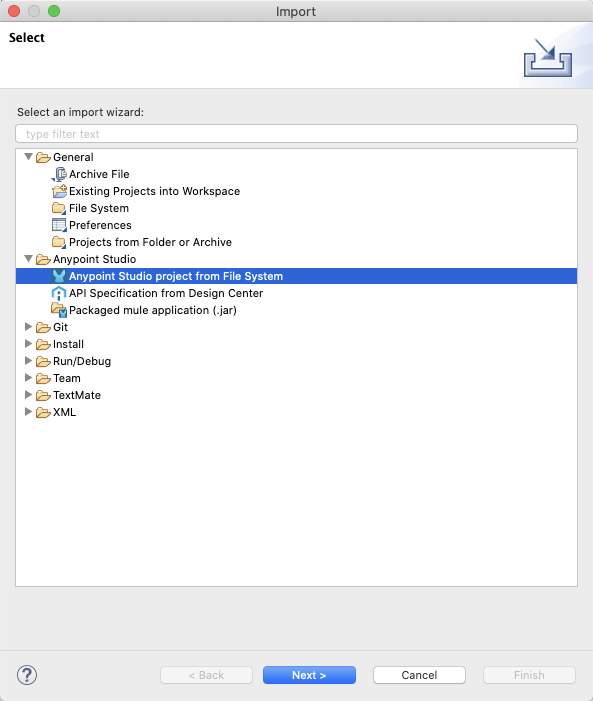
Unzip the file and switch over to Anypoint Studio. Click on File > Import

Click and expand the Anypoint Studio node and select Anypoint Studio project from File System and import the osv2-app1 app.
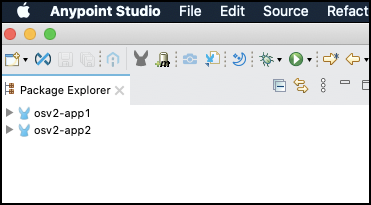
While we're here, repeat the process for osv2-app2 so you have both projects in Anypoint Studio. We'll use osv2-app2 in the next step.
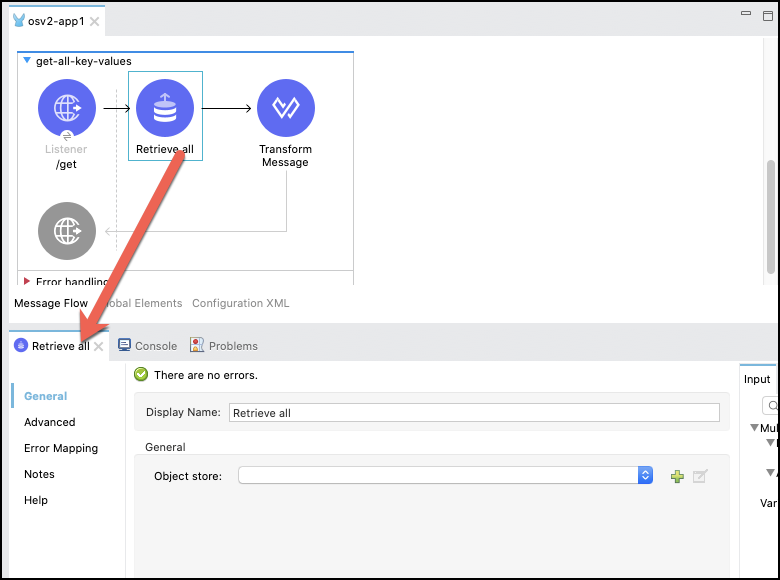
Expand osv2-app1 and navigate to src/main/mule/osv2-app1.xml to see the flows that make up the app that we deployed in the previous step.
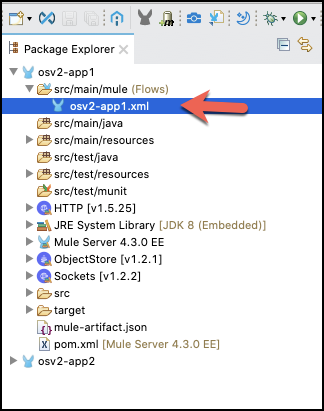
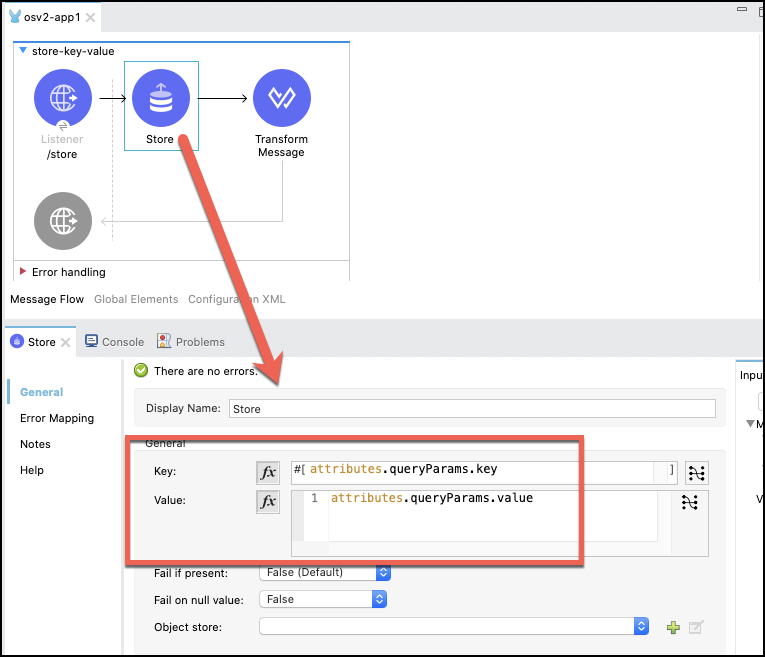
The application consists of the two flows that we called previously in Step 2. The first stores the key and value that we passed into the endpoint and leverages the Store operation.
The second flow uses the Retrieve All operation to return all the key-value pairs in JSON format in the response.
In the next step, we're going to setup and run Test App 2 to call the Object Store V2 REST API.
Hopefully you imported the Test App 2 into Anypoint Studio in the previous step. If not, go ahead and do that now.
With Test App 1 deployed and running in CloudHub, we will configure and run Test App 2 to call the Object Store V2 REST API now. Test App 2 stores and retrieves values in the object store that are associated with Test App 1 in CloudHub.
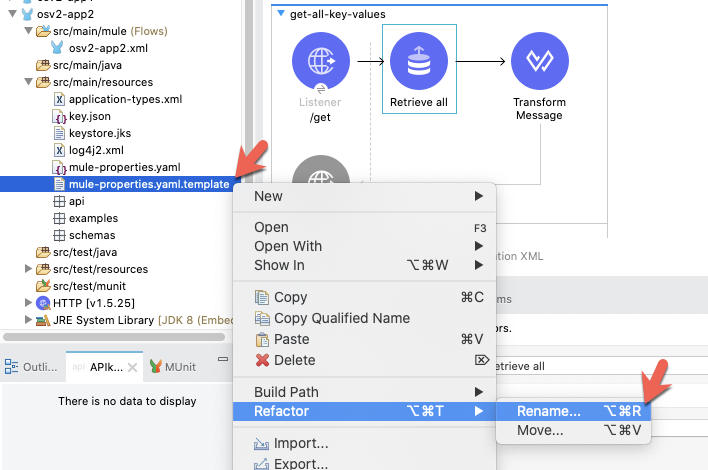
The first thing we need to do is configure the properties for the project. Expand the osv2-app2 and navigate to src/main/resources. Right-click on mule-properties.yaml.template and select Refactor > Rename
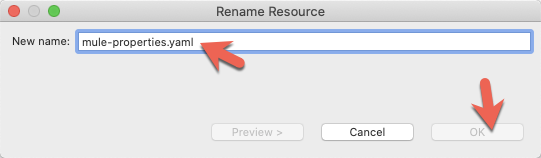
Rename the file to mule-properties.yaml and click on OK
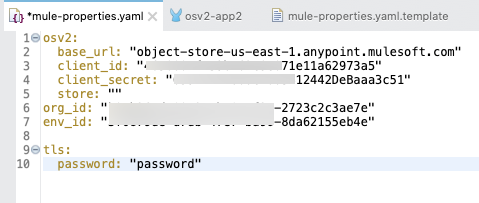
Open the newly renamed file. You'll see there are a number of properties that we need to fill in. For tls.password, go ahead and type in password so it looks like the following.

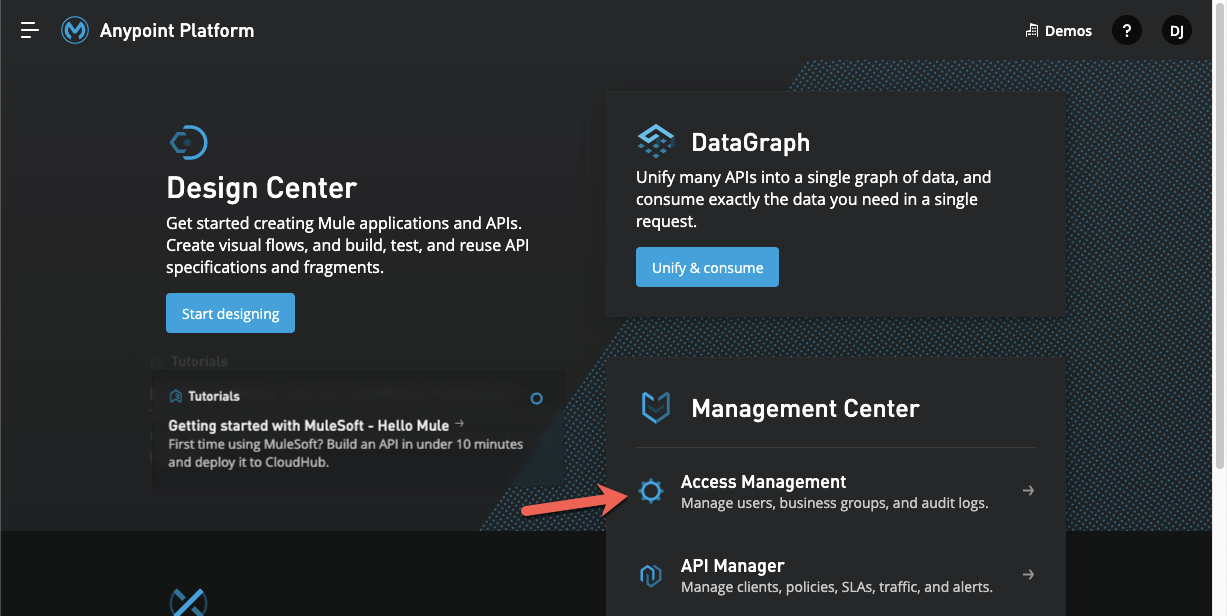
Go back to your browser and log in to Anypoint Platform and navigate to to Access Management
Click on Business Groups and then click on the name of the organization that you deployed Test App 1 to in Step 2. In my case, that was Demos.

Click on Environments and then click on the name of the environment that you deployed Test App 1 to earlier. In my case, that was Production.
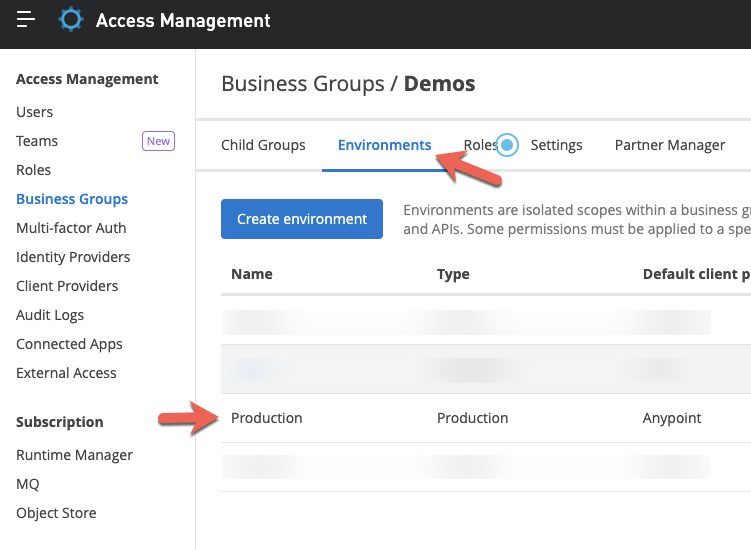
Disregard the pop-up window but look at the address bar in the browser. We need to copy the Organization ID and Environment ID values down and add those to the properties file.

After you copy down those IDs, click on Cancel and navigate back to Runtime Manager. Open the Test App 1 application and go to the Object Store section and click on Show Client Credentials on the top right of the page.
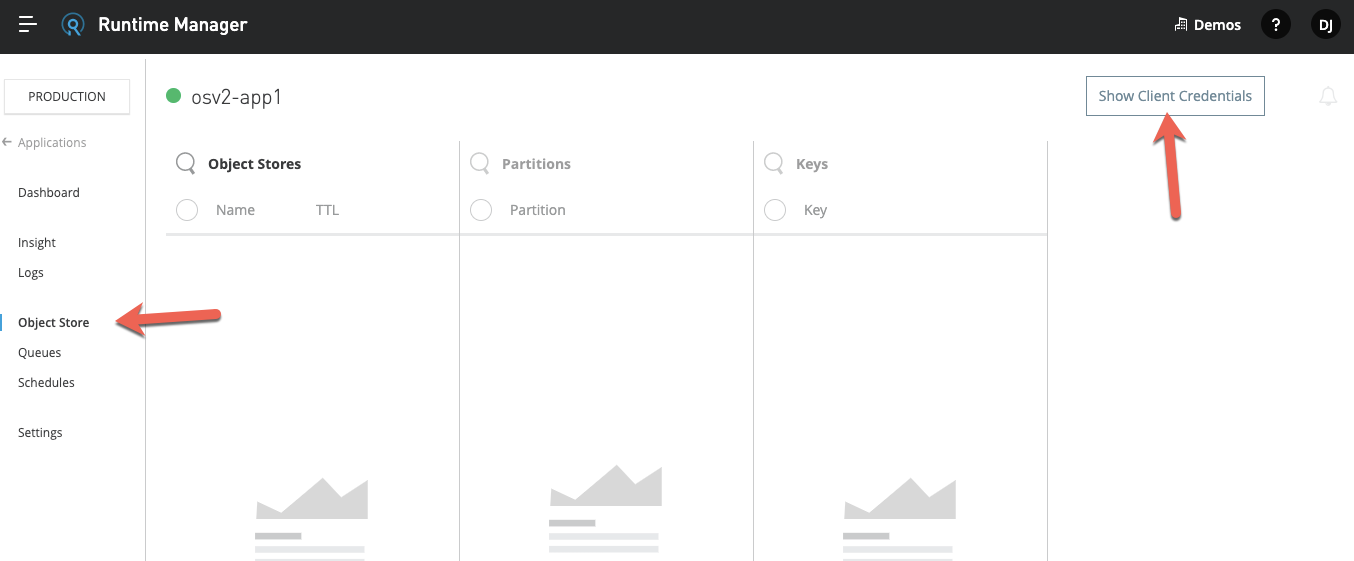
Copy and paste those credentials into the properties file for the osv2.client_id and osv2.client_secret properties.
Next we need to determine the Base URL to call the Object Store V2 REST API. You can find the list here.
It should match the region and control plane that you deployed the Test App 1 into. For this codelab, that's the US control plane prod and us-east-1
You should have everything but the osv2.store value populated now.
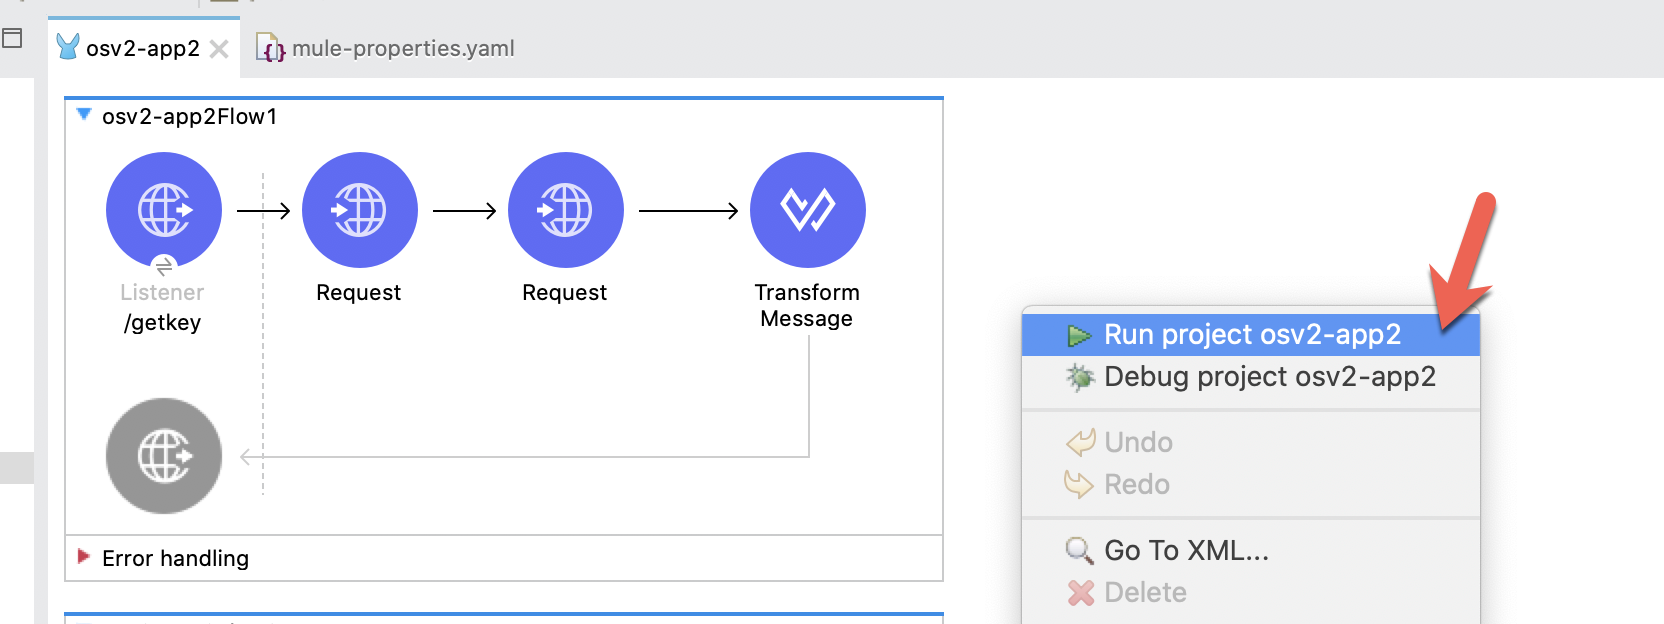
In order to get the last property value, we need to run the app in Anypoint Studio. Right click on the canvas and click on Run project osv2-app2
When the app is deployed successfully, call the following endpoint.
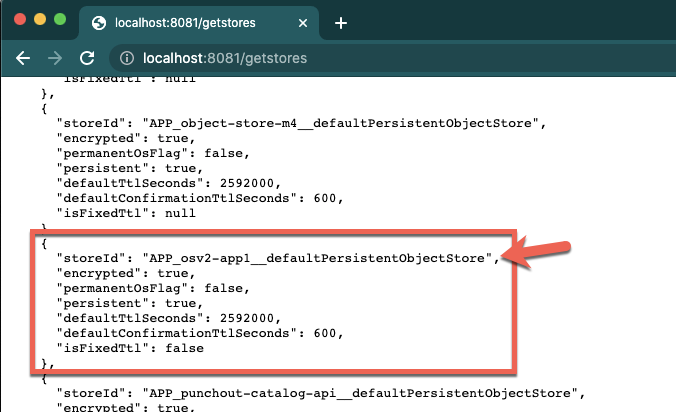
http://localhost:8081/getstoresThe response in JSON format will have all the stores available in that Organization and Environment. Scroll down and find the storeId that has the name of the Test App 1 name in it. For this codelab, the value is APP_osv2-app1__defaultPersistentObjectStore. Copy and paste that value into the properties file and restart the Mule application again.
Once the application is deployed successfully, move on to the next step to see how the REST API works.
In addition to the flow that we called in the previous step to get the list of Object Stores, there are 3 other flows. Let's walk through each and see what they demonstrate.
put-string-to-osv2

In this flow, the first HTTP Request generates the OAuth token that needs to be passed to the Object Store V2 REST API. It leverages the Client ID and Client Secret that was available in the Object Store section of the application.
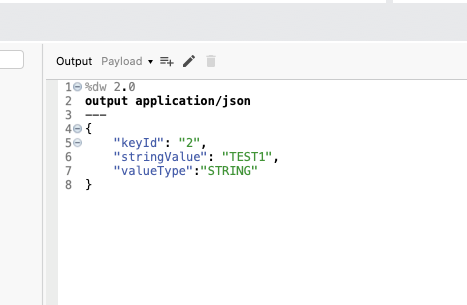
The Transform Message component creates the JSON message that needs to be passed to the REST API. For the codelab, these values are hardcoded but you can modify this for your own use.
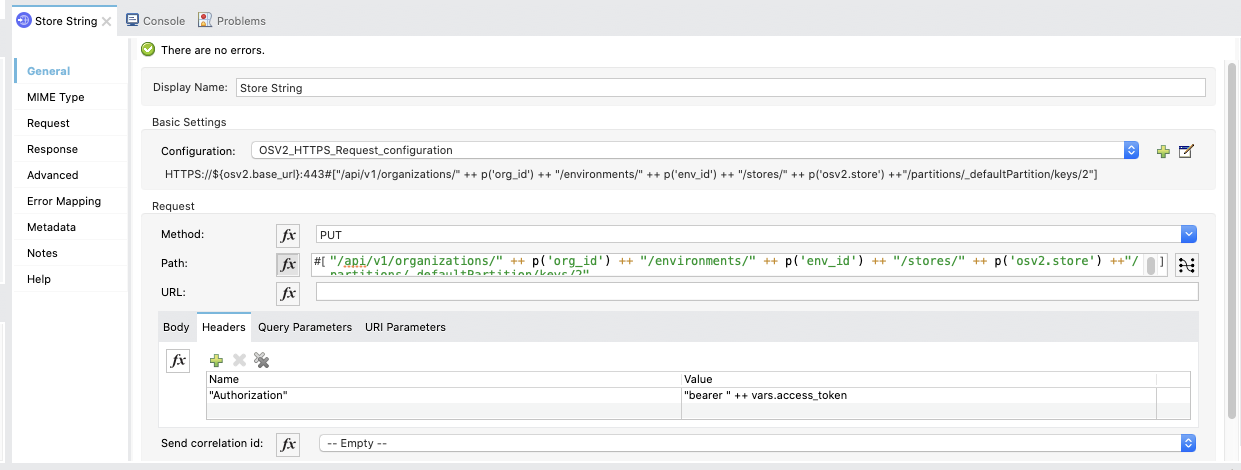
Lastly, the last HTTP Request calls the Object Store V2 REST API endpoint using the PUT method to store the string into the Object Store.
Switch over to your browser now and call the following URL
http://localhost:8081/putstringThis will return a blank response but in the background it's calling the REST API and storing the value TEST1 to the key 2.
To see if it worked successfully, we can call the Test App 1 endpoint to get all the keys stored in the Object Store. Open another tab and call the following URL
http://osv2-app1.us-e1.cloudhub.io/getYou should see the string that we just stored into the Object Store using the REST API.

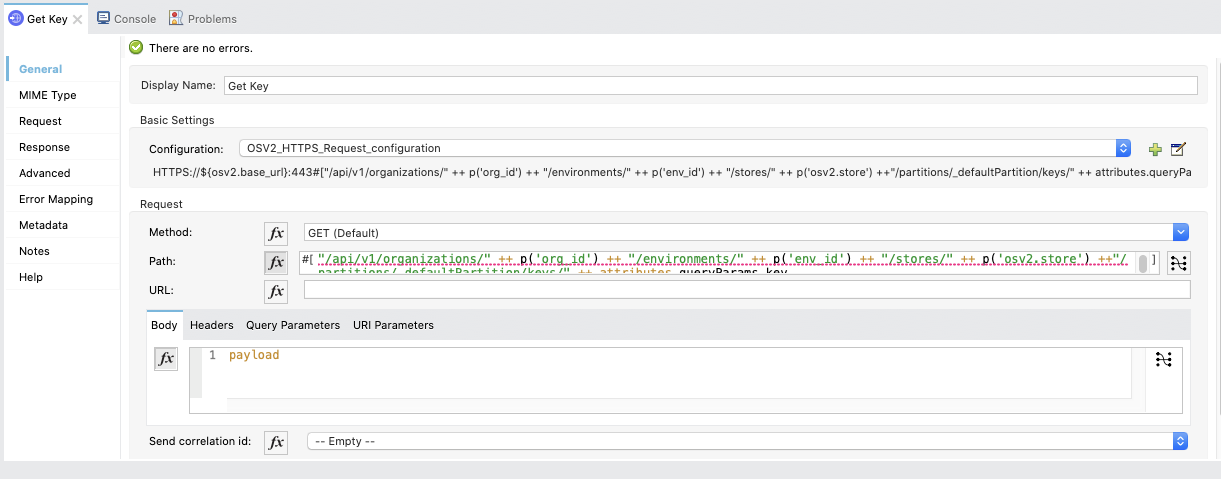
get-key-flow
We can also use the REST API to get the value of key 2. The next flow get-key-flow provides an example.
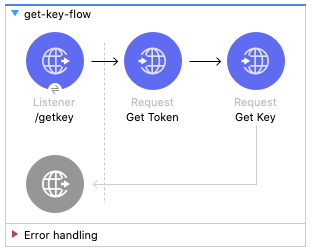
Similar to the put-string-to-osv2 flow, the first HTTP Request generates the OAuth token that needs to be passed to the Object Store V2 REST API.
The second HTTP Request calls the REST API with a key as a parameter and returns the value stored in the Object Store.
You can test that out by navigating to the following URL
http://localhost:8081/getkey?key=2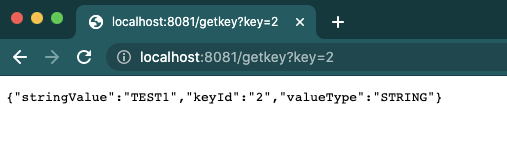
But, if we try to call the URL with the key value of 3, you'll see an interesting result. Because that value was written using the Object Store connector, it's returned back from the REST API as a binary value. This is similar to what we see in the Runtime Manager console.
http://localhost:8081/getkey?key=3
The only way to see that value is to use the Object Store connector to deserialize the value.
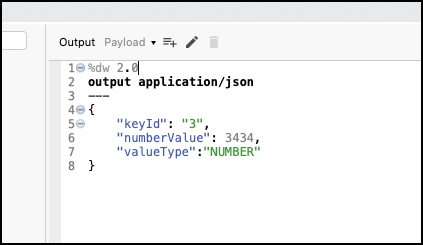
put-number-to-osv2
The example flow in the project shows how you can write a number to the Object Store. It's similar to the first flow that we looked at. The only difference is the JSON object that we pass into the PUT request.
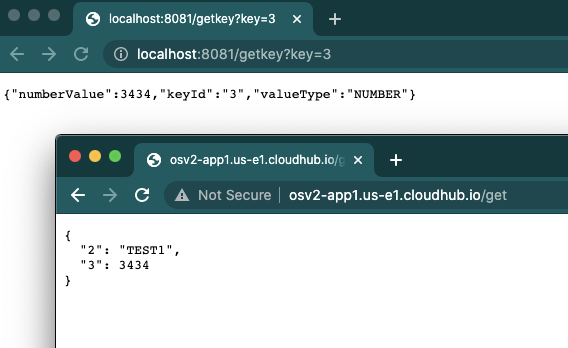
You can call this endpoint with the following URL
http://localhost:8081/putnumberBecause we have overwritten the key value 3 with a new value of 3434 using the REST API, you can call the /getkey endpoint of Test App 2 or the /get endpoint of Test App 1 and see the value because it hasn't been serialized.
In this codelab, you learned how to call the Object Store V2 REST API. The API allows you to perform the following:
- Retrieve a list of object stores and keys associated with an application.
- Store and retrieve key-value pairs in an object store.
- Delete key-value pairs from an object store.
We looked at examples of the first two capabilities. With the test project, you can configure the HTTP Request to address your use cases to interact with the API.