This is the first part of the IBM MQ Lab. Here we'll see some basic methods to start connecting IBM MQ with MuleSoft.
The advanced part of this codelab, for deeper understanding, is here IBM MQ Lab: Advanced Level. We learn encoding of data and more features.
What you'll do
- Create a Mule App using Anypoint Studio.
- Connect the app with an IBM MQ instance and perform the basic methods (publish, consume, on new message, etc).
What you'll learn
- Use the IBM MQ connector in Mule.
- Most common operations for MQs.
What you'll need
- Docker
- Anypoint Studio
- Advanced Rest Client (or another rest client like Postman)
You'll need to download Docker for desktop.
From the terminal run this command:
docker run \
  --env LICENSE=accept \
  --env MQ_QMGR_NAME=QM1 \
  --publish 1414:1414 \
  --publish 9443:9443 \
  --detach \
  ibmcom/mq
It is going to say "Unable to find image 'ibmcom/mq:latest' locally
latest: Pulling from ibmcom/mq" and it will start to pull an image for IBM MQ.
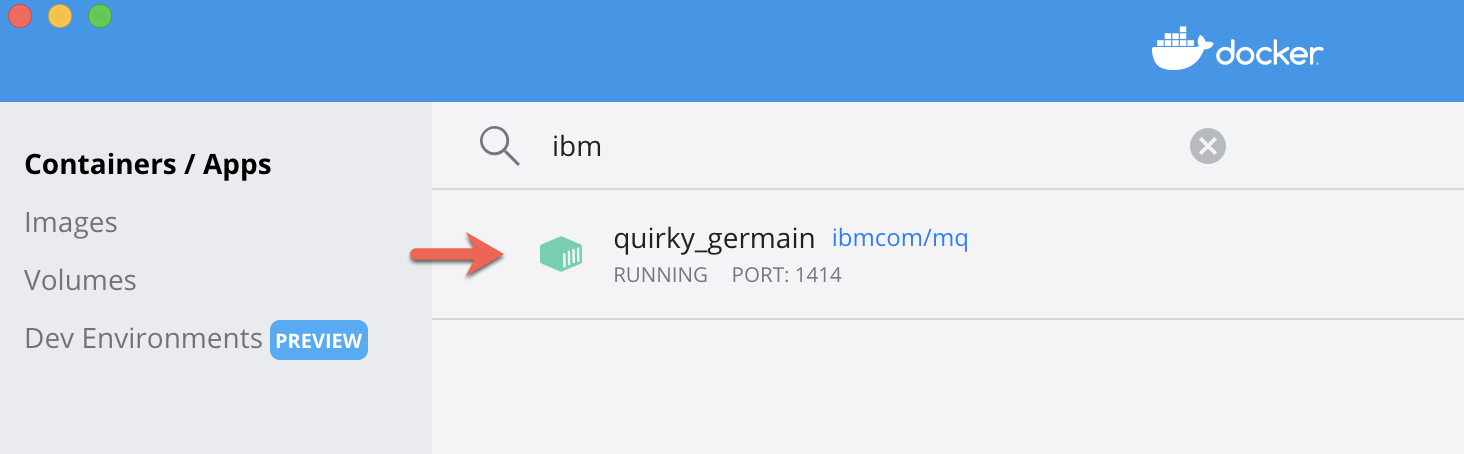
Once it finished downloading, in Docker it will be up and running with a random name:
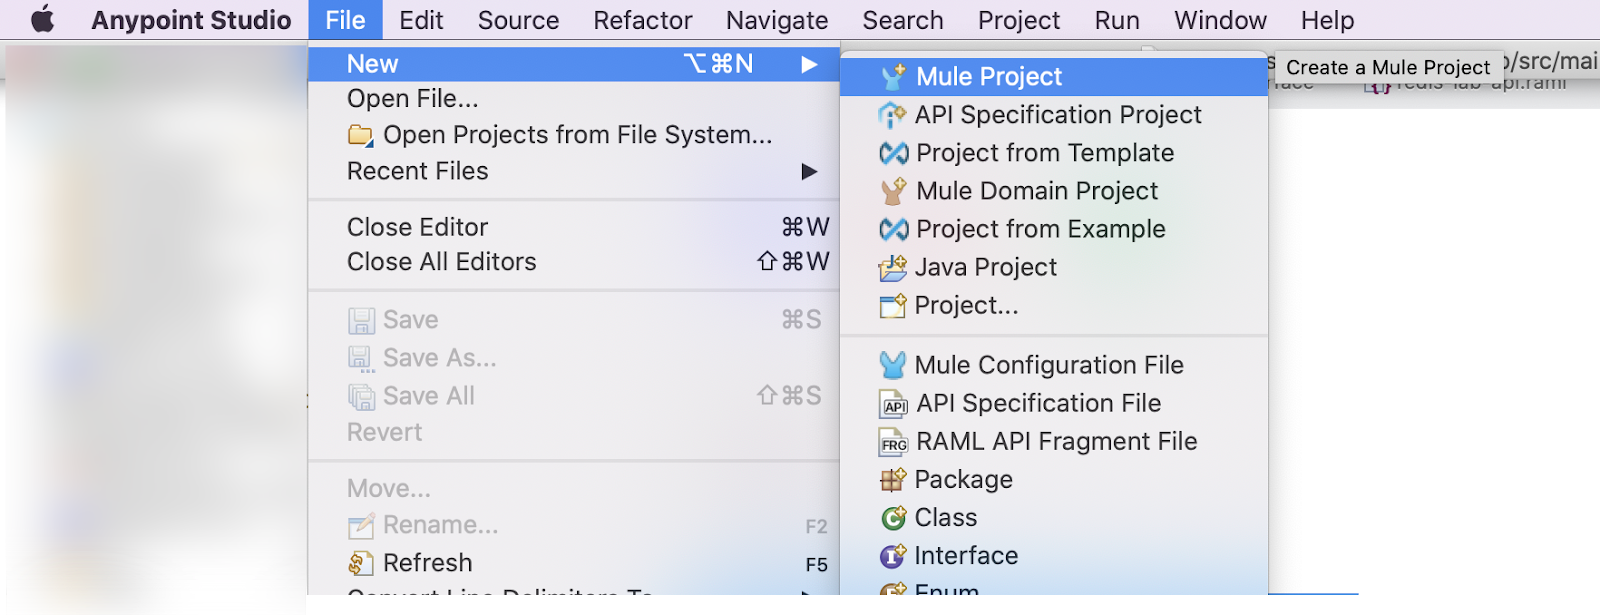
1. Create a new Mule Project and choose a project name.
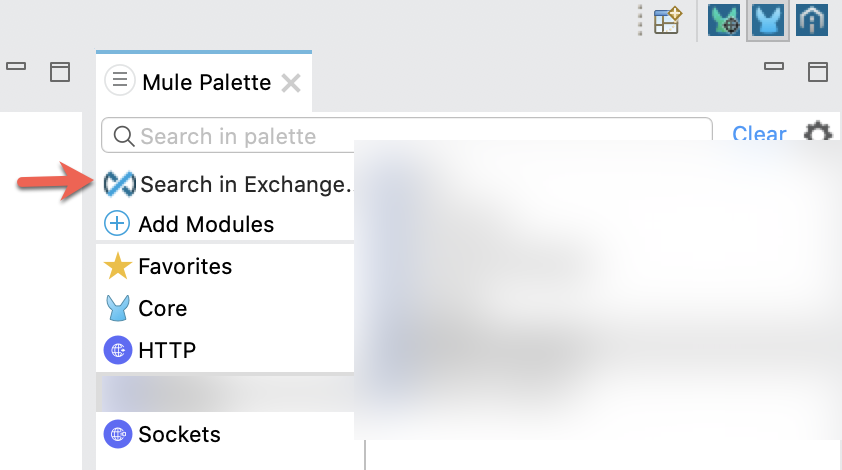
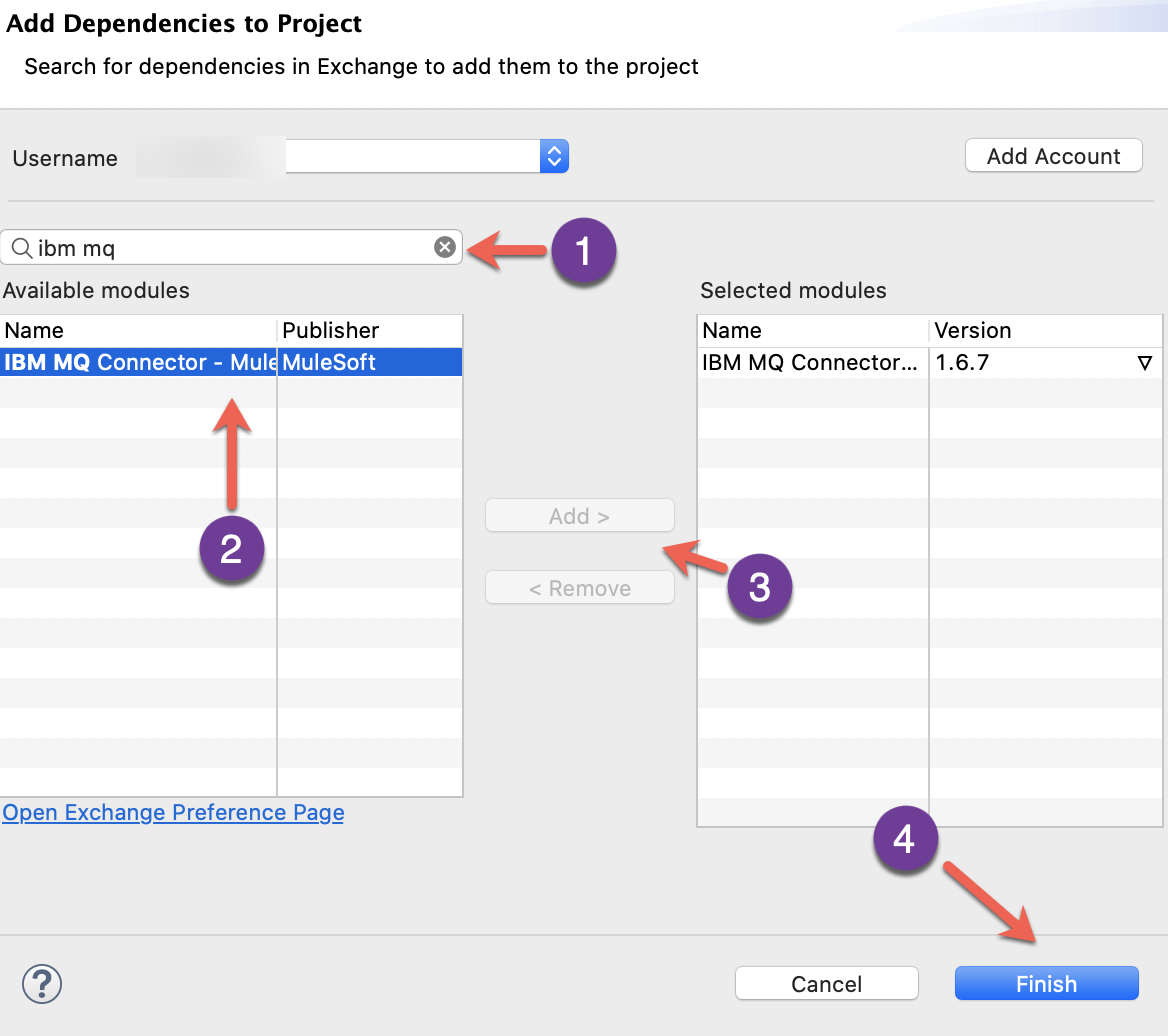
2. Add the IBM MQ connector to the Mule Palette.
3. Create a file named config.yaml (in src/main/resources) to avoid hardcoded values in the IBM MQ Connector.
ibm_mq:
  host: "localhost"
  port: "1414"
  queue_manager: "QM1"
  channel: "DEV.APP.SVRCONN"
  username: "app"
4. In the xml file automatically created (in my case named ‘ibm-mq-lab''), switch to Global Elements view and add a new configuration for the config.yaml.

4. Configure the IBM MQ connector.
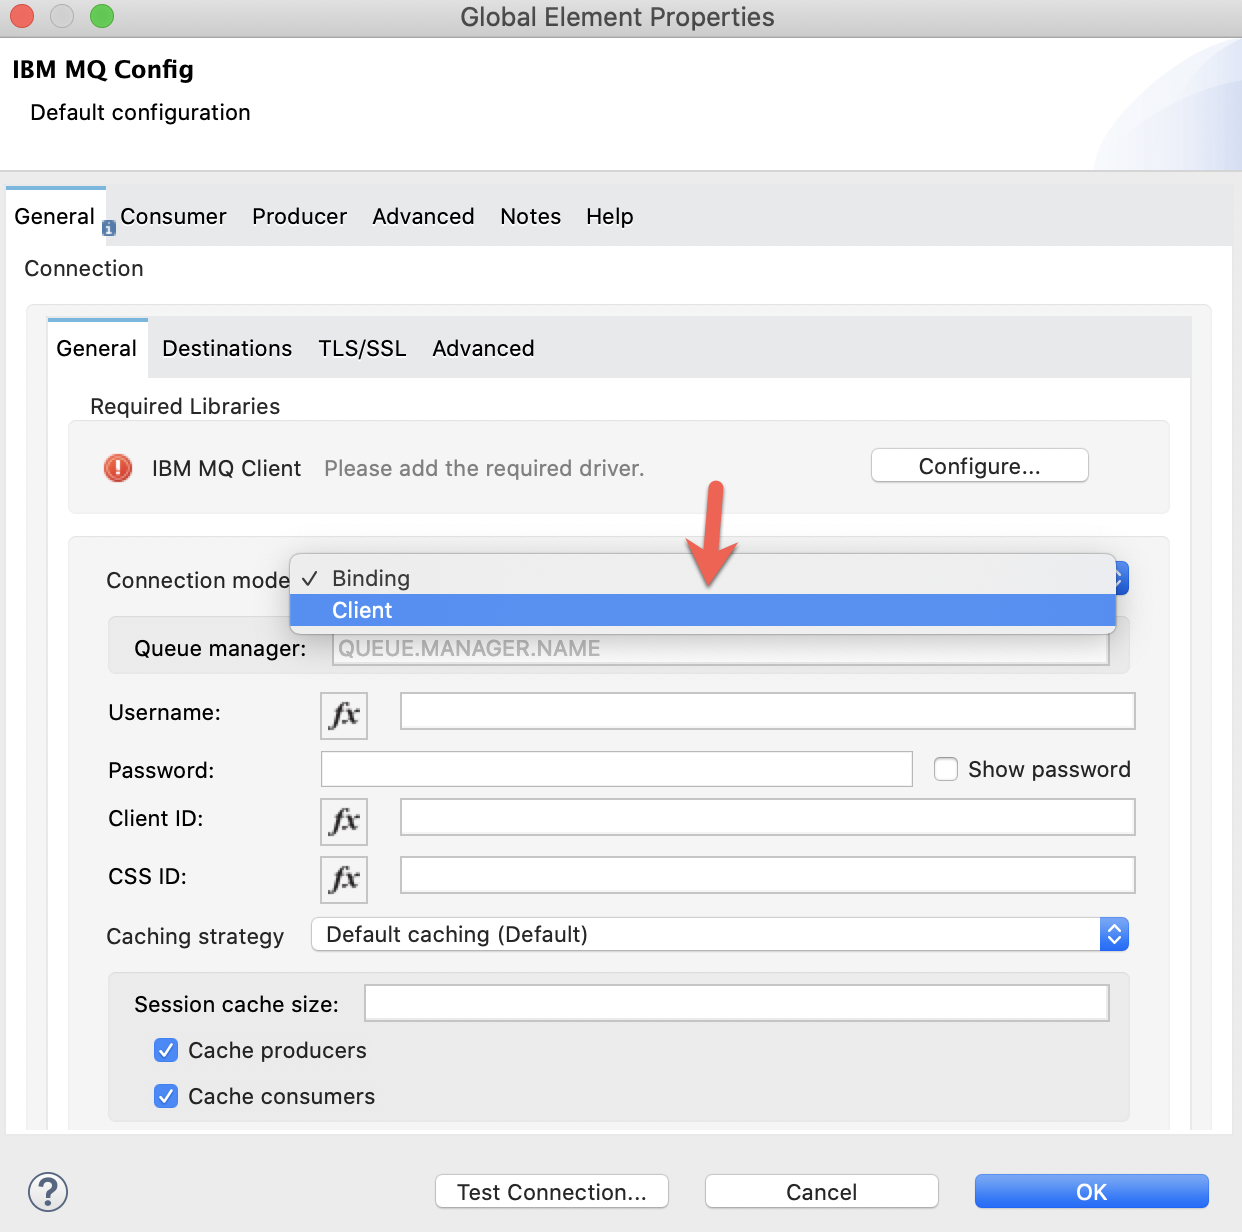
In Global Elements select IBM MQ Config and hit Edit.
Then, switch to Client connection mode:
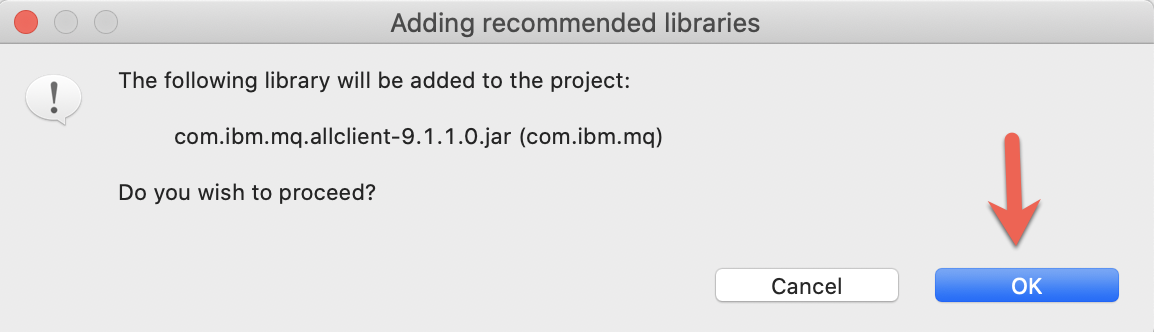
Add recommended libraries to configure the IBM MQ Client:

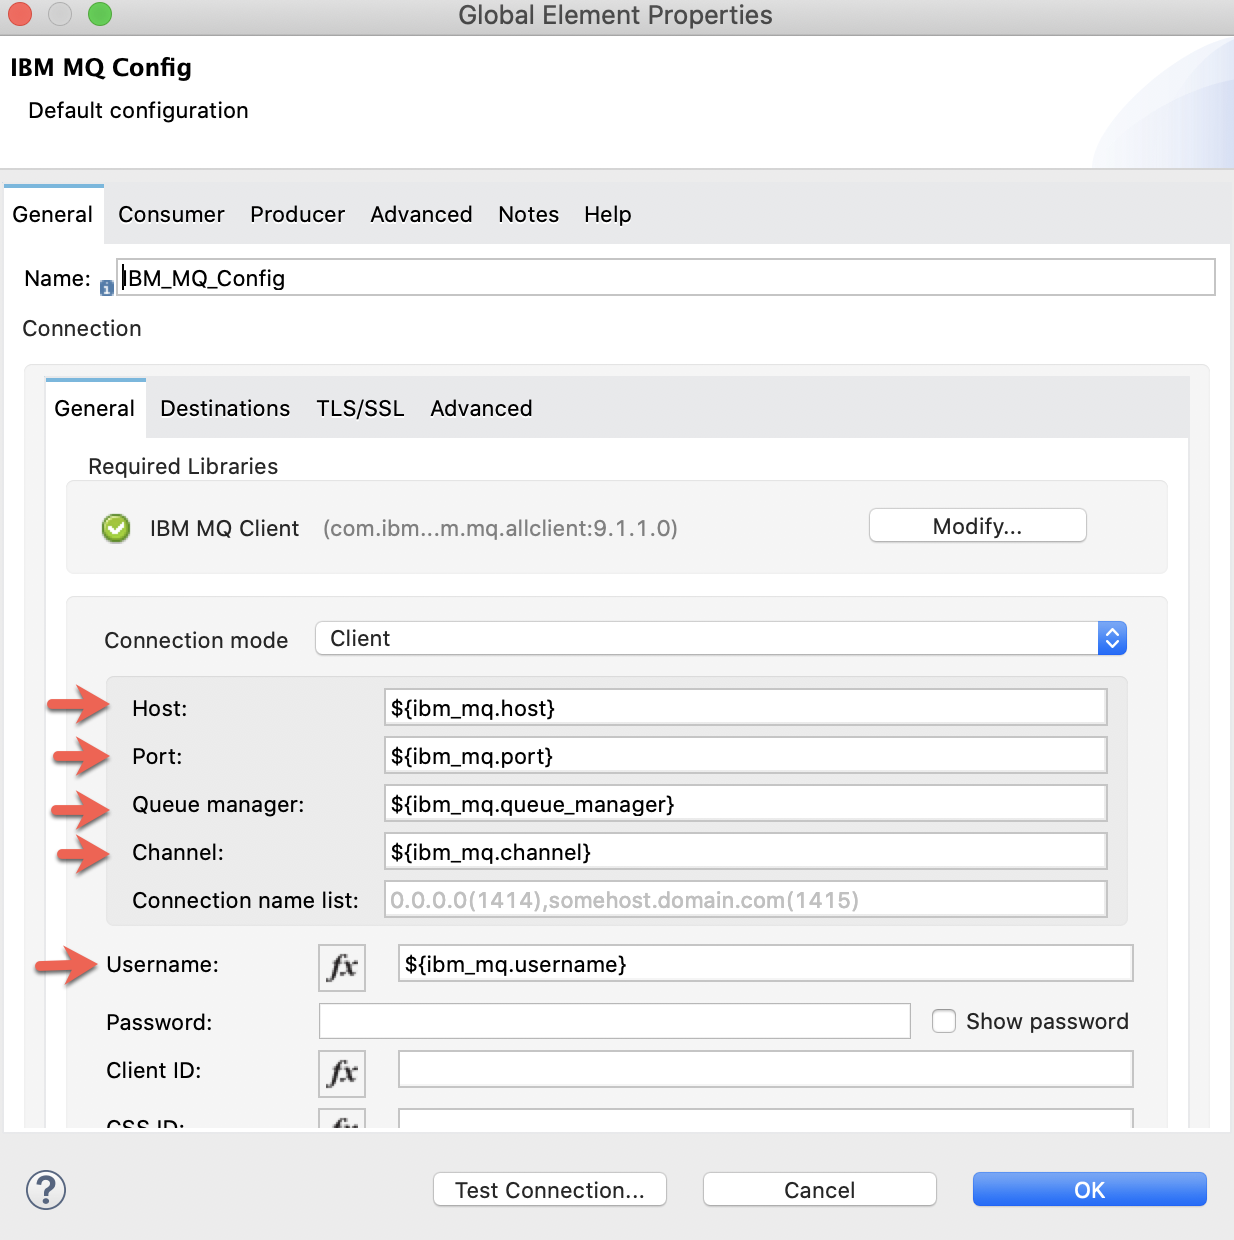
Write the Host, Port, Queue Manager, Channel and Username information, taken from the config.yaml:
Now, we are going to manage our IBM MQ instance from Chrome, Firefox or whatever browser you are using.
We are going to create a new topic and a new queue for later using in studio.
Go to the following link:
https://localhost:9443
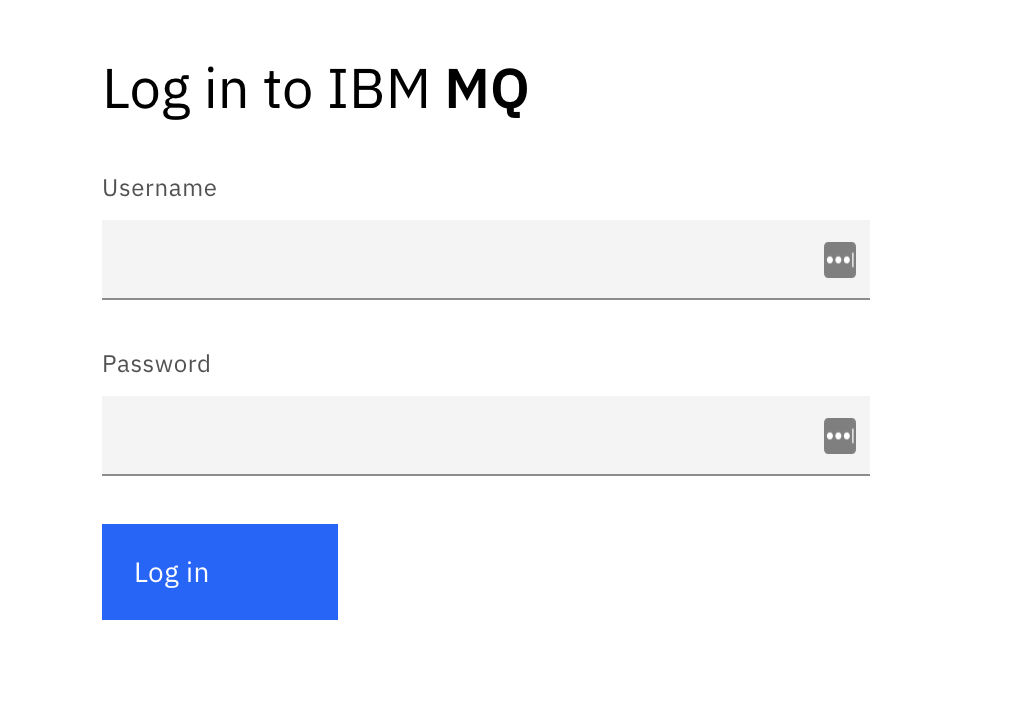
And we land on the login page for managing IBM MQ.
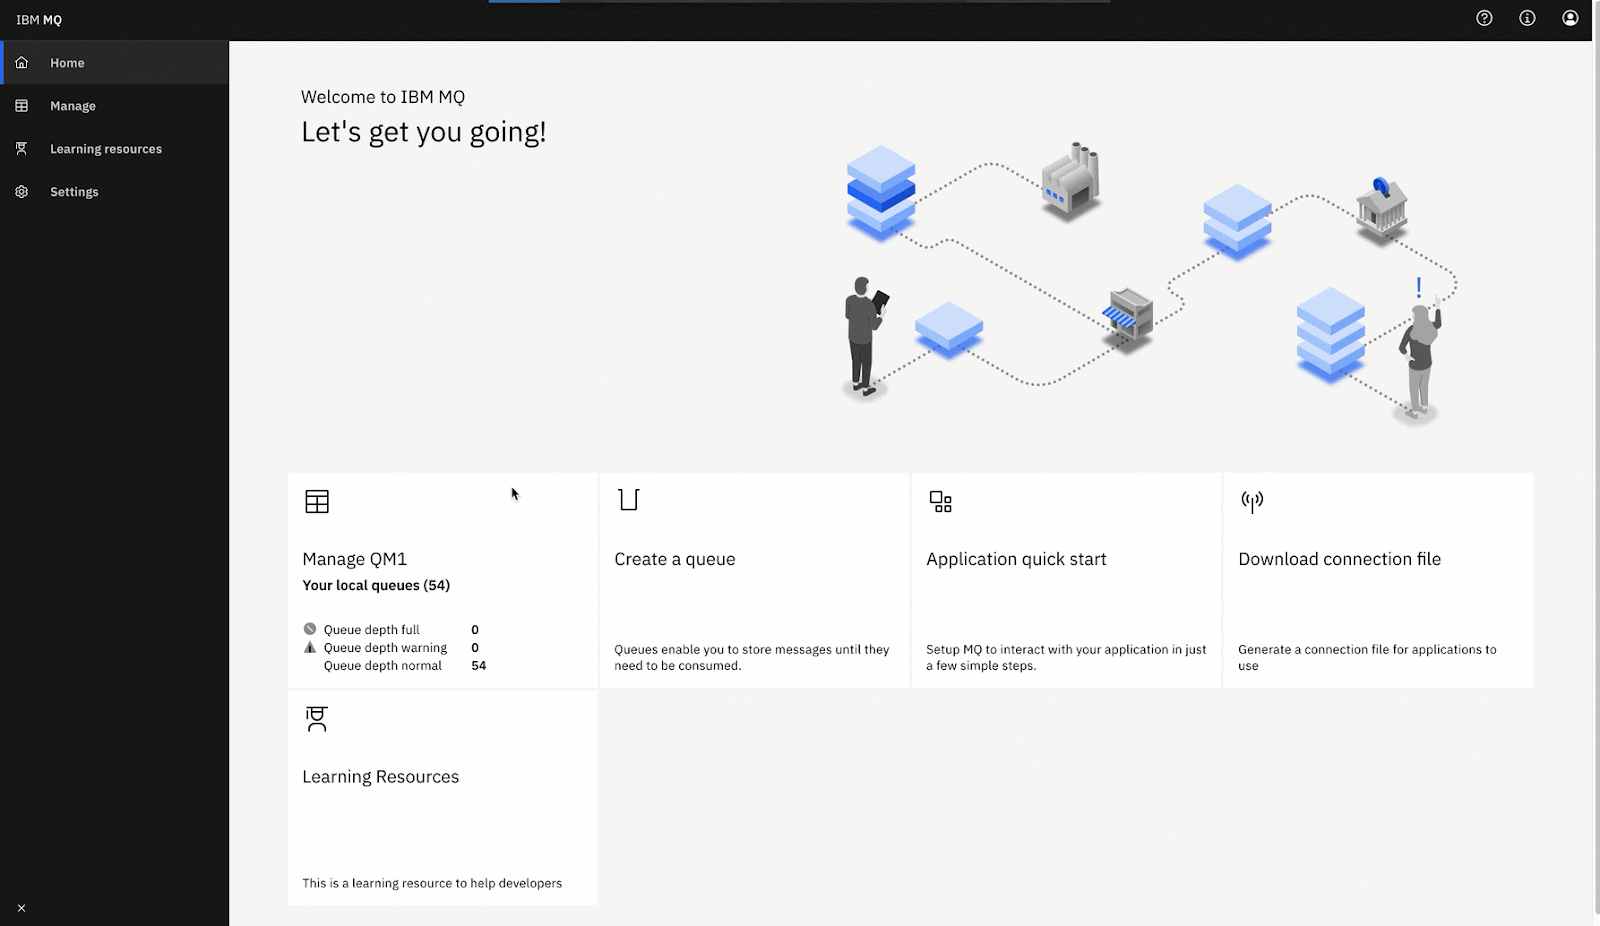
From here you will manage your queues and topics. And it is where you are able to configure a new user and permissions.
Here are the username and password to use:
Username: admin
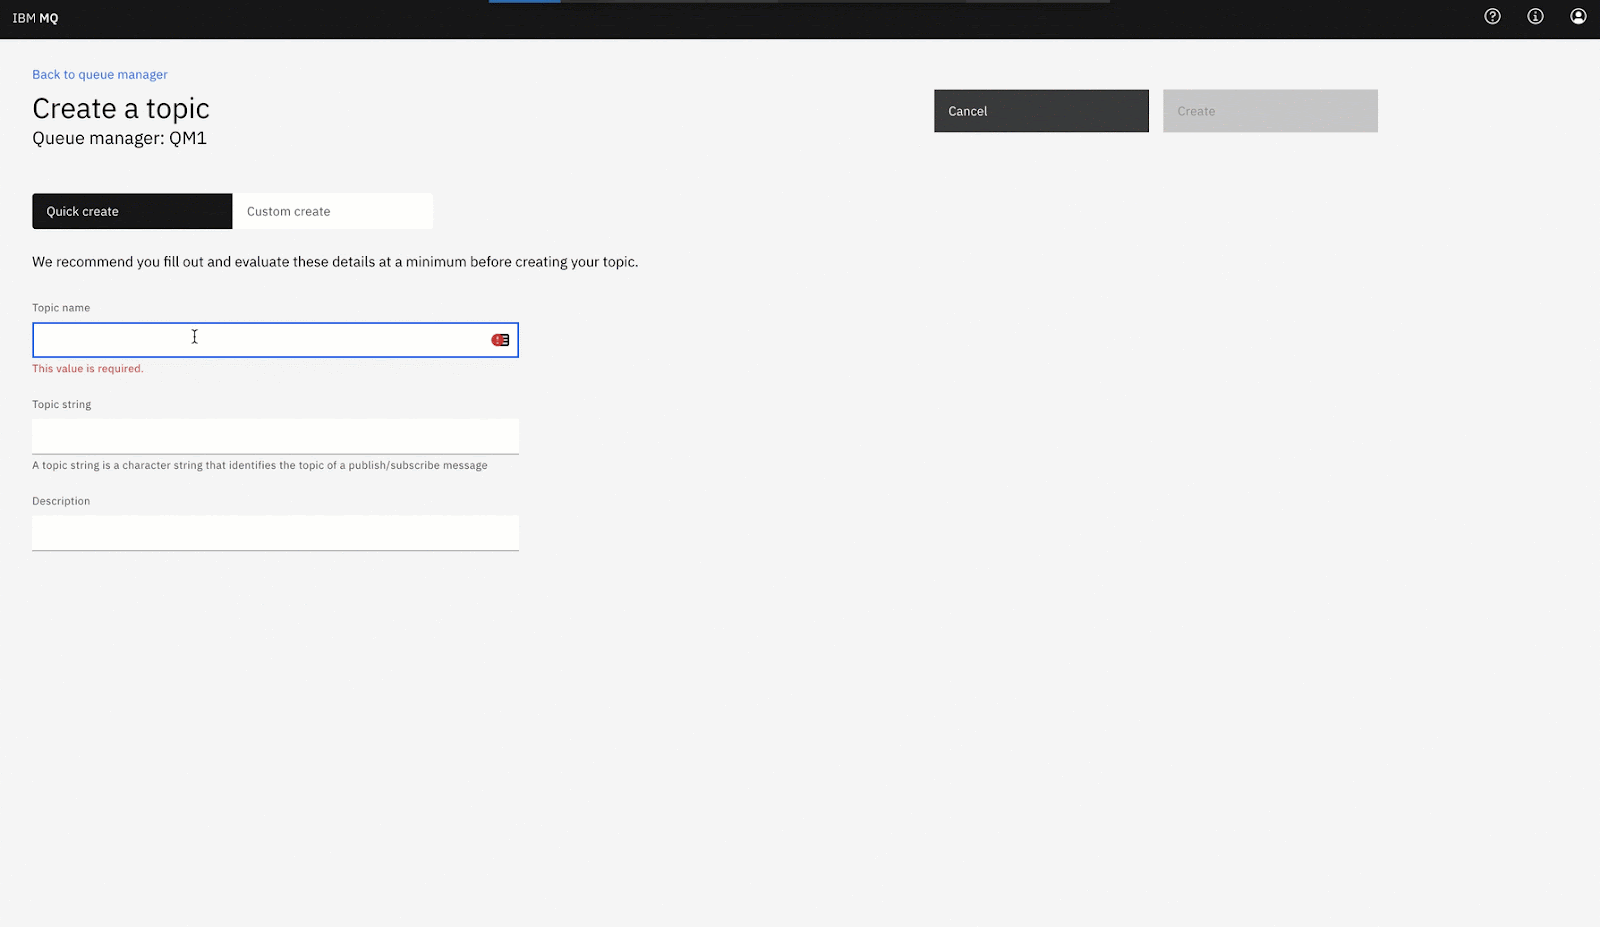
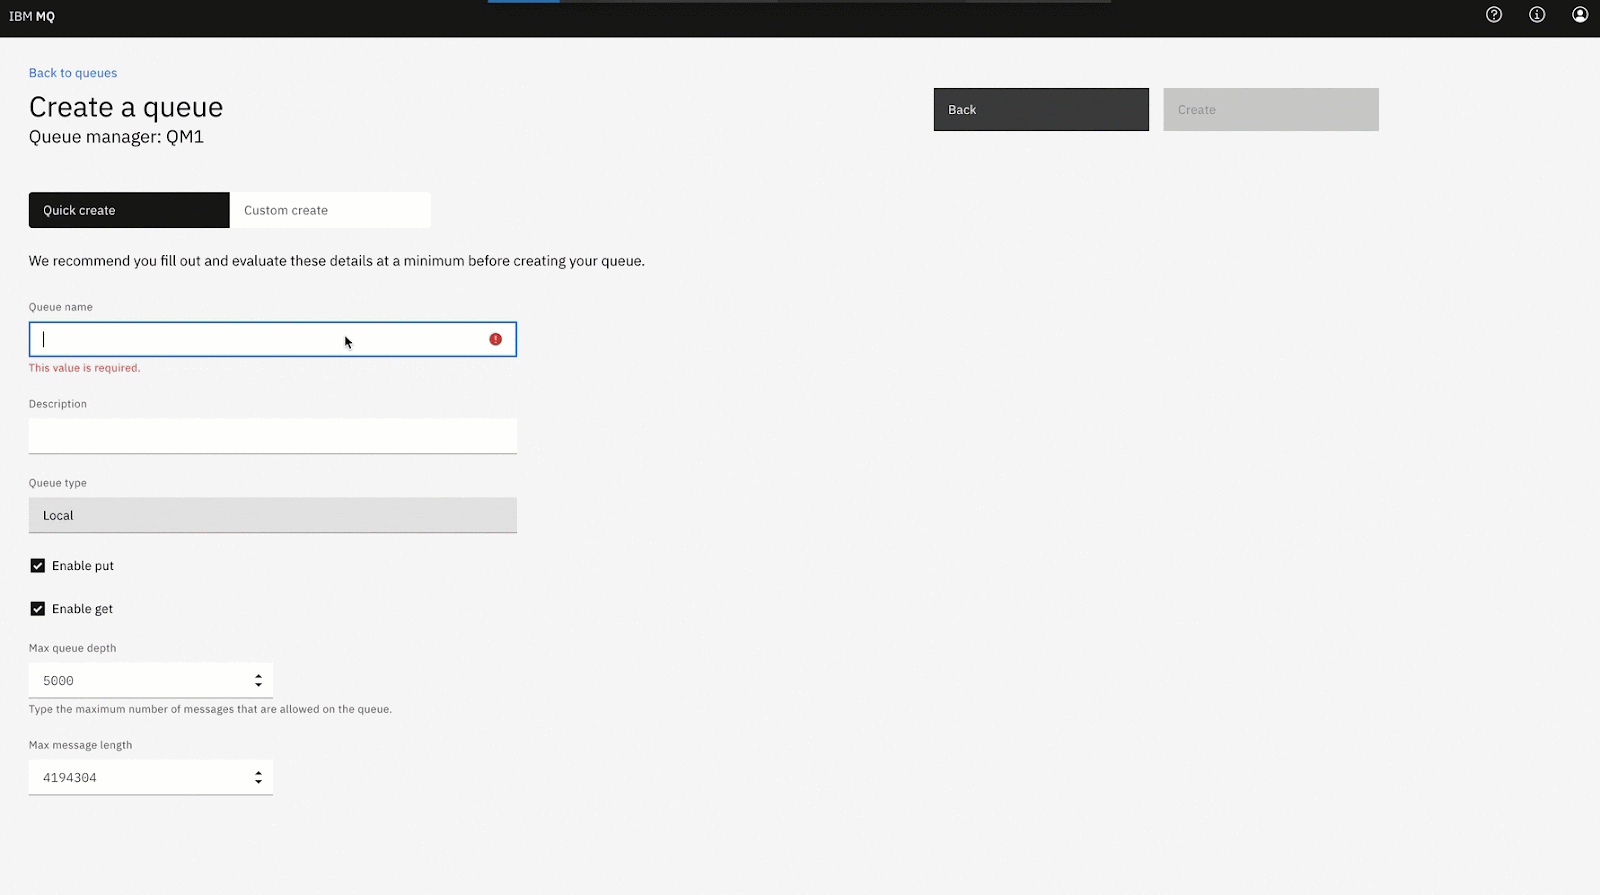
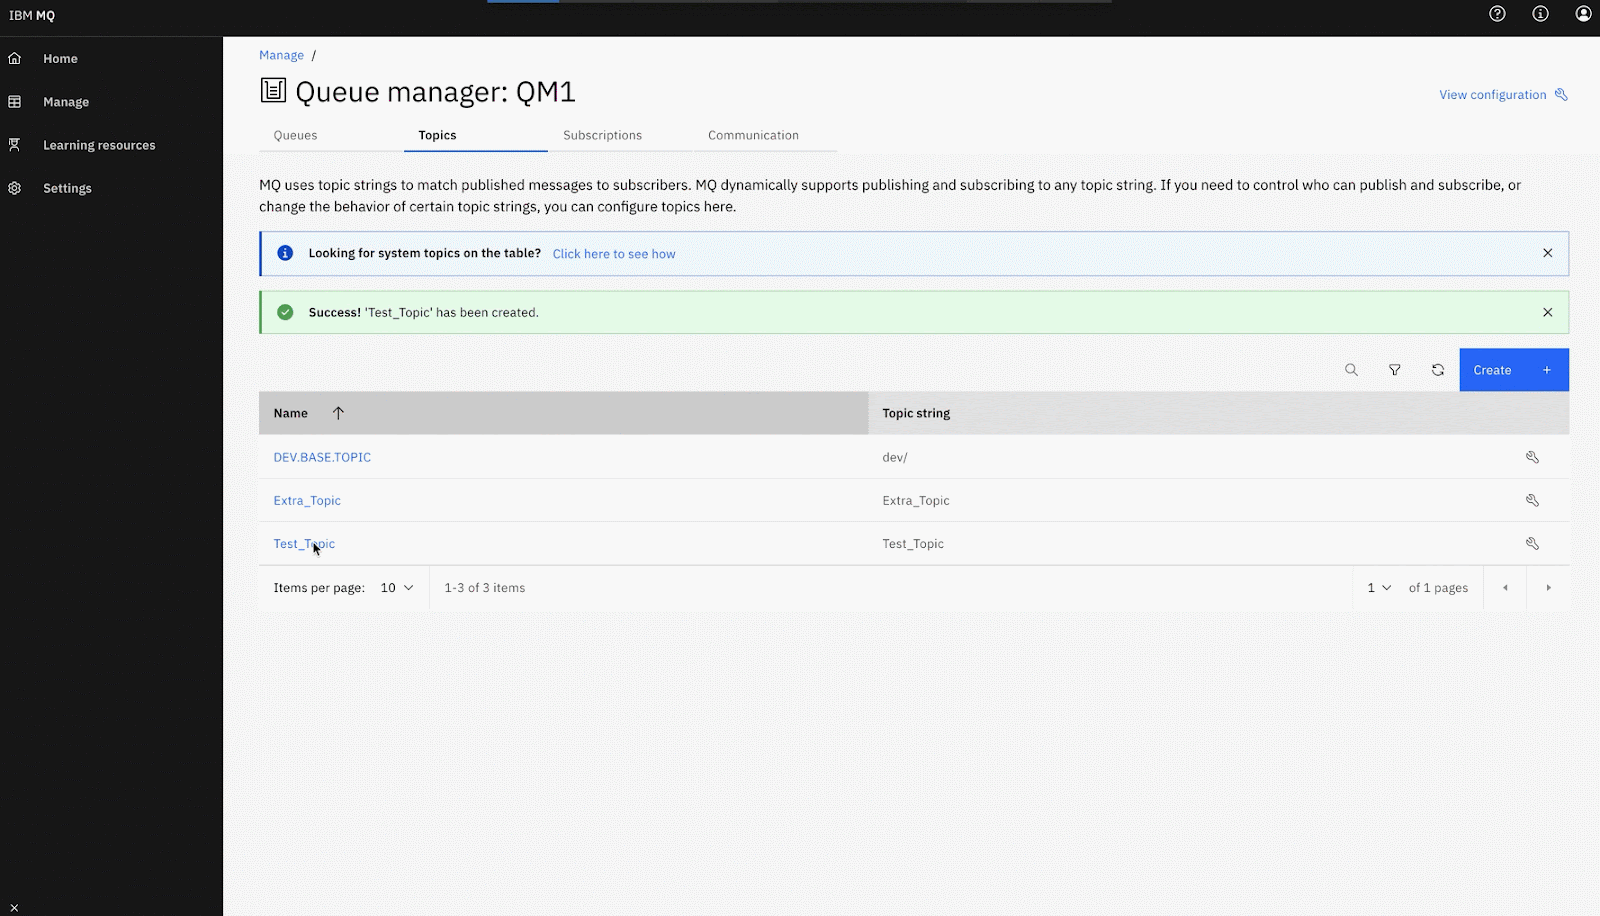
Password: passw0rdFollow this steps to create a new Topic:
Assign a Topic name Test_Topic and a Topic string (is the string we are using in studio later for setting a topic):
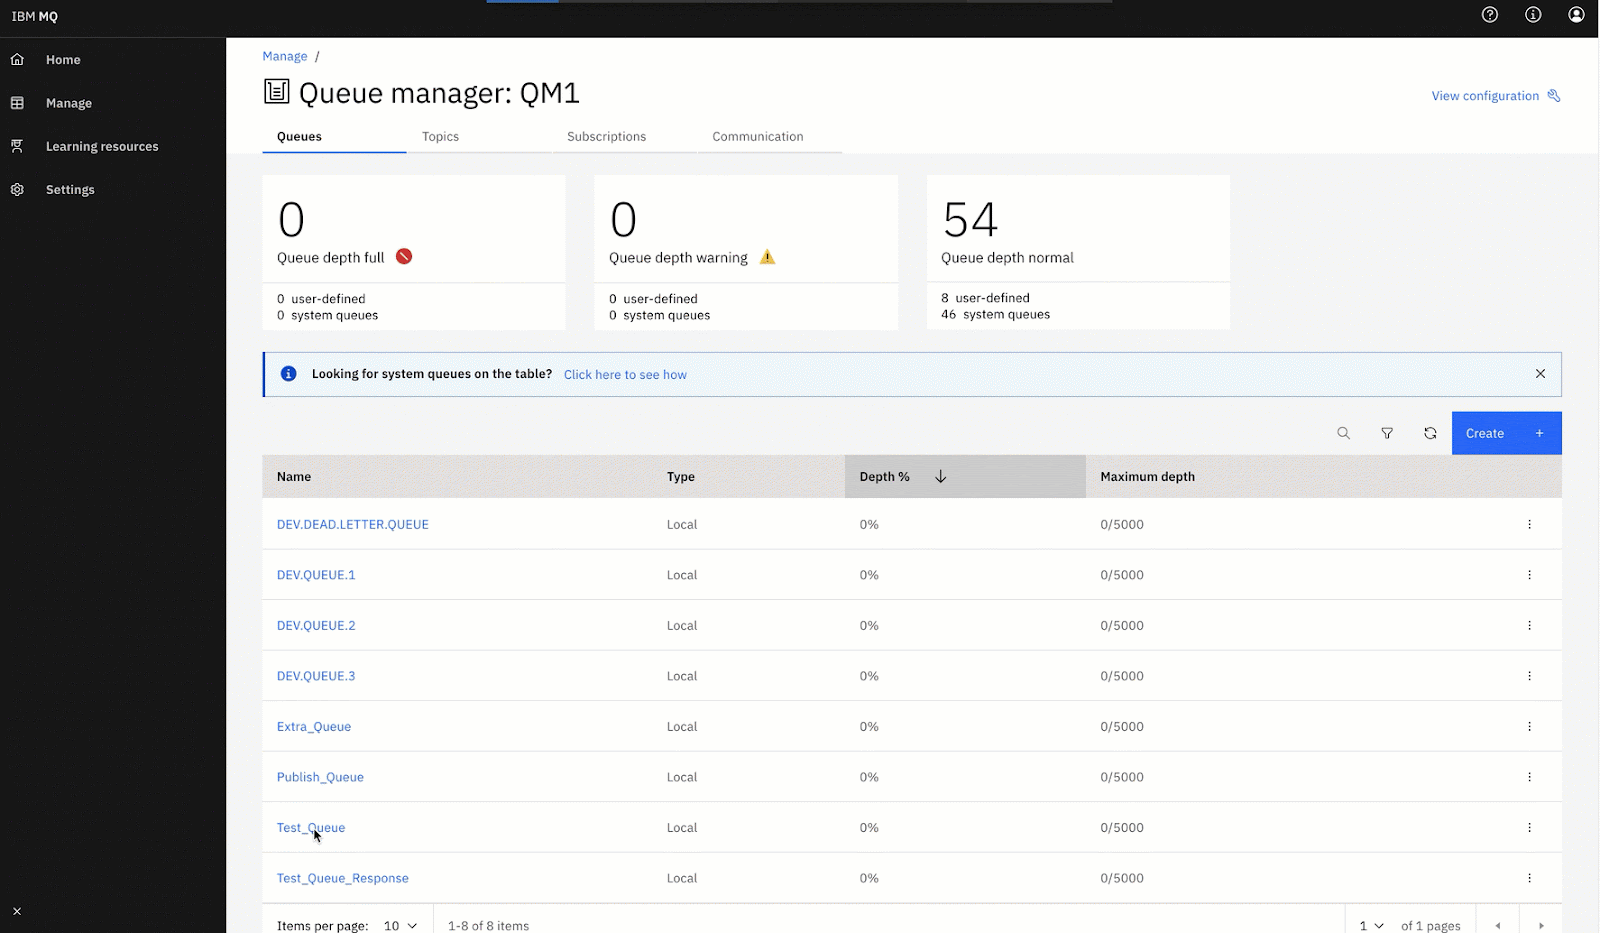
Create a new local Queue also:
Assign a Queue name and an optional description:
Create a user app in each topic and queue you created to grant permissions.
For the topic:
For the queue:
Now we are ready to implement in Studio some methods using the topic and queue we just created.
We are going to implement the publish for one topic.
1. Create a new flow for publishing in a topic with the name topic-publisher:
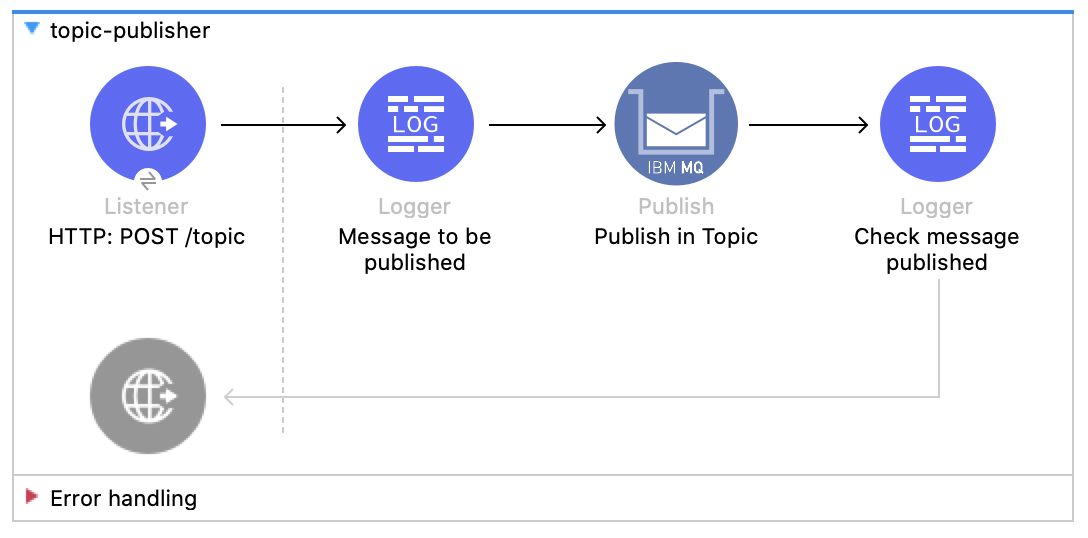
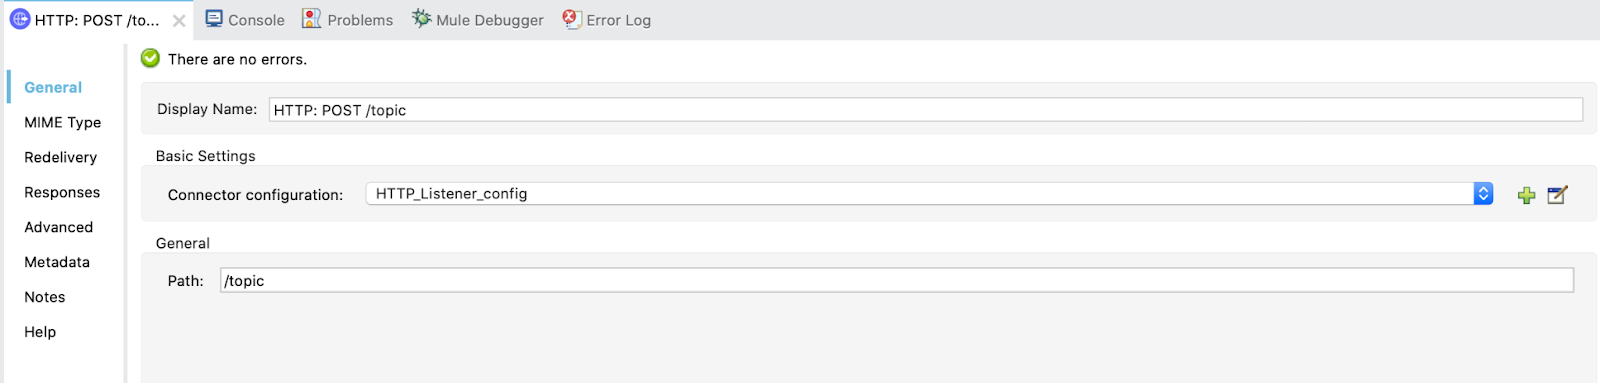
2. Configure the Listener. Create a new listener config with default values and set the display name to HTTP: POST /topic and the path to /topic:
3. Configure the first Logger
. With Display Name Message to be Published.
In Message write (without clicking Fx):
Message to be published: #[payload]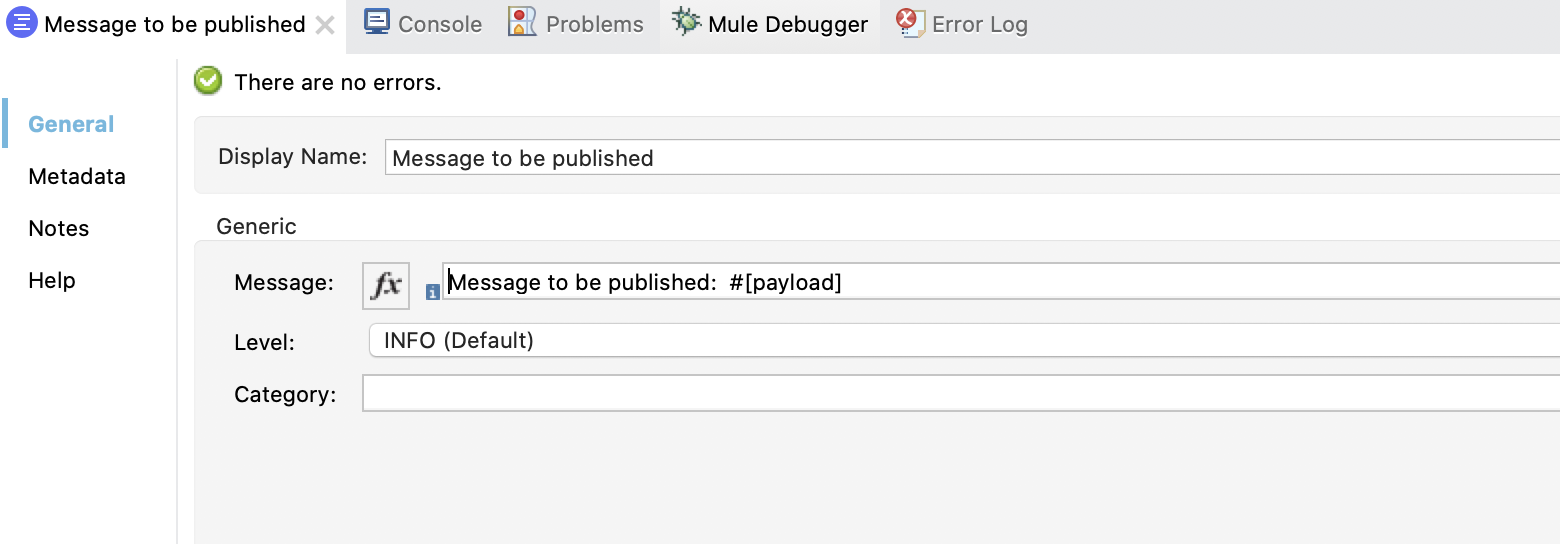
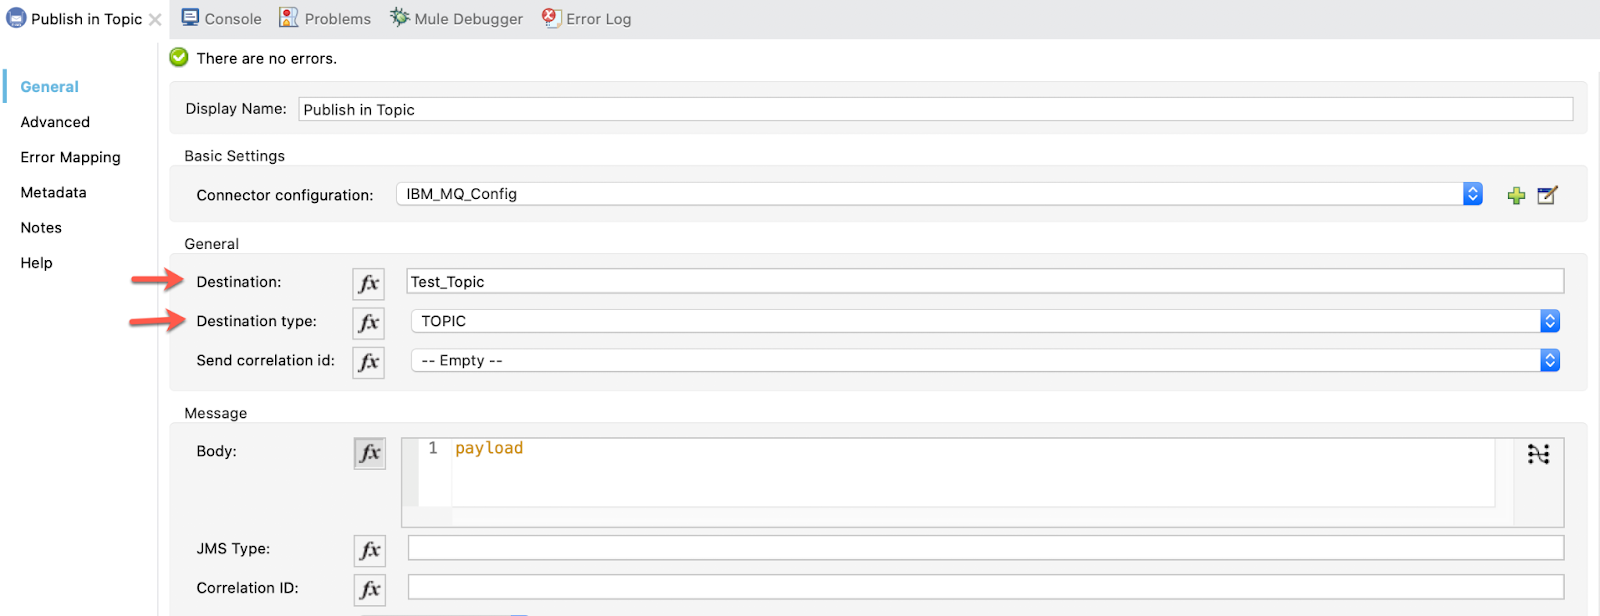
4. Configure the Publish. Set Display Name to Publish in Topic and use the configuration already created in Global Elements.
The destination will be the Test_Topic we created in IBM MQ Console and the Destination type wil be Topic.
5. Configure the last Logger. With Display Name Check message published.
In Message write:
"Message published in Topic" 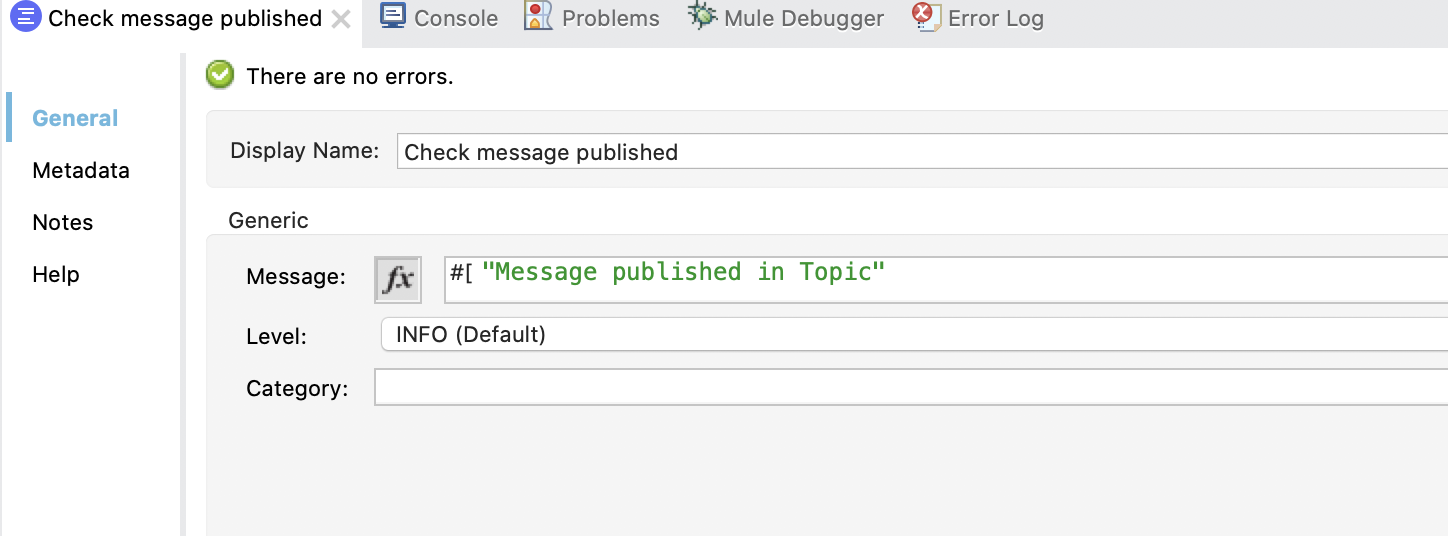
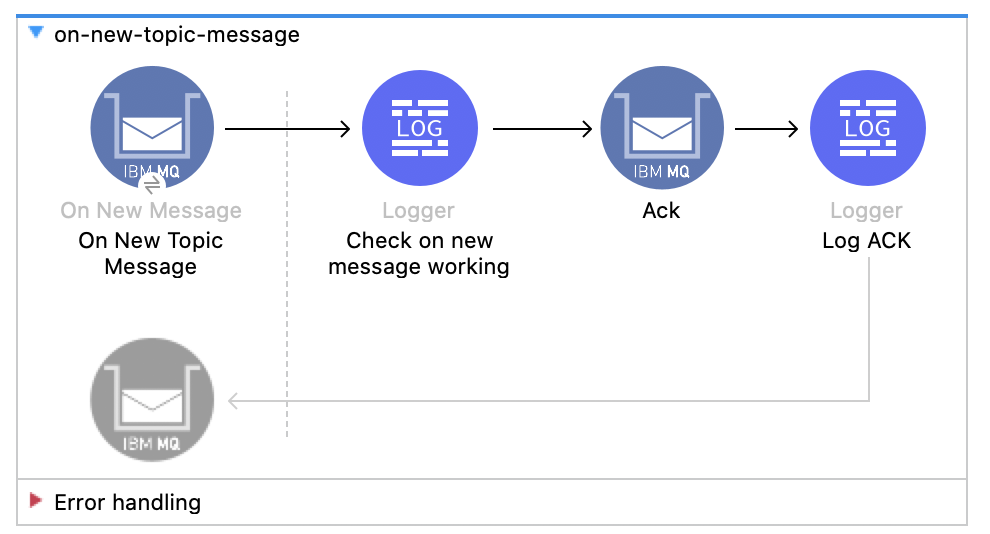
Create a listener for the Test_Topic. Each time the topic-publisher is executed, the on new message is going to be executed too.
1. Create a new flow with the name on-new-topic-message:
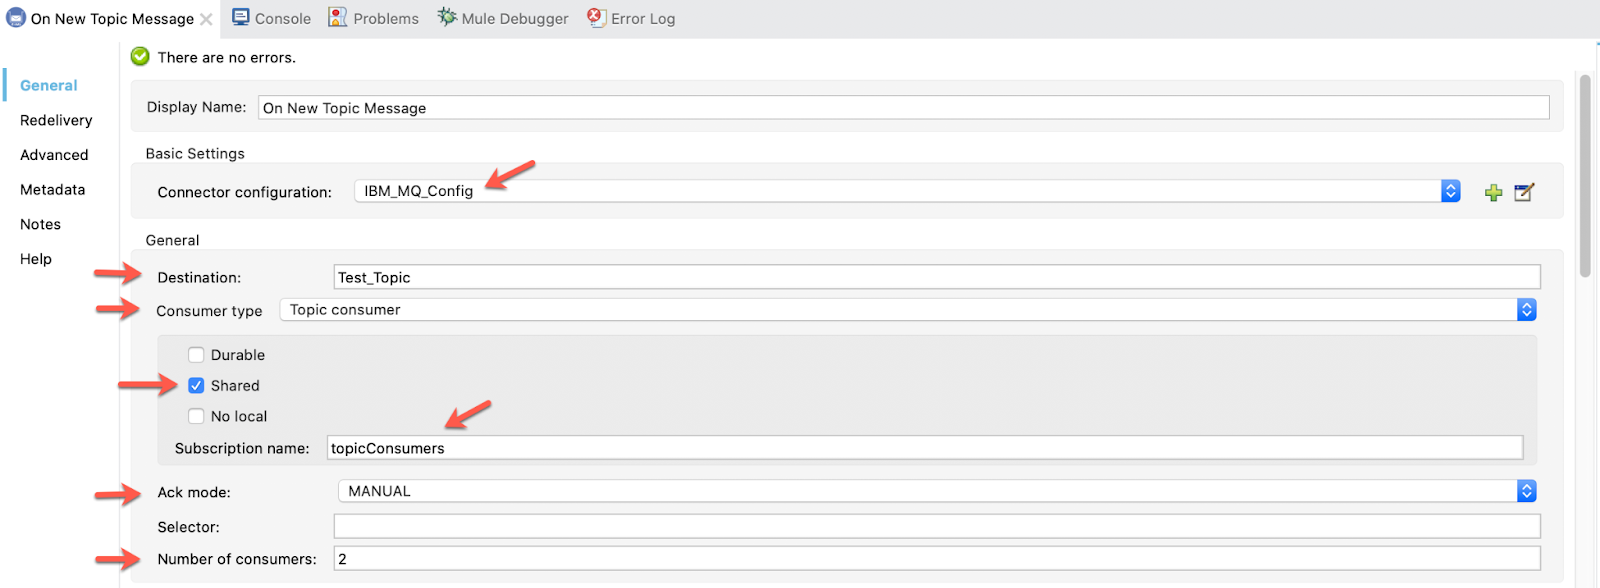
2. Configure the On New Message. Set the Display Name to On New Topic Message and add some configurations.
Make sure you specify the Destination, Consumer type, a shared Subscription name and the manual Acknowledgement mode (number of consumers can be as much as you need):
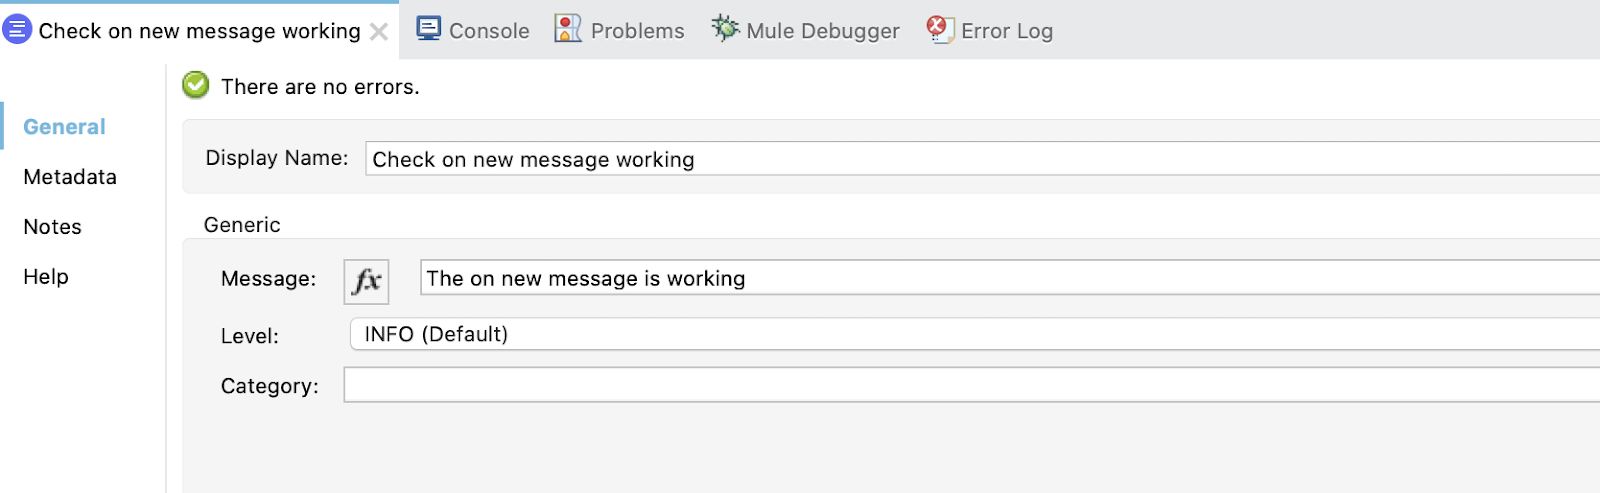
3. Configure the first Logger. Set the Display Name to Check on new message working. And set a message "The on new message is working".
4. Configure the Ack to be notified if everything is working correctly (in a manual way).
AckId: attributes.ackId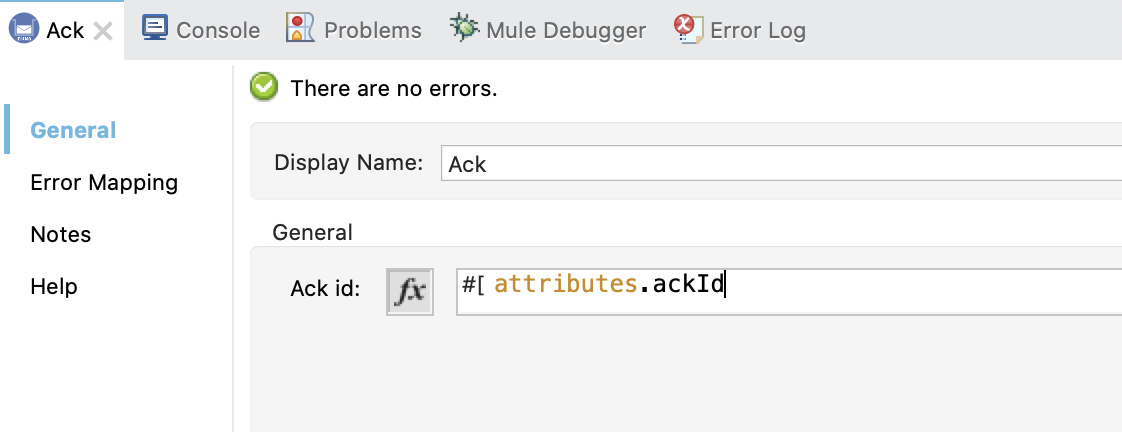
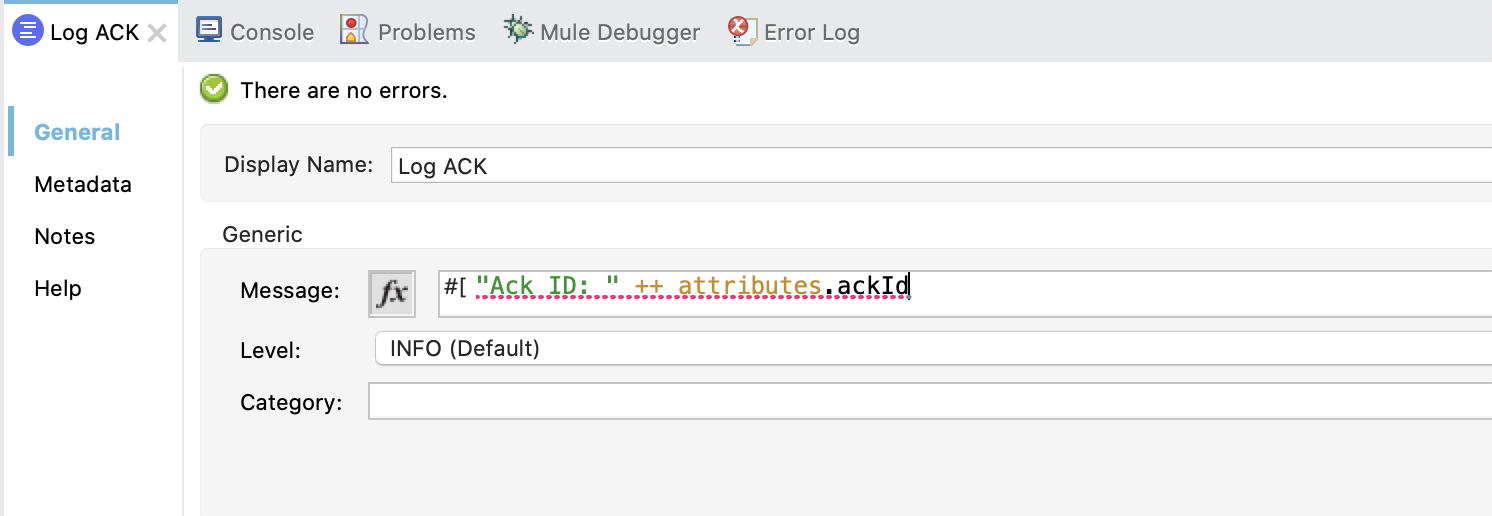
5. Configure the last Logger that will log the ackId. Change the Display Name to Log ACK.
Message: "Ack ID: " ++ attributes.ackId
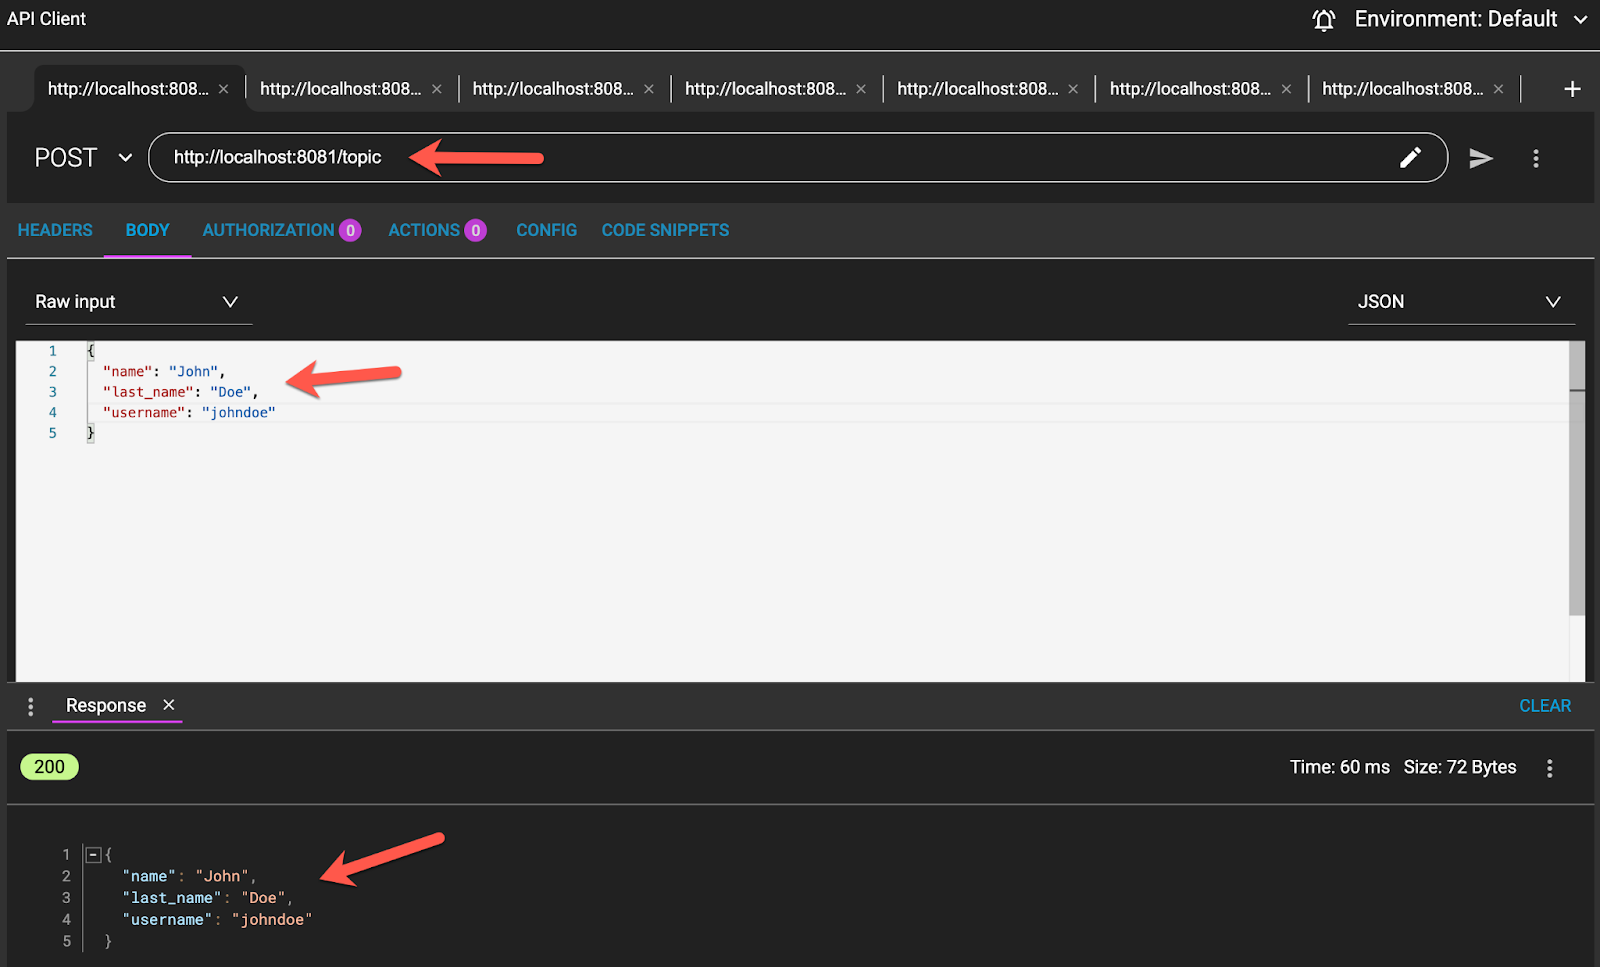
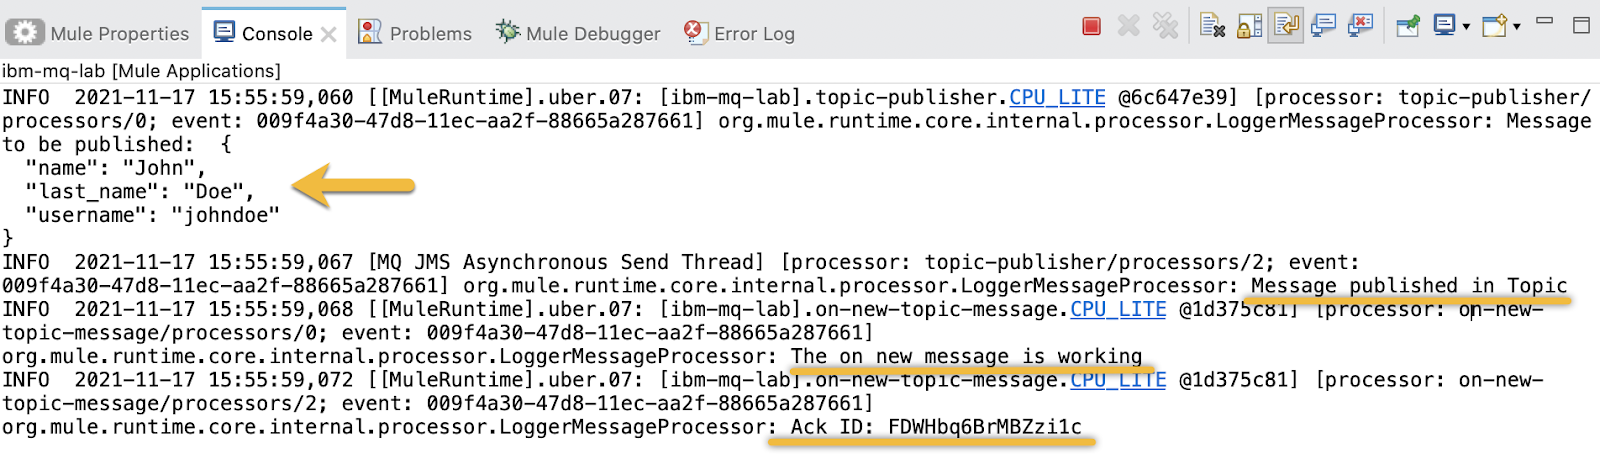
Test the publish and on new message using a topic. From ARC and Studio.
From ARC / Postman (whatever you are using) send a POST request:
URL:
http://localhost:8081/topicPOST MESSAGE:
{
 "name": "John",
 "last_name": "Doe",
 "username": "johndoe"
}
And you can see also the loggers in the console in Studio:
Implement the publisher for one queue.
1. Create a new flow with the name queue-publisher:
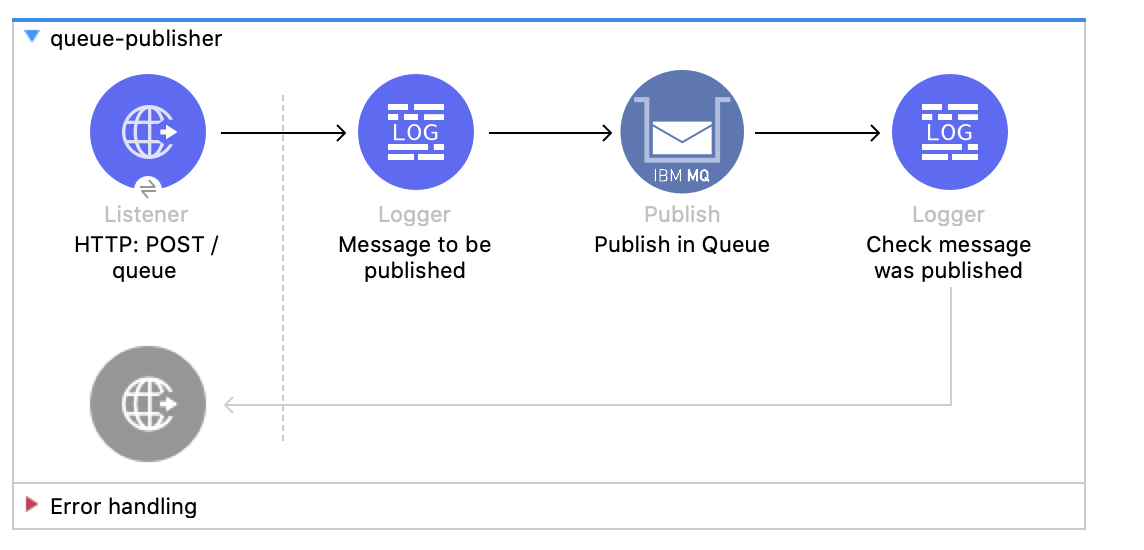
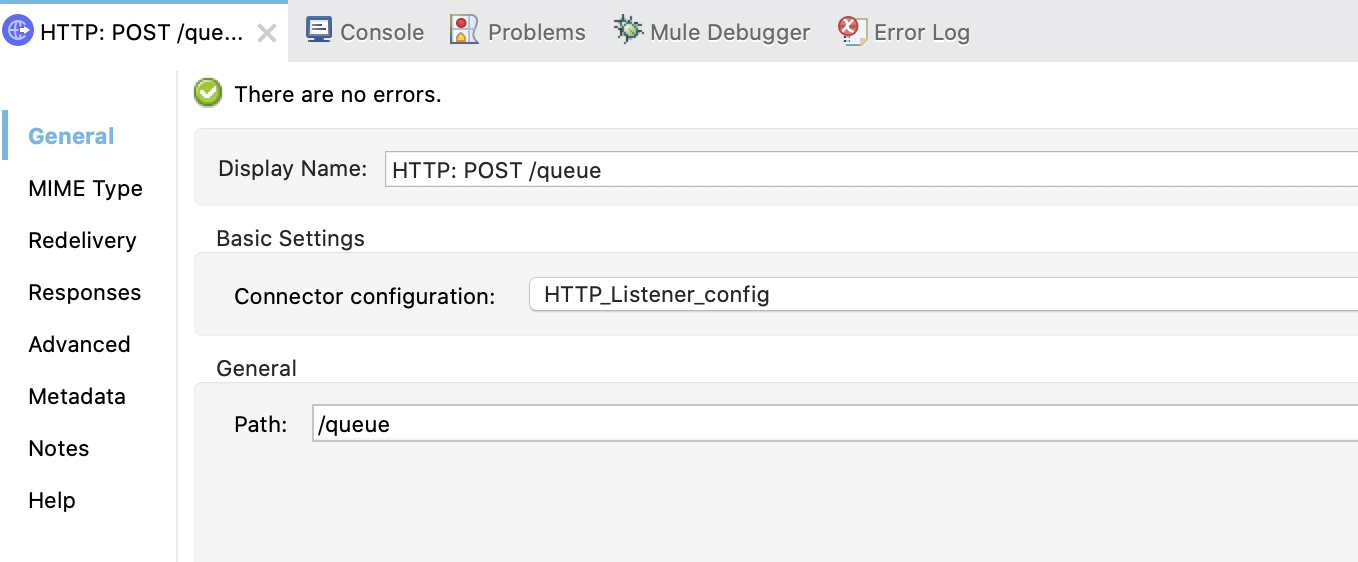
2. Configure the Listener. Use the created listener config and set the display name to HTTP: POST /queue and the path to /queue:
3. Configure the first Logger
. With Display Name Message to be Published.
In Message write:
Message to be published: #[payload]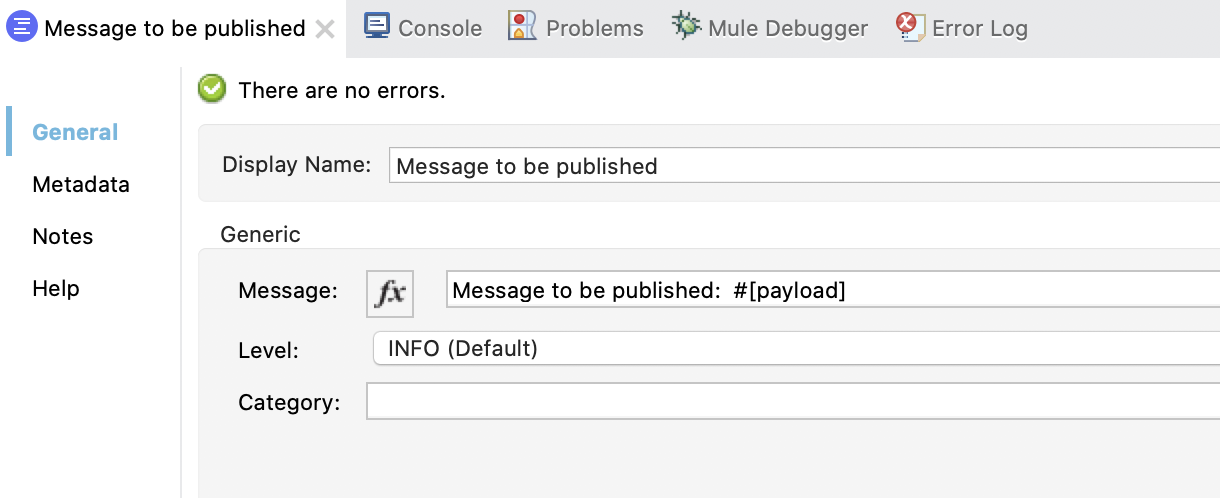
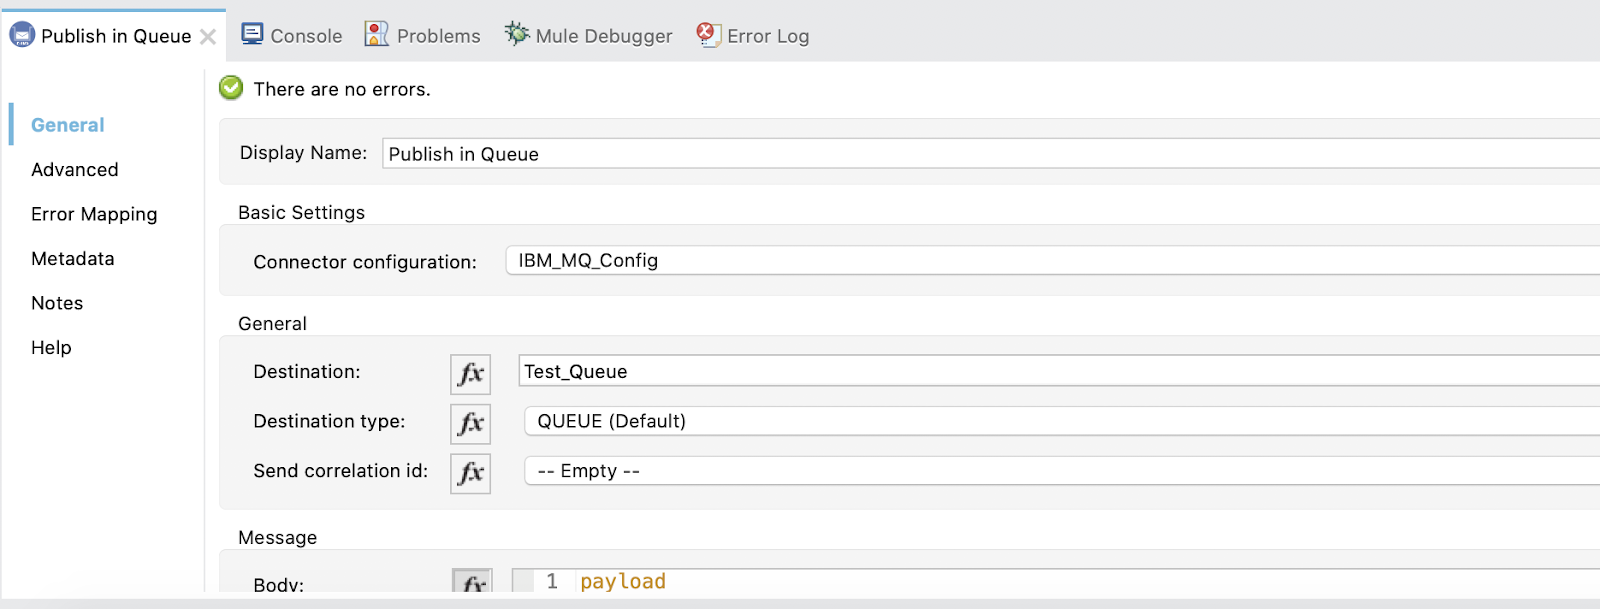
4. Configure the Publish. Set Display Name to Publish in Queue and use the configuration already created in Global Elements.
The destination will be the Test_Queue we created in IBM MQ Console and the Destination type will be Queue:
5. Configure the last Logger. With Display Name Check message published.
In Message write:
"Message published in Queue" Implement the consumer for a Queue.
1. Create a new flow with the name queue-consumer:
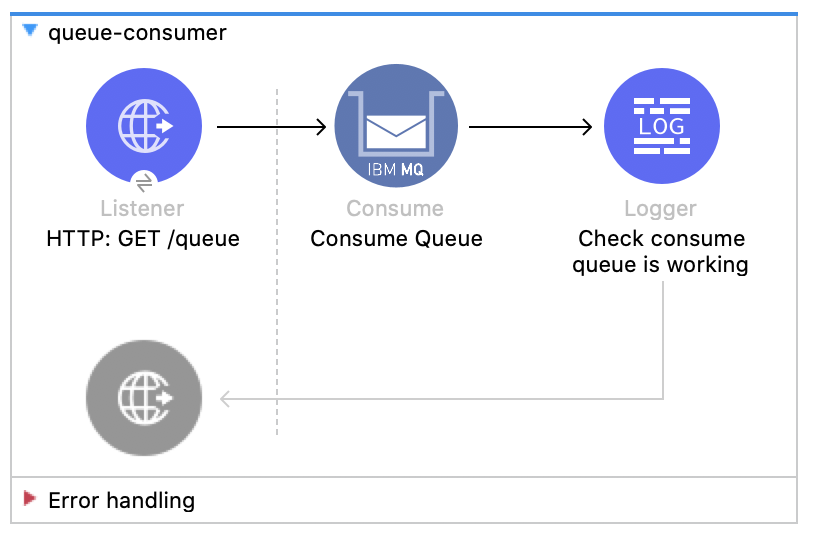
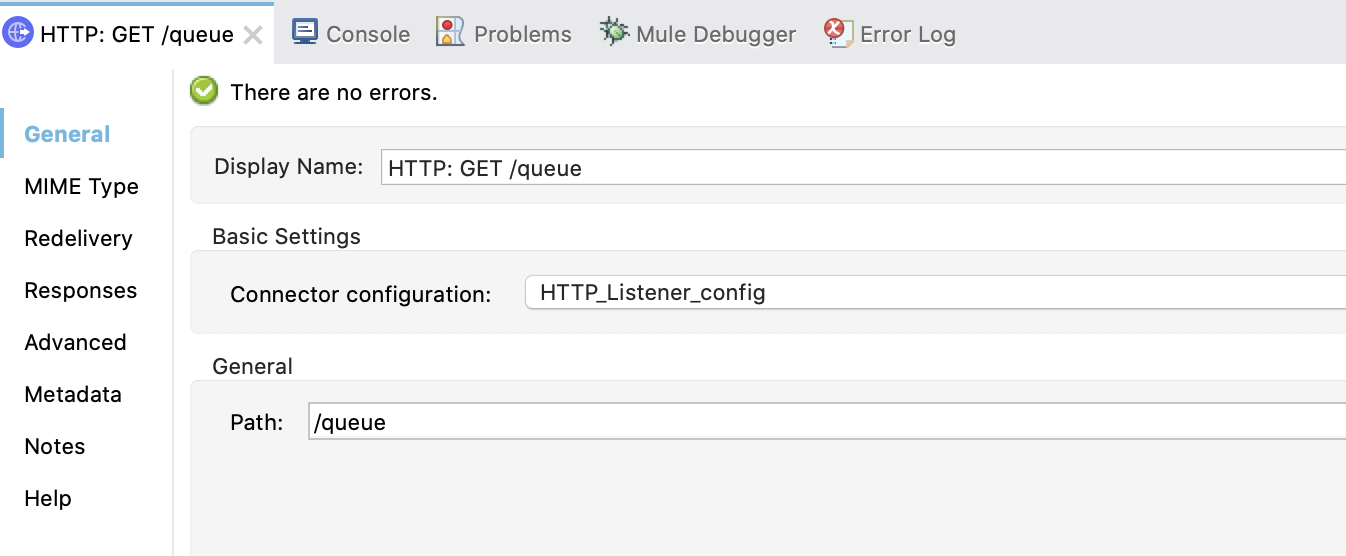
2. Configure the Listener. Use the created listener config and set the display name to HTTP: GET /queue and the path /queue:
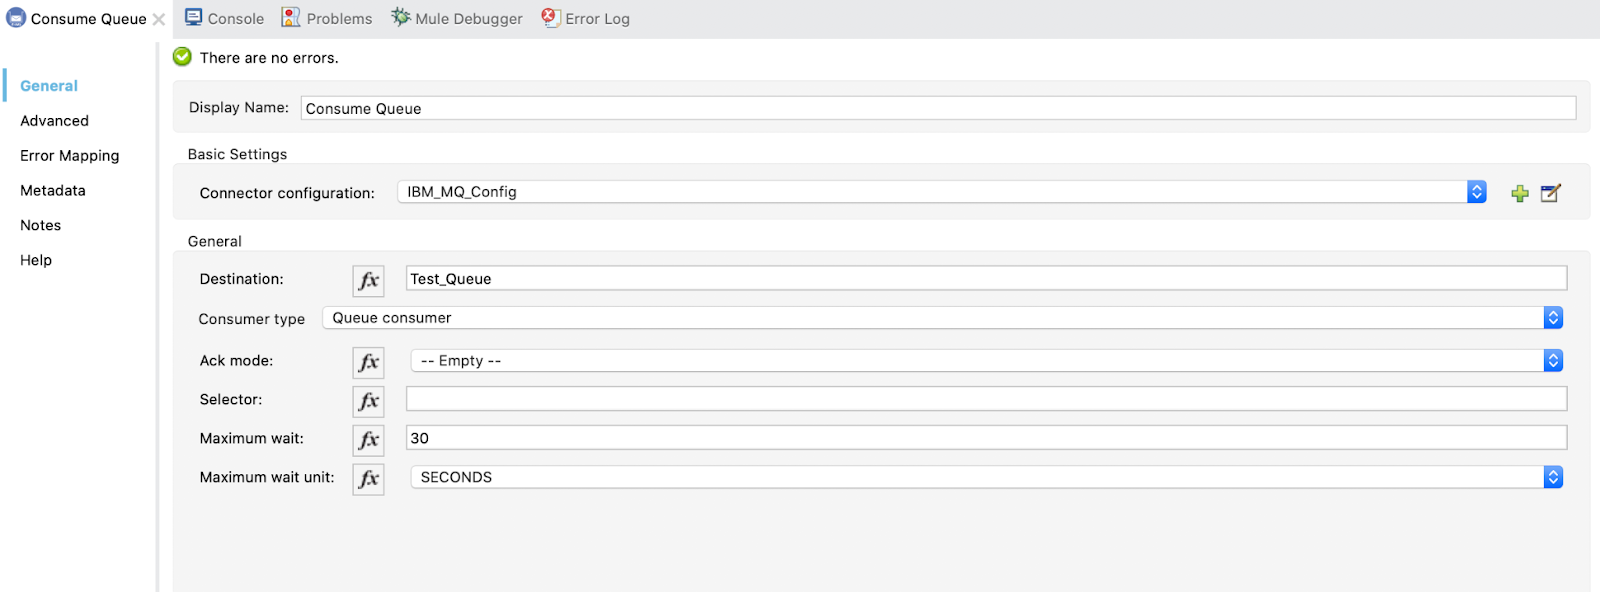
3. Configure the Consume. Set Display Name to Consume Queue and use the configuration already created in Global Elements.
The destination will be Test_Queue and the Destination type will be Queue
Add also a longer connection timeout with Maximum wait of 30 seconds:
4. Configure the Logger. With Display Name Check consume queue is working and
In Message write:
"The queue message was consumed"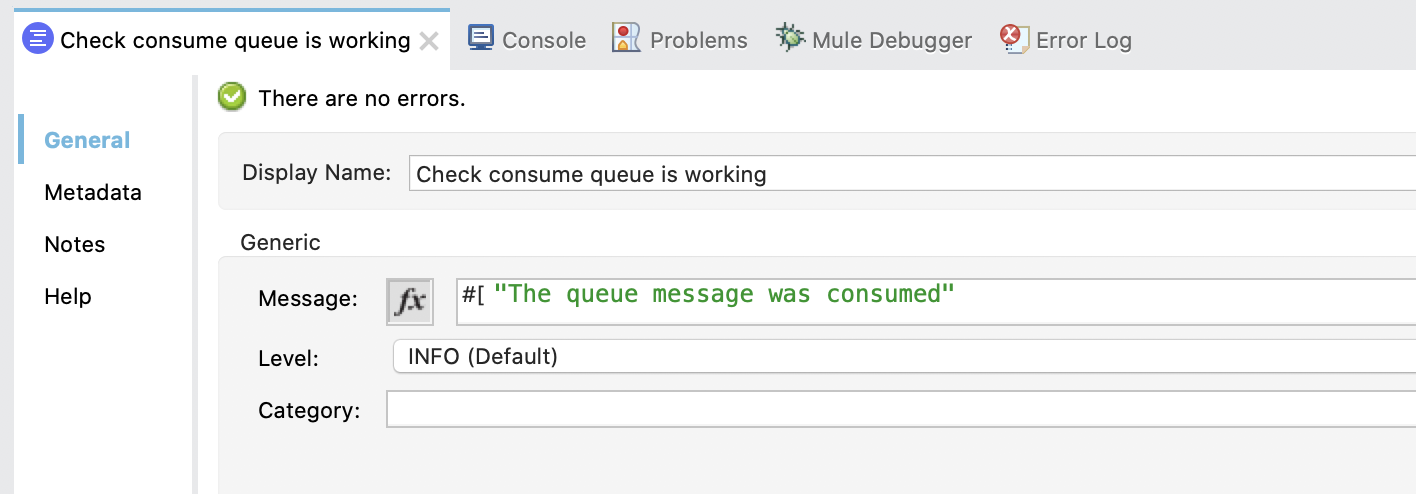
Test the publisher and consumer methods for a queue. From ARC and Studio.
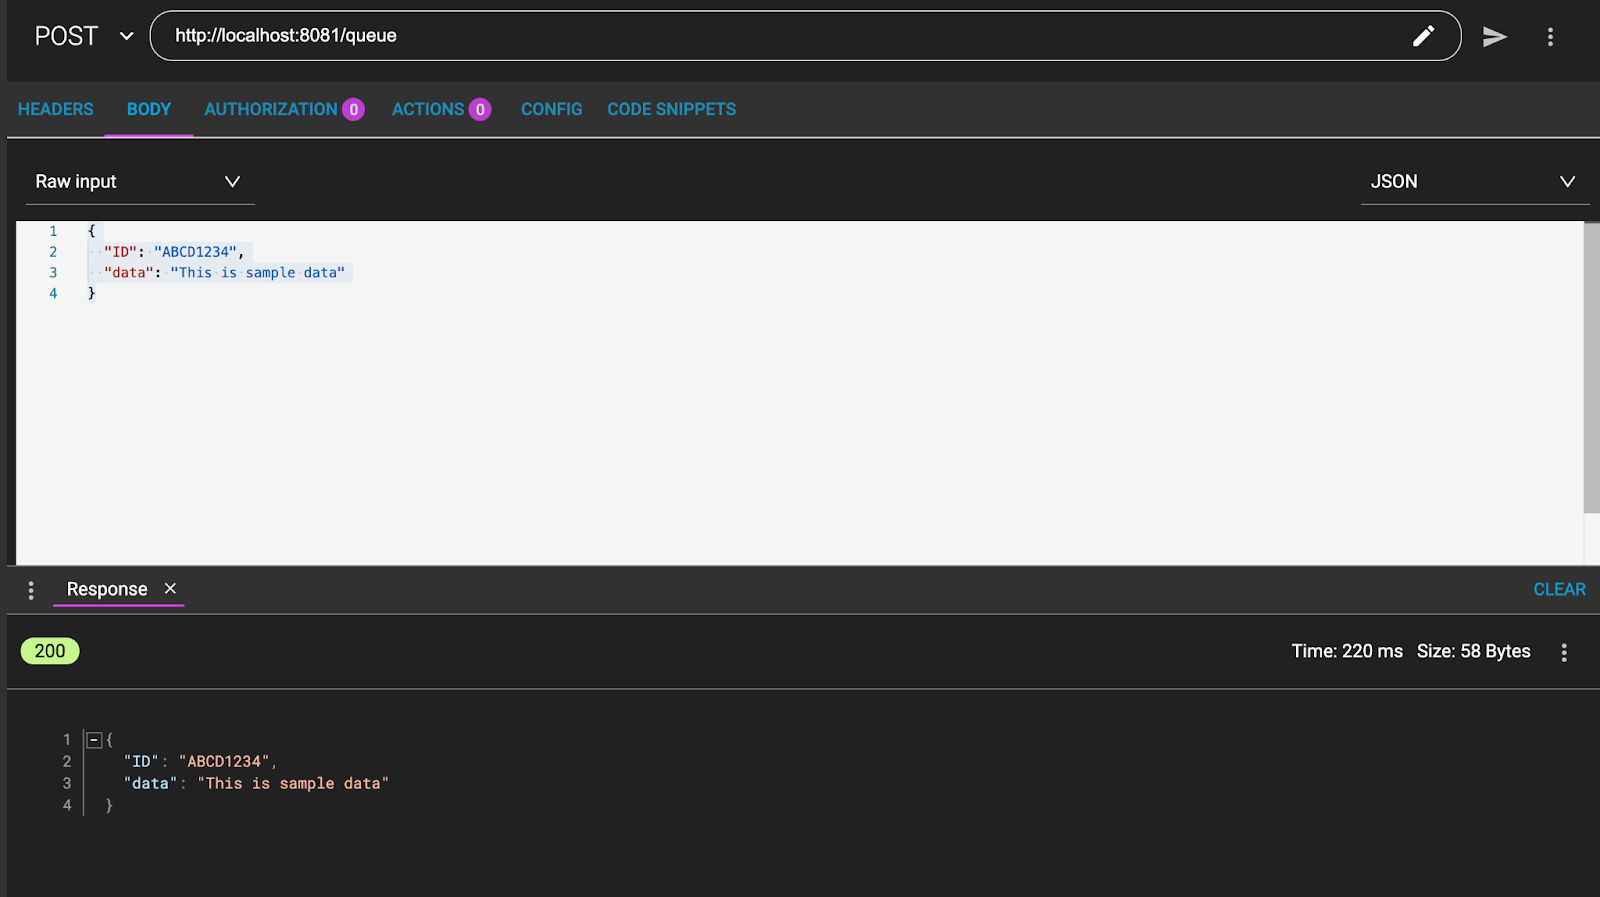
1. First we publish in the queue. From ARC / Postman send a POST request:
URL:
http://localhost:8081/queuePOST MESSAGE:
{
 "ID": "ABCD1234",
 "data": "This is sample data"
}
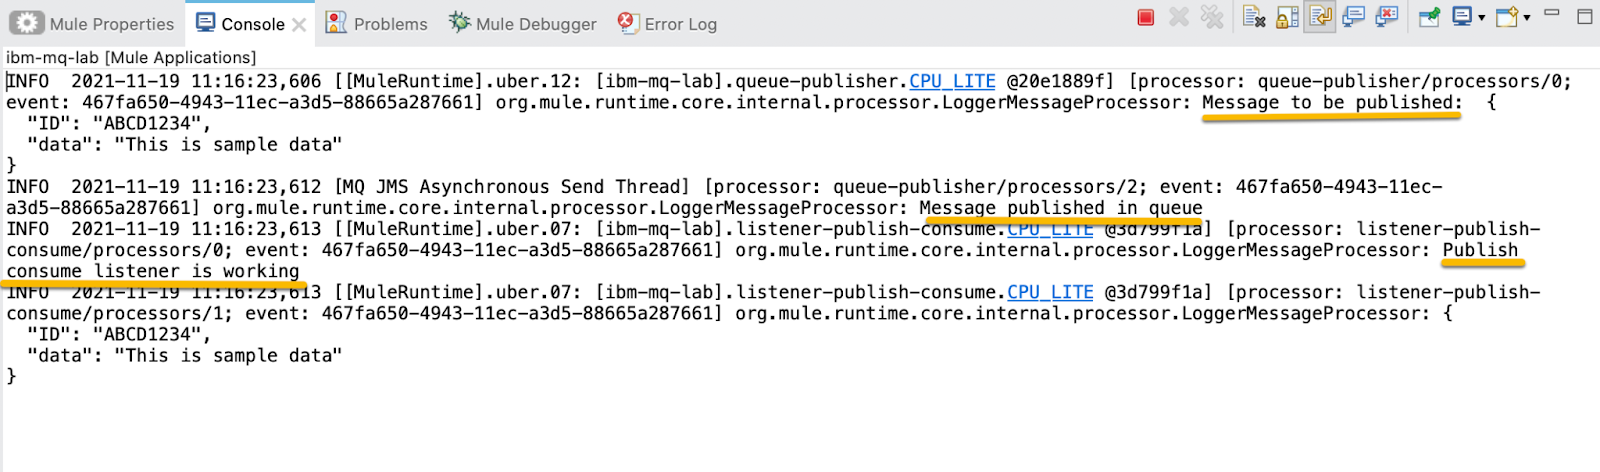
See also the loggers in the console in Studio:
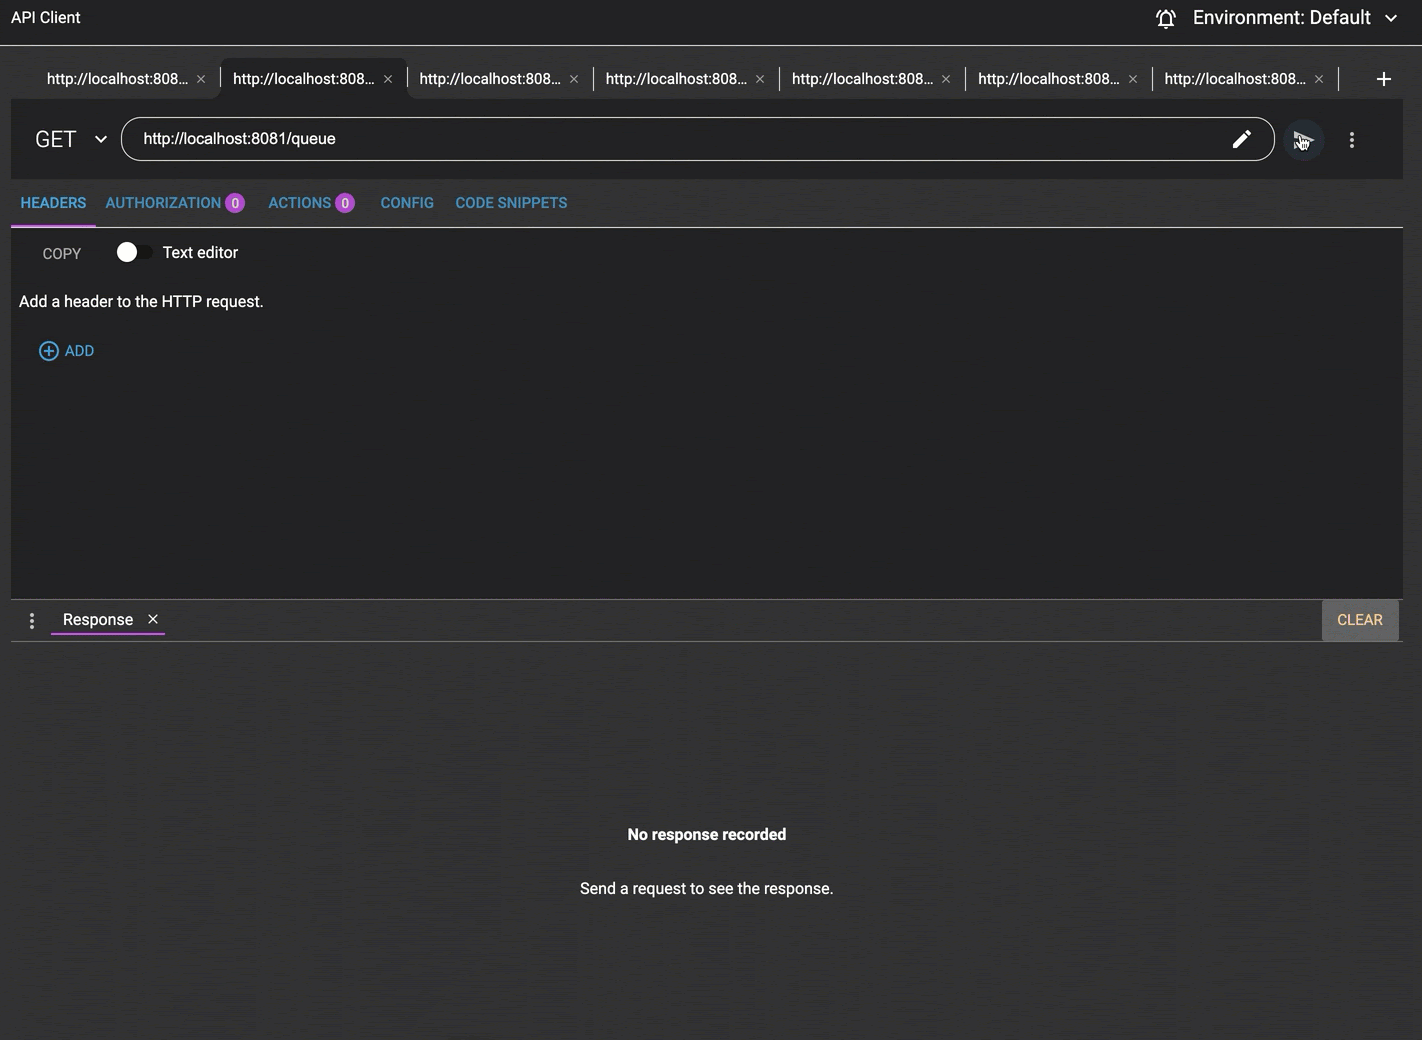
2. Now, consume the message.
From the client send a GET request:
http://localhost:8081/queue