This lab will walk you through how MuleSoft's Universal API Management can be used to complement the development of APIs deployed to the AWS API Gateway, for instance to access Lambda services.
What you will learn
- How the Anypoint API cataloging tool can be added to a CICD pipeline to update the AWS API Gateway, to automatically catalog the latest version of an API. Allowing API consumers to see a real-time view of what services are available and drive reuse
- How the Anypoint API Governance feature can be used to check API specifications, to make sure they meet security, industry, compliance and organizational standards. Driving consistency, reducing risk and making APIs easier to consume
- How Anypoint Exchange can reduce duplication, drive reuse and enable self service with an internal audience and through ACM to an external audience
It will walk you through how to set up a simple CICD pipeline using GitHub and Jenkins, but this is only to show in principle how this can be done. It does not cover in-depth DevOps practices or all the additional steps that would be needed to productionize this process. Its focus is to show the "art of the possible".
Finally although this tutorial assumes the user is using Mac OSX, the scripts and instructions could easily be tweaked to run on Windows.

These are the prerequisites required for the tutorial;
- An Anypoint environment (this could be a trial environment)
- A copy of the Anypoint API Catalog tool installed locally. Instructions can be found here, but basically in involves installing a Node app;
% npm install -g anypoint-cli@latest- Access to an AWS account with permissions to create and update an API in the API Gateway. A free tier account should allow you to do this - but remember to remove what you need afterwards
- The AWS CLI installed locally. Details on how to do this can be found here.
- Docker Desktop installed
- VSCode has been used for this tutorial but any text editor could be used
- The GitHub client installed locally and a GitHub account
- Jenkins (this can be run locally). Details of how to do this can be found here. Note that Jenkins will also require Java 8 or 11 to be installed
To setup your project for testing;
Create a directory on your laptop and clone the GitHub project from here;
% git clone https://github.com/dfelcey/aws-api-demo.gitIn VSCode open the directory/folder you have just cloned the project to;
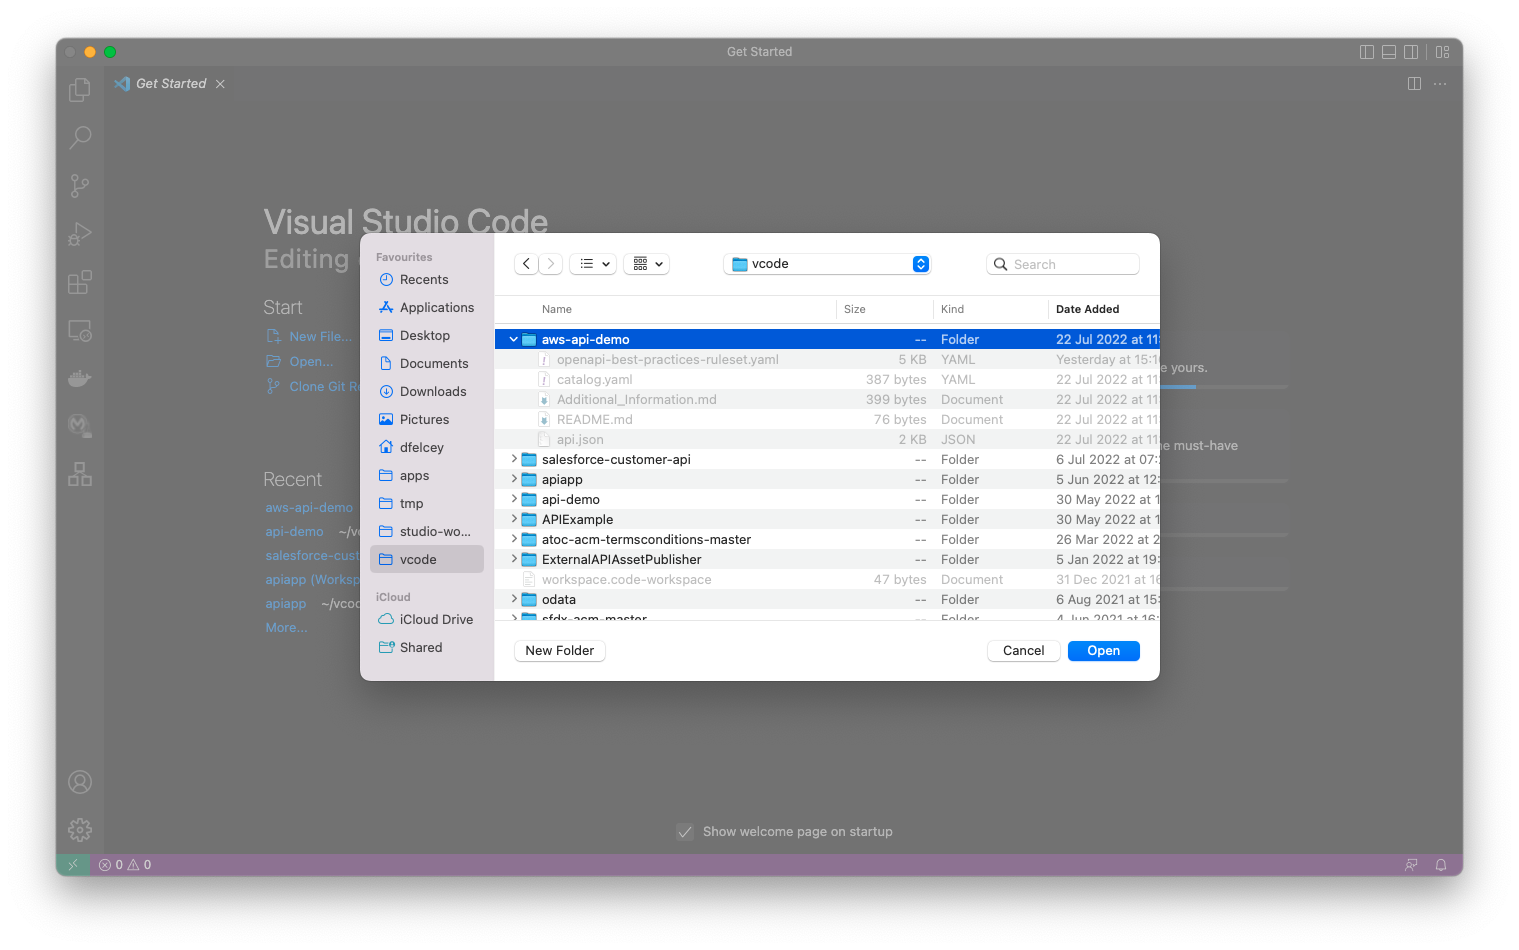
And then publish to GitHub (Ctrl + Shift + Command). You can choose any project name you like, or just call it aws-api-demo;

To set up your AWS environment first check you have the AWS CLI installed. Enter aws –version and you should see something like this;
% aws --version
aws-cli/2.7.16 Python/3.9.11 Darwin/21.5.0 exe/x86_64 prompt/off
To use the AWS CLI you need to set up your credentials. This is outlined here, but basically if you login to the AWS console, select your account and the Security Credentials menu optio. To create new access keys click on Create New Access Key
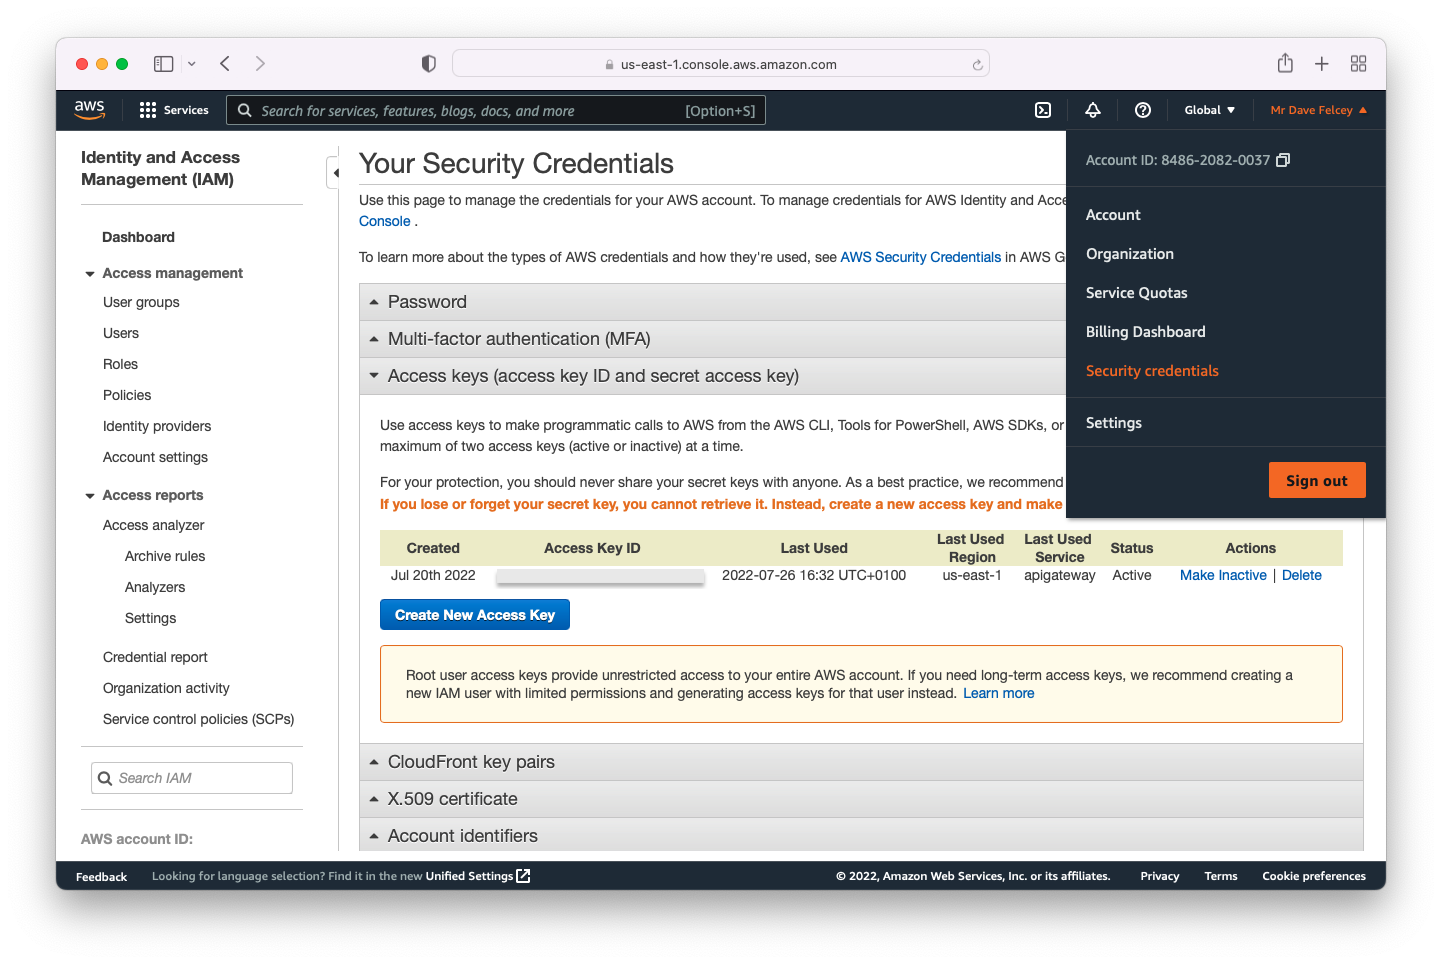
Save the access credentials to use later as environment variables and from the command line
Run the aws configure command to add these to the AWS CLI credentials file as outline here;
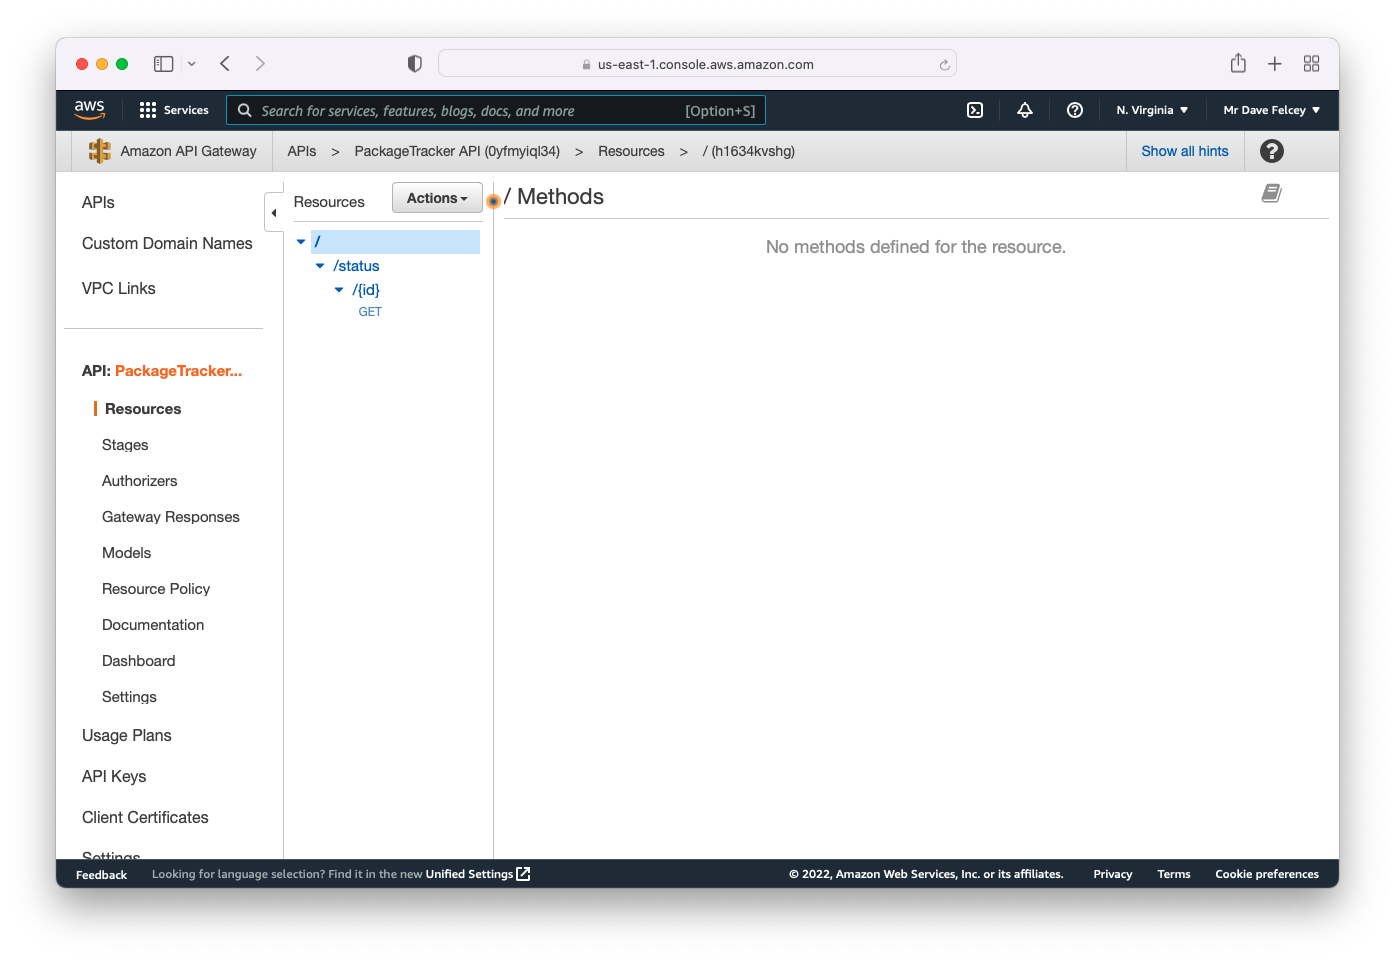
% aws configureOnce this has been done you can then create the initial version of the API in the AWS API Gateway - the Jenkins CICD pipeline will just update this. To create the initial version of the API, make sure you are in the project directory/folder that contains the api.json API definition and run the commands below;
% AWS_PROFILE=default
% aws apigateway import-rest-api \
    --parameters endpointConfigurationTypes=REGIONAL \
    --cli-binary-format raw-in-base64-out \
    --fail-on-warnings \
    --body 'file://api.json'
After running this command you should be able to see the API Gateway in the AWS console, similar to the screenshot below;
You are now ready to setup the Jenkins pipeline
To use the AWS CLI from Jenkins there are a number of options. CloudBees and others provide plugins, but the easiest approach I found after trying them all was to run the AWS CLI in a Docker container.
To do this you first need to install Docker and on a Mac the easiest way to do this is using Docker Desktop. Once you have installed it, make sure it's running - you should see an icon in your toolbar - and then run the following command;
% docker --version
Docker version 20.10.16, build aa7e414
% docker pull amazon/aws-cli
This will confirm that Docker is installed and running and will also download the Docker AWS CLI image to use later with Jenkins.
If when publishing an API it fails the governance checks you typically want to stop the process, notify the developers about the issue and provide details about how to address them. For this we can use the email step in a Jenkins pipeline. For this you will need to set up a fake email address.
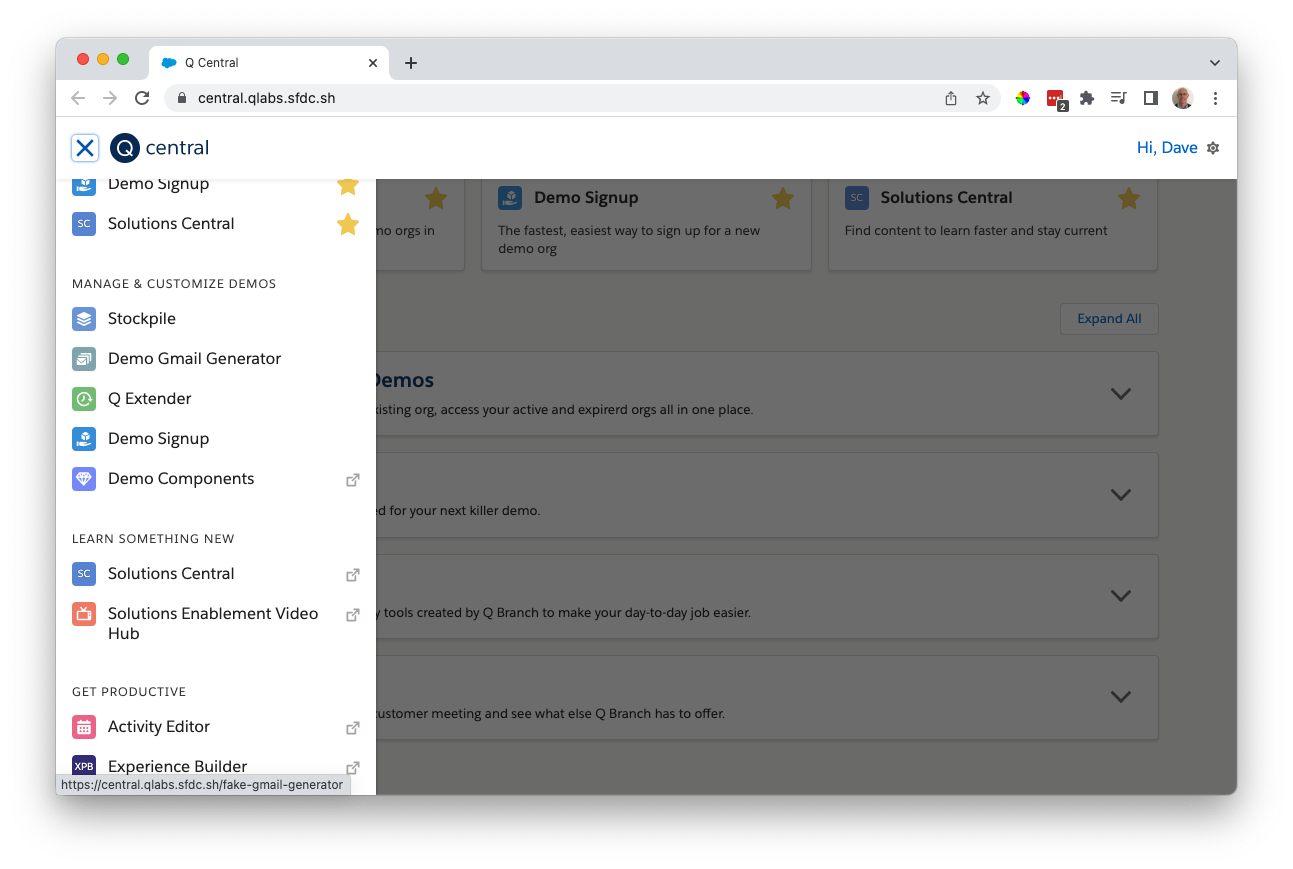
Fortunately, Solution Central has made this really easy.
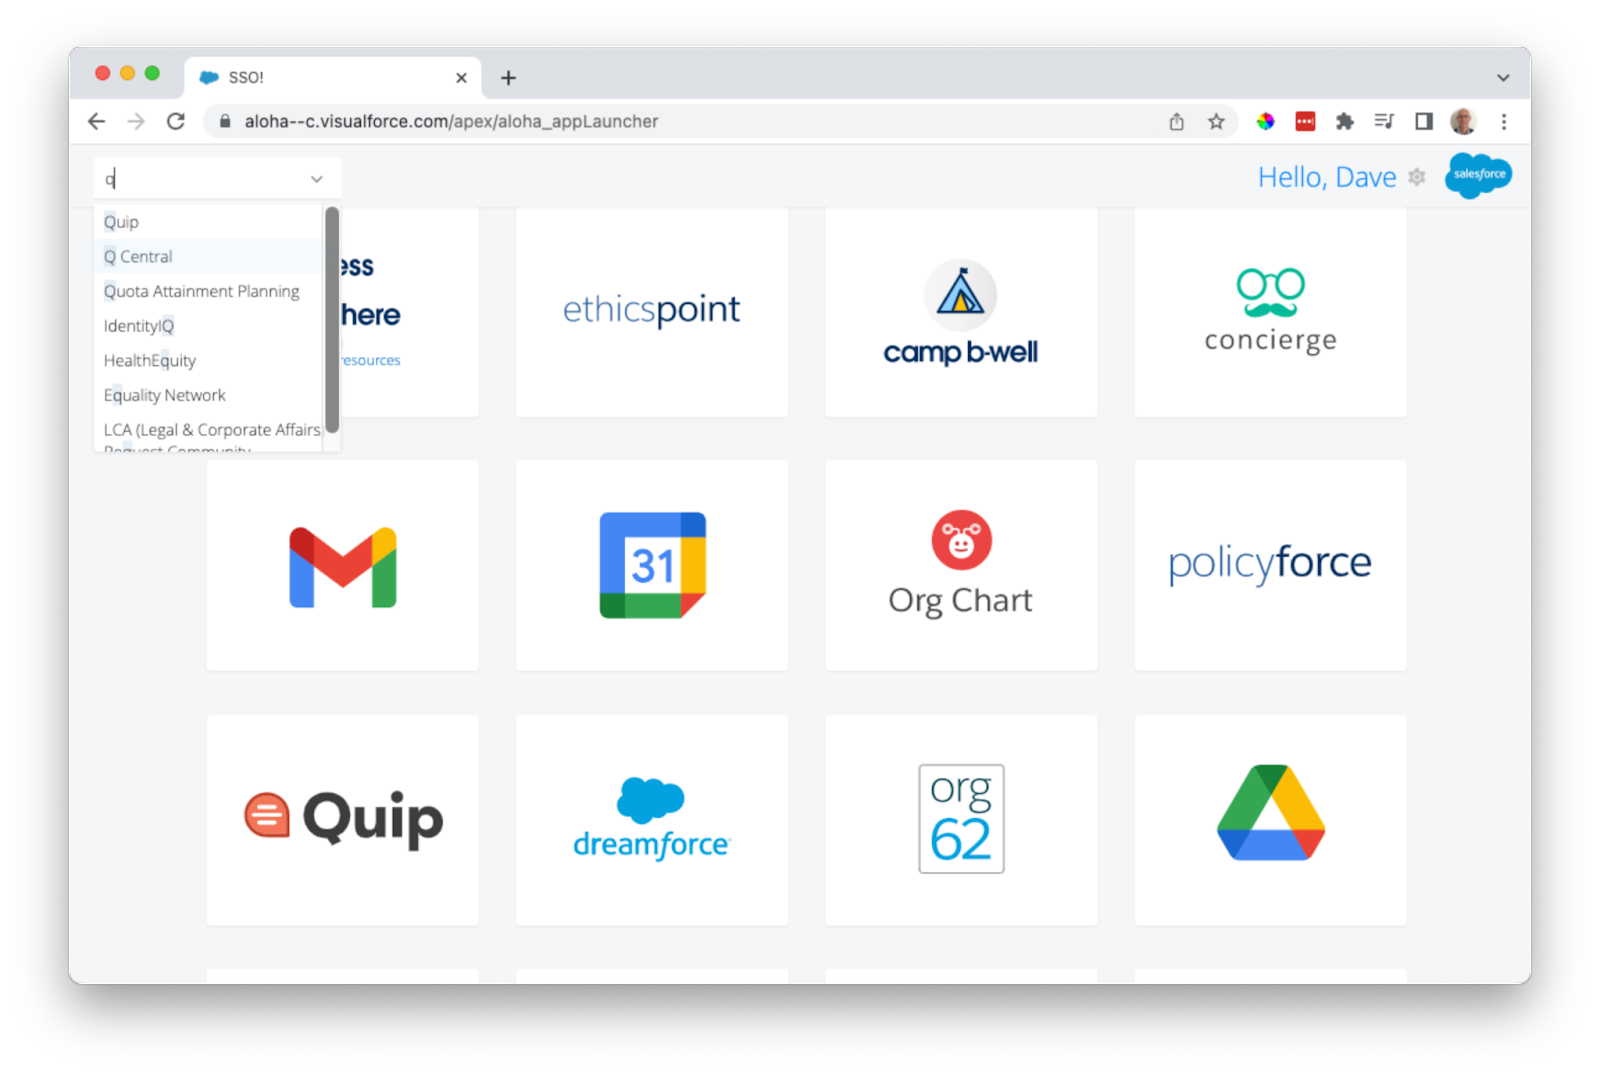
- Go to the Q Central site (there is a link on the Aloha site)
- Select the Demo Email Generator option from the site menu
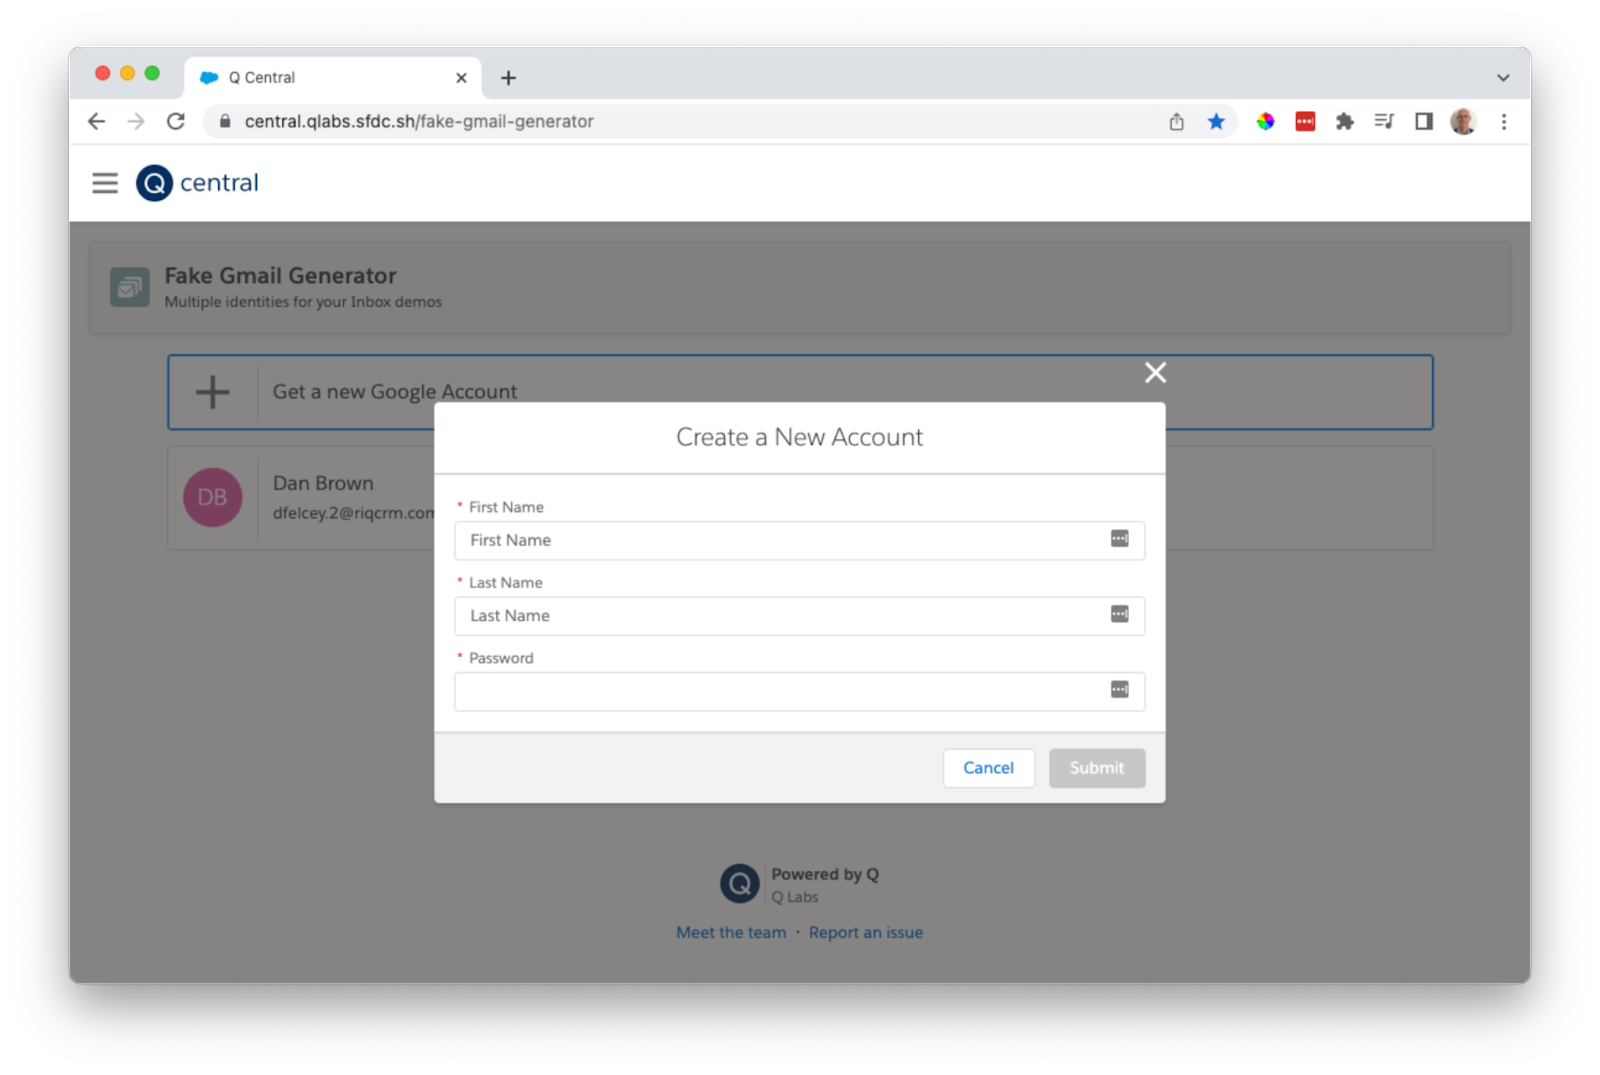
- Follow the steps to register a fake email address for testing
- Login to the fake Gmail account and enable less secure applications to connect to the Gmail account, so that Jenkins can send notifications
Click on your account and select Manage your Google Account
Then select the Security option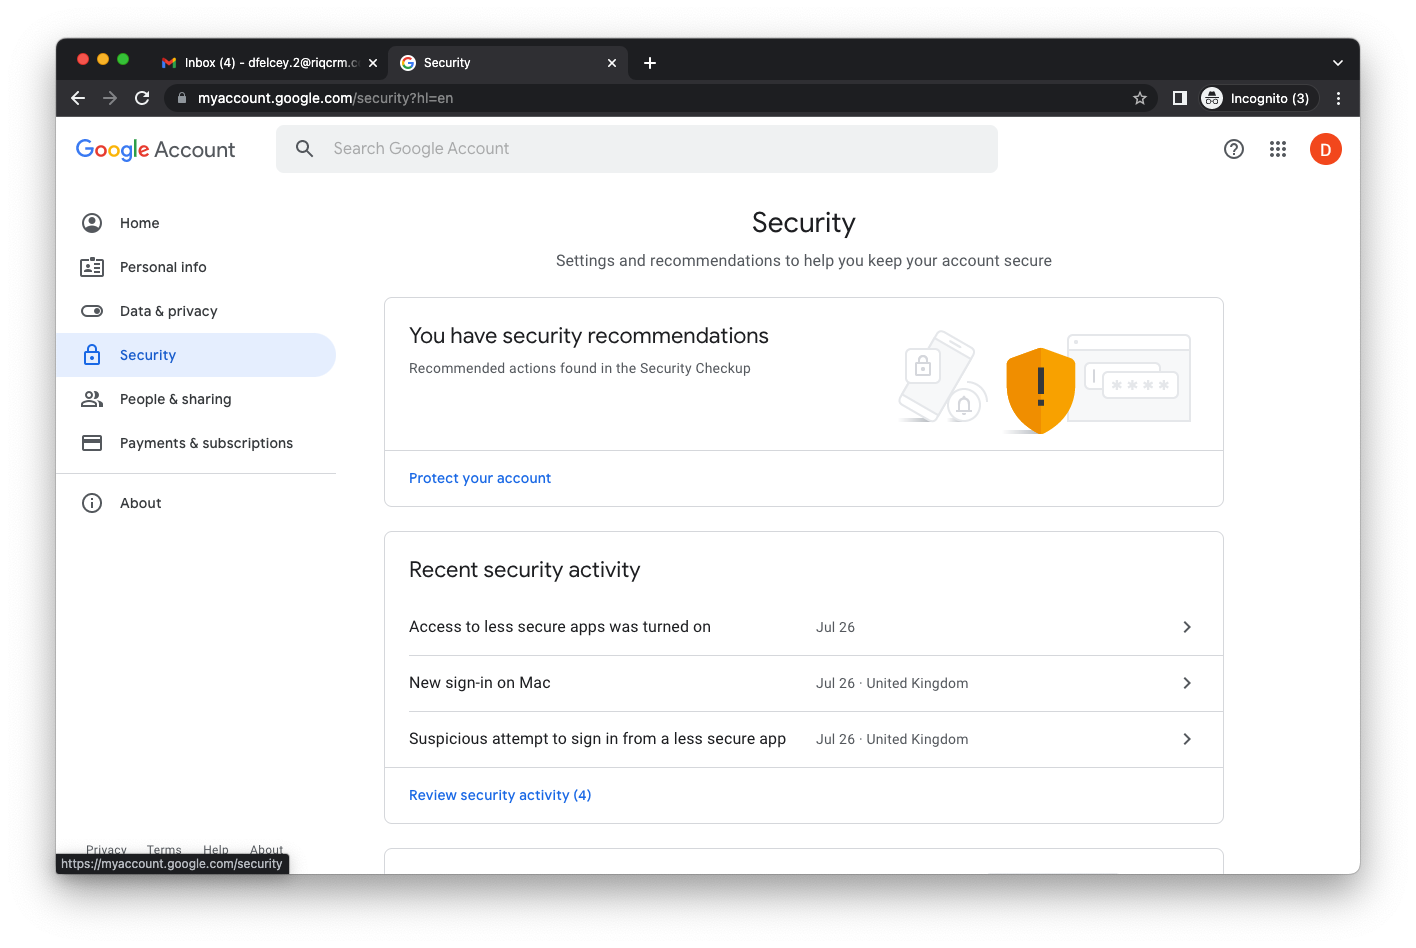
Scroll down to Less Secure Apps and turn on the option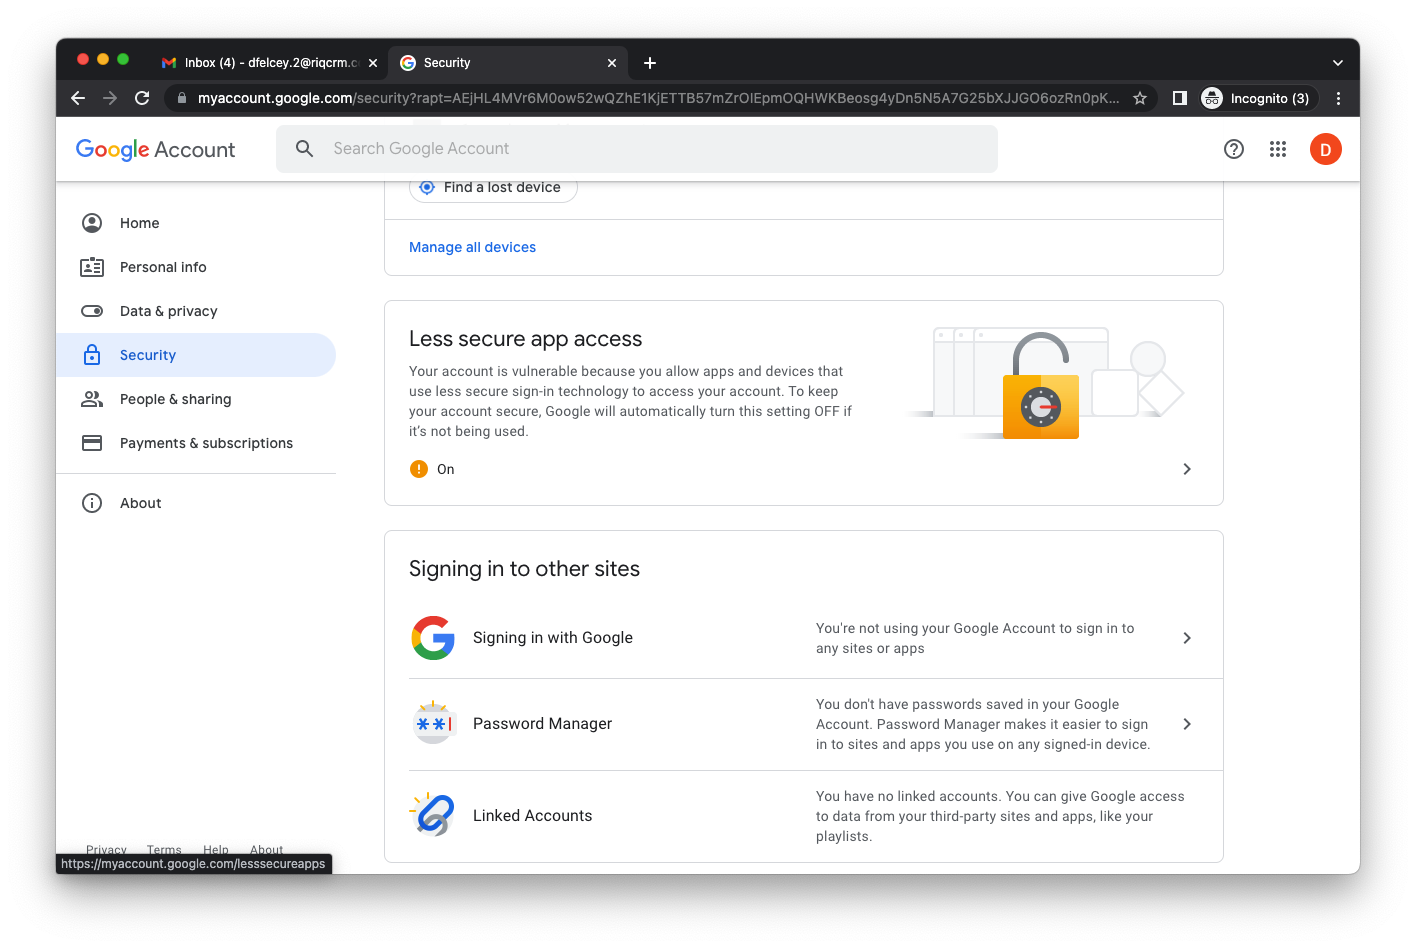
With all the other necessary components setup you are now ready to setup and configure your Jenkins server and pull everything together.
First start your Jenkins server. If you have downloaded the WAR file then start it from the command line;
% java -jar jenkins.warOnce it has started - this should take about 30s - then open a browser and navigate to http://localhost:8080
What you will see is something like this - though you won't have any pipelines to start with
Configuration
Credentials
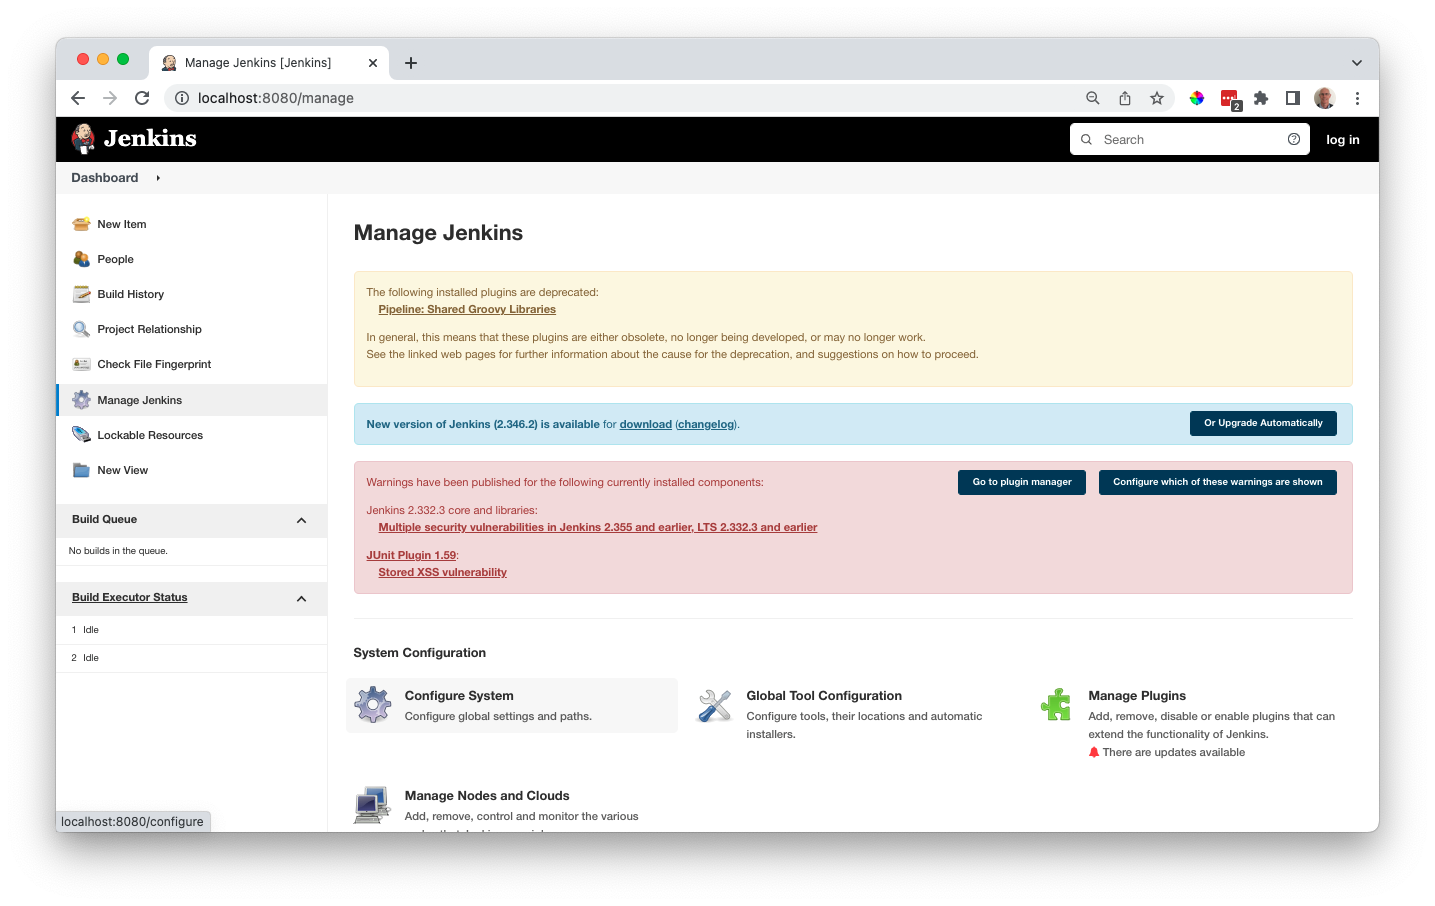
When using Jenkins credentials for accessing the Anypoint platform, AWS and Gmail are stored in the Jenkins Credentials Store. To get to it select the Manage Jenkins menu option and the Manage Credentials icon.
Now create the following credentials in the Global credential space;
To connect to the Anypoint Platform
my-anypoint-creds Your username and password to login to the Anypoint Platform
my-client-id Client id for the environment you will be using
my-client-secret Client secret for the environment you will be using
The id and secret are Secret Text credentials, creds is a Username with Password credential
To connect to AWS
aws-access-key-id AWS access key
aws-secret-access-key AWS secret access key
aws-default-region AWS region
These are all Secret Text credentials
To connect to Gmail
fake-gmail-account-credentails The Gmail username and password Gmail account
This is a Username with Password credential
To configure the email stage of the pipeline you first need to configure the Email plugin. Select the Manage Jenkins menu option and the Configure System icon
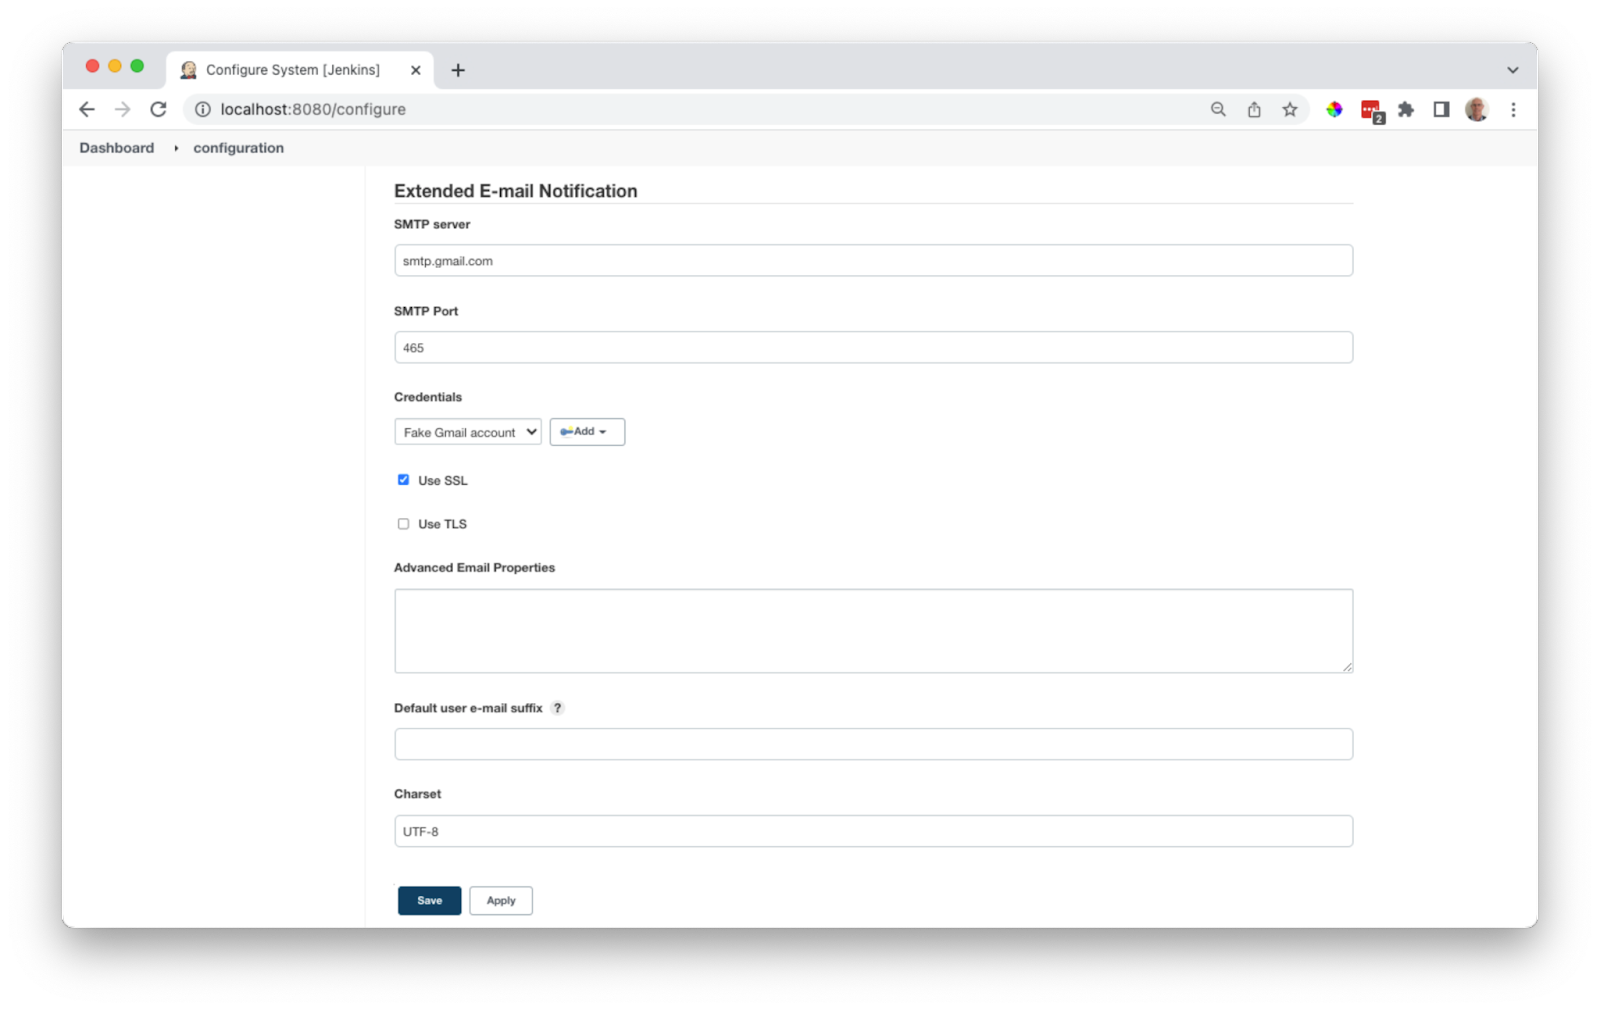
Scroll down to the Email setup section and complete both the E-Mail Notification and the Extended E-Mail Notification sections. These are the values to update;
SMTP Server: smtp.gmail.com
SMTP Port: 465
Credentials: <your email credentials>
Use SSL: Yes
Use SMTP: Authentication: Yes
Once setup you can check its working using the Test Configuration button
The Pipeline
The full pipeline is shown at the end of this section, below, and you can copy and paste this into your pipeline if you have followed the credentials and email setup steps above. But to understand what it is doing, let's look at each stage.
Before all the stages we set up some environment variables to use. These will need to be change to reflect your environment
pipeline {
  agent any

  environment {
        CATALOG_DESCRIPTOR = 'catalog.yaml'
        ANYPOINT_ORG = '67d9aaea-3ab0-4fb4-8f45-61f48c60c4f2'
        ANYPOINT_ENV = 'Sandbox'
        ANYPOINT_HOST = 'anypoint.mulesoft.com'
        AWS_API_ID = '0yfmyiql34'
        API_FILE = "api.json"
        TMP_DIR = 'tmp'
  }

  . . .
}
The first stage is to check out the latest version of the API from GitHub
. . .

stage('Checkout Scm') {
      steps {
        git(branch: 'master', url: 'https://github.com/dfelcey/aws-api-demo.git')
      }
    }
. . .
Then we need push it to Anypoint Exchange using the API catalog tool
. . .

   stage('Catalog and validate') {
      steps {
        withCredentials([
            usernamePassword(usernameVariable: 'ANYPOINT_USERNAME', passwordVariable: 'ANYPOINT_PASSWORD', credentialsId: 'my-anypoint-creds'),
            string(credentialsId: 'my-client-id', variable: 'ANYPOINT_CLIENT_ID'),
            string(credentialsId: 'my-client-secret', variable: 'ANYPOINT_CLIENT_SECRET')
        ]) {
            sh '''
            if [ -e $CATALOG_DESCRIPTOR ]
            then
                # Publish API

                rm $TMP_DIR/*

                api-catalog publish-asset \
                --organization $ANYPOINT_ORG \
                --host=$ANYPOINT_HOST \
                --environment=$ANYPOINT_ENV \
                --client_id=$ANYPOINT_CLIENT_ID \
                --client_secret=$ANYPOINT_CLIENT_SECRET > catalog-result.txt

                cat catalog-result.txt

                # Capture latest version
                while IFS= read -r line
                do
                  echo $line
                  read -a strarr <<< $line
                  if [[ "$line" == "Version"* ]]
                  then
                    VERSION="${strarr[1]}"
                  fi
                done < catalog-result.txt

                echo "Latest version: $VERSION"
                echo $VERSION > version.txt
            else
               exit 1
            fi
            '''
        }
      }
    }

. . .
After this step you will see an updated version of the API in Anypoint Exchange with any changes that have been made
Next we need to download the recently published API and validate it against some governance rules - this 2 stages really
. . .

   stage('Download asset from Exchange') {
      steps {
        withCredentials([
            usernamePassword(usernameVariable: 'ANYPOINT_USERNAME', passwordVariable: 'ANYPOINT_PASSWORD', credentialsId: 'my-anypoint-creds')
        ]) {
            sh '''
            # Save ruleset for later
            cp openapi-best-practices-ruleset.yaml $TMP_DIR

            VERSION=$(<version.txt)

            # Download new asset
            anypoint-cli exchange asset download package-tracker-api/$VERSION $TMP_DIR \
                --organization $ANYPOINT_ORG \
                --host=$ANYPOINT_HOST \
                --environment=$ANYPOINT_ENV
             '''
        }
      }
    }

    stage('Validate against ruleset') {
      steps {
        withCredentials([
            usernamePassword(usernameVariable: 'ANYPOINT_USERNAME', passwordVariable: 'ANYPOINT_PASSWORD', credentialsId: 'my-anypoint-creds')
        ]) {
            sh '''
            # Validate API

            # Move and unzip file
            unzip -o $TMP_DIR/*.zip -d $TMP_DIR
            ls $TMP_DIR
            anypoint-cli governance api validate --rulesets  tmp/openapi-best-practices-ruleset.yaml $TMP_DIR/*.zip \
            --organization $ANYPOINT_ORG \
            --host=$ANYPOINT_HOST \
            --environment=$ANYPOINT_ENV > output.txt

            cat output.txt

            # If output indicates error then stop
            if [[ $(grep "Spec does not conform with Ruleset" output.txt) ]] ; then
               echo "Failed validation"
               exit 1
            fi
            '''
        }
      }
    }

. . .
If the API passes the governance checks it can then be published to the AWS Gateway
. . .

   stage('Update AWS API Gateway') {
      steps {
        withCredentials([
            string(credentialsId: 'aws-access-key-id', variable: 'AWS_ACCESS_KEY_ID'),
            string(credentialsId: 'aws-secret-access-key', variable: 'AWS_SECRET_ACCESS_KEY'),
            string(credentialsId: 'aws-default-region', variable: 'AWS_DEFAULT_REGION')
        ]) {
            sh '''
            docker run --rm -v "$(pwd):/data" \
                -e AWS_ACCESS_KEY_ID=$AWS_ACCESS_KEY_ID \
                -e AWS_SECRET_ACCESS_KEY=$AWS_SECRET_ACCESS_KEY \
                -e AWS_DEFAULT_REGION=$AWS_DEFAULT_REGION \
                amazon/aws-cli \
                apigateway put-rest-api \
                --cli-binary-format raw-in-base64-out \
                --rest-api-id $AWS_API_ID \
                --mode overwrite \
                --body "file:///data/$API_FILE"
            '''
        }
      }
    }

. . .
If the validation checks on the API fail then the API is not published to the AWS API Gateway and an email is sent to the developer / development manager with details about why the API failed the governance checks
. . .
post {
failure('Send email with errors and warnings') {
archiveArtifacts artifacts: 'output.txt', onlyIfSuccessful: true
emailext attachLog: true, attachmentsPattern: 'output.txt',
body: "${currentBuild.currentResult}: Job ${env.JOB_NAME} build ${env.BUILD_NUMBER}\n More info at: ${env.BUILD_URL}",
recipientProviders: [developers(), requestor()],
to: '$DEFAULT_RECIPIENTS',
subject: "Jenkins Build ${currentBuild.currentResult}: Job ${env.JOB_NAME}"
}
}
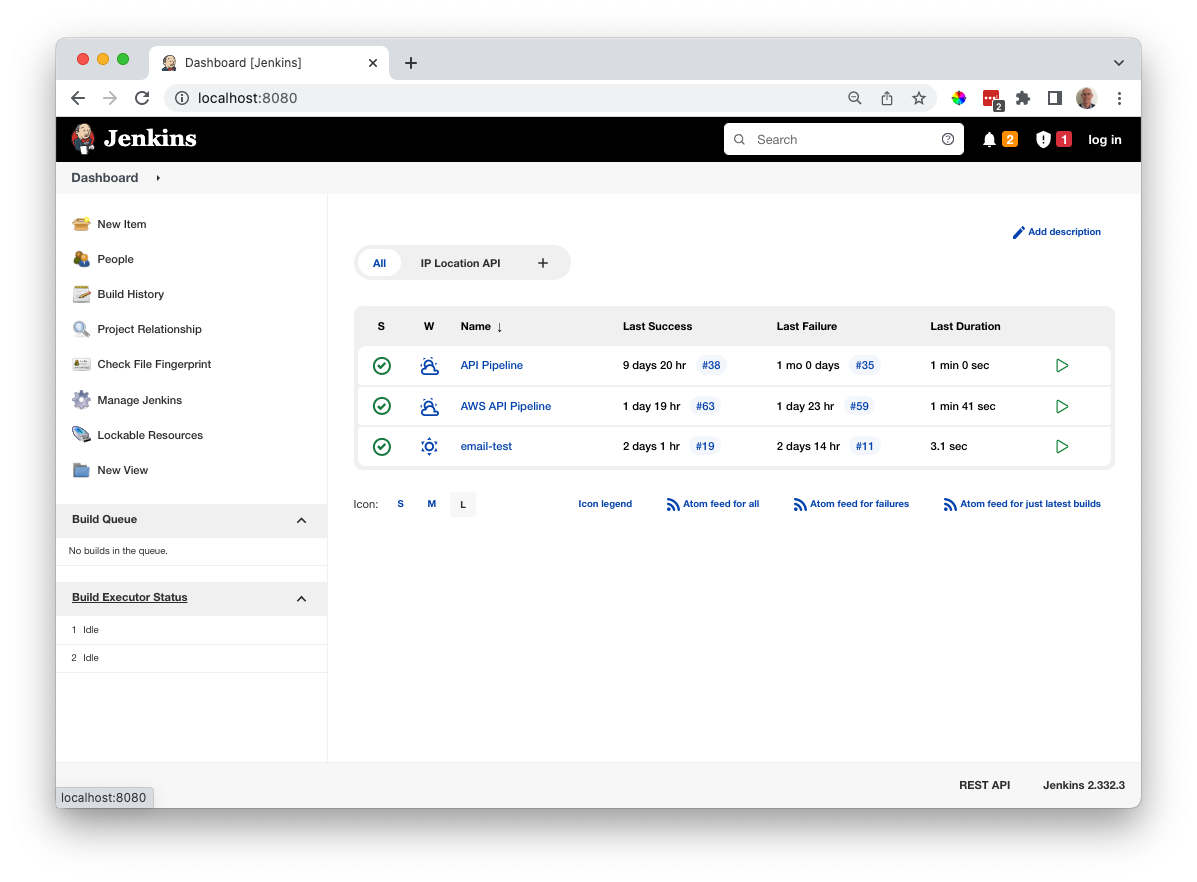
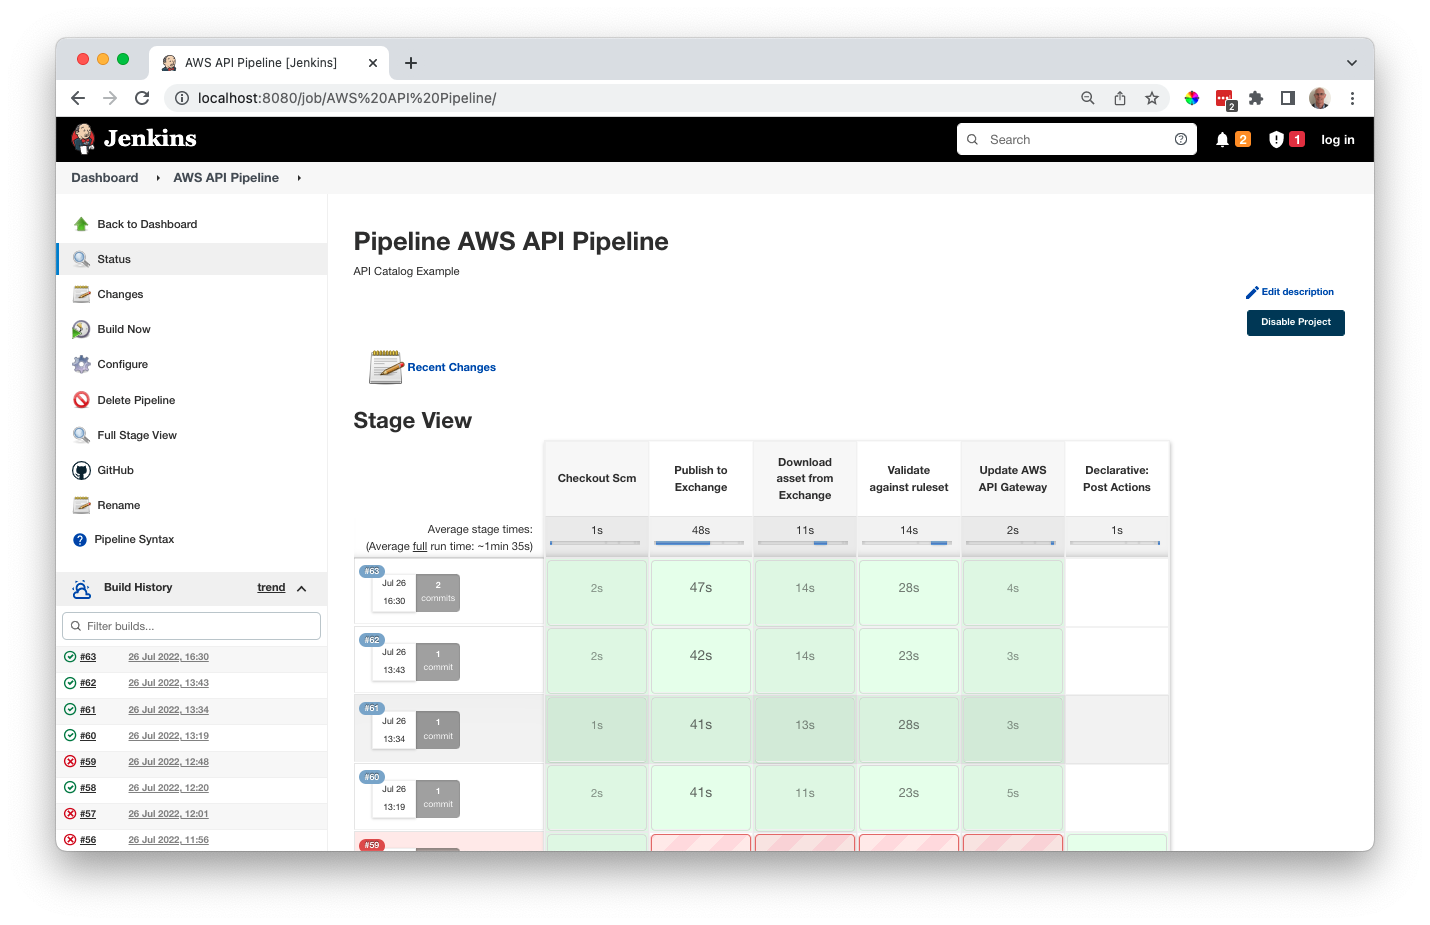
. . .When the pipeline runs successfully Jenkins will look like this
And when there is a governance failure like this
The full Jenkins pipeline
pipeline {
  agent any

  environment {
        CATALOG_DESCRIPTOR = 'catalog.yaml'
        ANYPOINT_ORG = '67d9aaea-3ab0-4fb4-8f45-61f48c60c4f2'
        ANYPOINT_ENV = 'Sandbox'
        ANYPOINT_HOST = 'anypoint.mulesoft.com'
        AWS_API_ID = '0yfmyiql34'
        API_FILE = "api.json"
        TMP_DIR = 'tmp'
  }

  stages {
    stage('Checkout Scm') {
      steps {
        git(branch: 'master', url: 'https://github.com/dfelcey/aws-api-demo.git')
      }
    }

    stage('Catalog and validate') {
      steps {
        withCredentials([
            usernamePassword(usernameVariable: 'ANYPOINT_USERNAME', passwordVariable: 'ANYPOINT_PASSWORD', credentialsId: 'my-anypoint-creds'),
            string(credentialsId: 'my-client-id', variable: 'ANYPOINT_CLIENT_ID'),
            string(credentialsId: 'my-client-secret', variable: 'ANYPOINT_CLIENT_SECRET')
        ]) {
            sh '''
            if [ -e $CATALOG_DESCRIPTOR ]
            then
                # Publish API

                rm $TMP_DIR/*

                api-catalog publish-asset \
                --organization $ANYPOINT_ORG \
                --host=$ANYPOINT_HOST \
                --environment=$ANYPOINT_ENV \
                --client_id=$ANYPOINT_CLIENT_ID \
                --client_secret=$ANYPOINT_CLIENT_SECRET > catalog-result.txt

                cat catalog-result.txt

                # Capture latest version
                while IFS= read -r line
                do
                  echo $line
                  read -a strarr <<< $line
                  if [[ "$line" == "Version"* ]]
                  then
                    VERSION="${strarr[1]}"
                  fi
                done < catalog-result.txt

                echo "Latest version: $VERSION"
                echo $VERSION > version.txt
            else
               exit 1
            fi
            '''
        }
      }
    }

    stage('Download asset from Exchange') {
      steps {
        withCredentials([
            usernamePassword(usernameVariable: 'ANYPOINT_USERNAME', passwordVariable: 'ANYPOINT_PASSWORD', credentialsId: 'my-anypoint-creds')
        ]) {
            sh '''
            # Save ruleset for later
            cp openapi-best-practices-ruleset.yaml $TMP_DIR

            VERSION=$(<version.txt)

            # Download new asset
            anypoint-cli exchange asset download package-tracker-api/$VERSION $TMP_DIR \
                --organization $ANYPOINT_ORG \
                --host=$ANYPOINT_HOST \
                --environment=$ANYPOINT_ENV
             '''
        }
      }
    }

    stage('Validate against ruleset') {
      steps {
        withCredentials([
            usernamePassword(usernameVariable: 'ANYPOINT_USERNAME', passwordVariable: 'ANYPOINT_PASSWORD', credentialsId: 'my-anypoint-creds')
        ]) {
            sh '''
            # Validate API

            # Move and unzip file
            unzip -o $TMP_DIR/*.zip -d $TMP_DIR
            ls $TMP_DIR
            anypoint-cli governance api validate --rulesets  tmp/openapi-best-practices-ruleset.yaml $TMP_DIR/*.zip \
            --organization $ANYPOINT_ORG \
            --host=$ANYPOINT_HOST \
            --environment=$ANYPOINT_ENV > output.txt

            cat output.txt

            # If output indicates error then stop
            if [[ $(grep "Spec does not conform with Ruleset" output.txt) ]] ; then
               echo "Failed validation"
               exit 1
            fi
            '''
        }
      }
    }

    stage('Update AWS API Gateway') {
      steps {
        withCredentials([
            string(credentialsId: 'aws-access-key-id', variable: 'AWS_ACCESS_KEY_ID'),
            string(credentialsId: 'aws-secret-access-key', variable: 'AWS_SECRET_ACCESS_KEY'),
            string(credentialsId: 'aws-default-region', variable: 'AWS_DEFAULT_REGION')
        ]) {
            sh '''
            docker run --rm -v "$(pwd):/data" \
                -e AWS_ACCESS_KEY_ID=$AWS_ACCESS_KEY_ID \
                -e AWS_SECRET_ACCESS_KEY=$AWS_SECRET_ACCESS_KEY \
                -e AWS_DEFAULT_REGION=$AWS_DEFAULT_REGION \
                amazon/aws-cli \
                apigateway put-rest-api \
                --cli-binary-format raw-in-base64-out \
                --rest-api-id $AWS_API_ID \
                --mode overwrite \
                --body "file:///data/$API_FILE"
            '''
        }
      }
    }
  }
  post {
    failure('Send email with errors and warnings') {
            archiveArtifacts artifacts: 'output.txt', onlyIfSuccessful: true

            emailext attachLog: true, attachmentsPattern: 'output.txt',
                body: "${currentBuild.currentResult}: Job ${env.JOB_NAME} build ${env.BUILD_NUMBER}\n More info at: ${env.BUILD_URL}",
                recipientProviders: [developers(), requestor()],
                to: '$DEFAULT_RECIPIENTS',
                subject: "Jenkins Build ${currentBuild.currentResult}: Job ${env.JOB_NAME}"
        }
    }
}
So what does it look like all together? Here is a video walkthrough.