Last Updated: 2020-11-25
Overview
Google provides an extensive library of APIs. In order to call these APIs from Mule, there are a couple of steps that need to be taken. In this codelab, we'll be covering how to setup Google and how to setup your Mule application to handle OAuth 2.0 - Authorization Code authentication with the Google APIs. We'll use the HTTP Request operation to make the calls. The HTTP Request connector supports connecting a Mule application to a service that requires any of the following types of authentication:
- Basic Authentication
- NTLM Authentication
- Digest Authentication
- OAuth2 - Authorization Code
- OAuth2 - Client Credentials
What you'll learn
- How to setup the HTTP Request connector for OAuth
- How to call the Google Drive API from a Mule application.
What you'll need
- Anypoint Studio 7.7.x
- Mule EE 4.3.0
- Google Cloud Platform
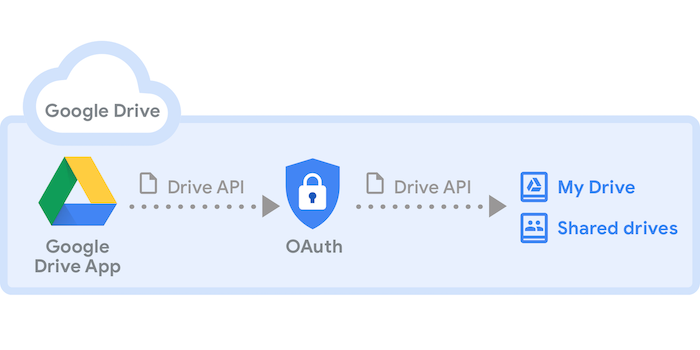
Before we build the Mule application, we need to setup a project in Google Cloud and create the credentials for the OAuth 2.0 call for the API that we plan to use. For this codelab, we'll use the Google Drive API.
Create Project
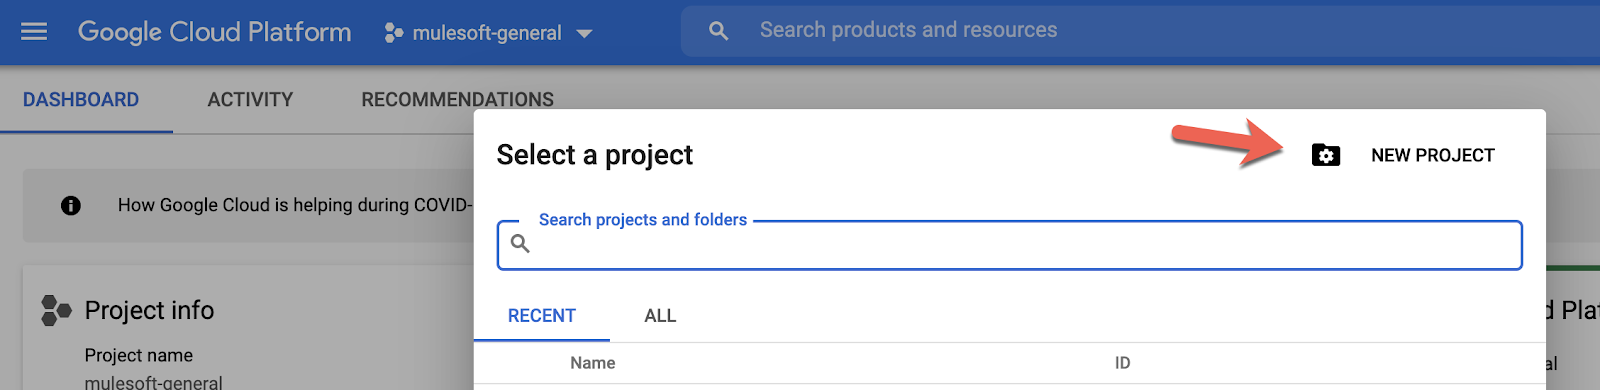
Go to Google Cloud Console (https://console.cloud.google.com) and create a new project or use an existing one.
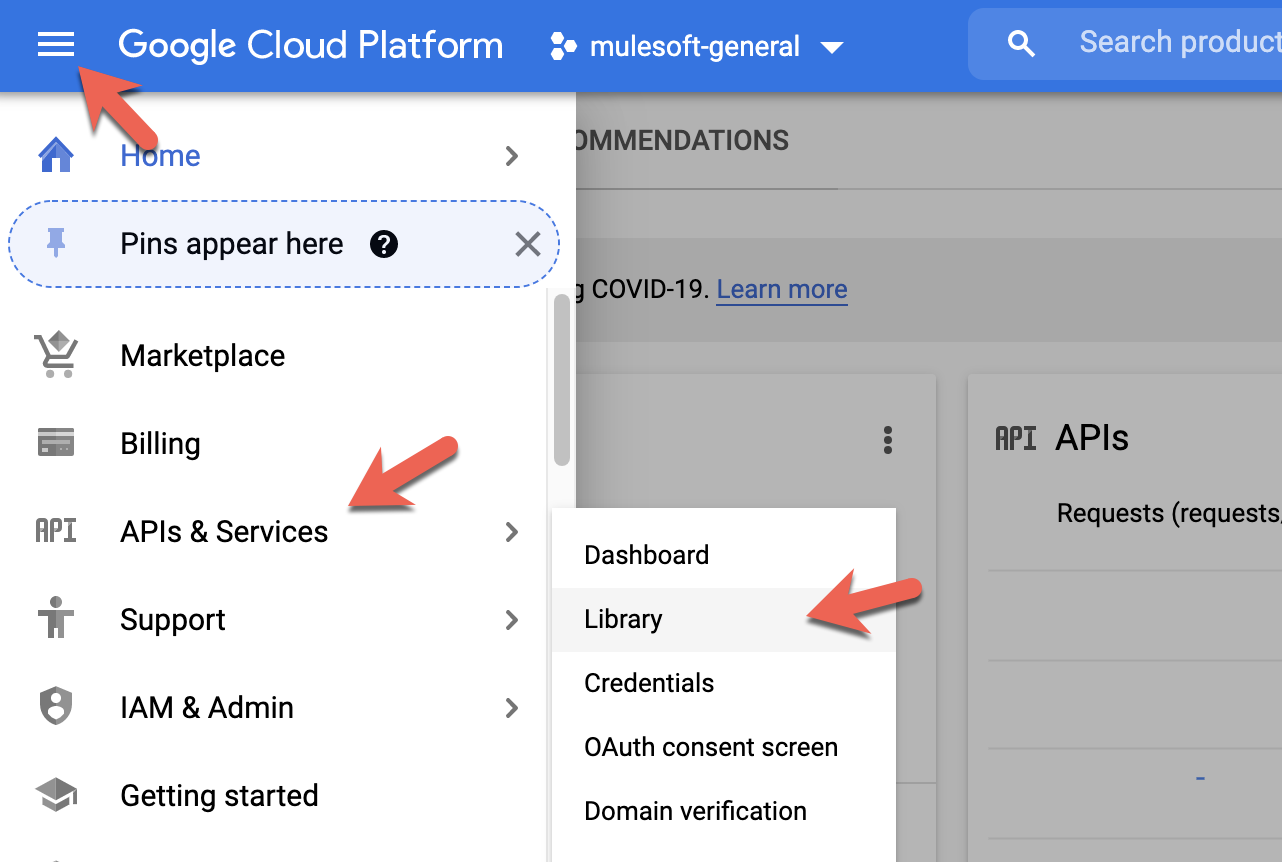
In the project, click on the hamburger menu in the top left and navigate to to APIs & Services and click on Library
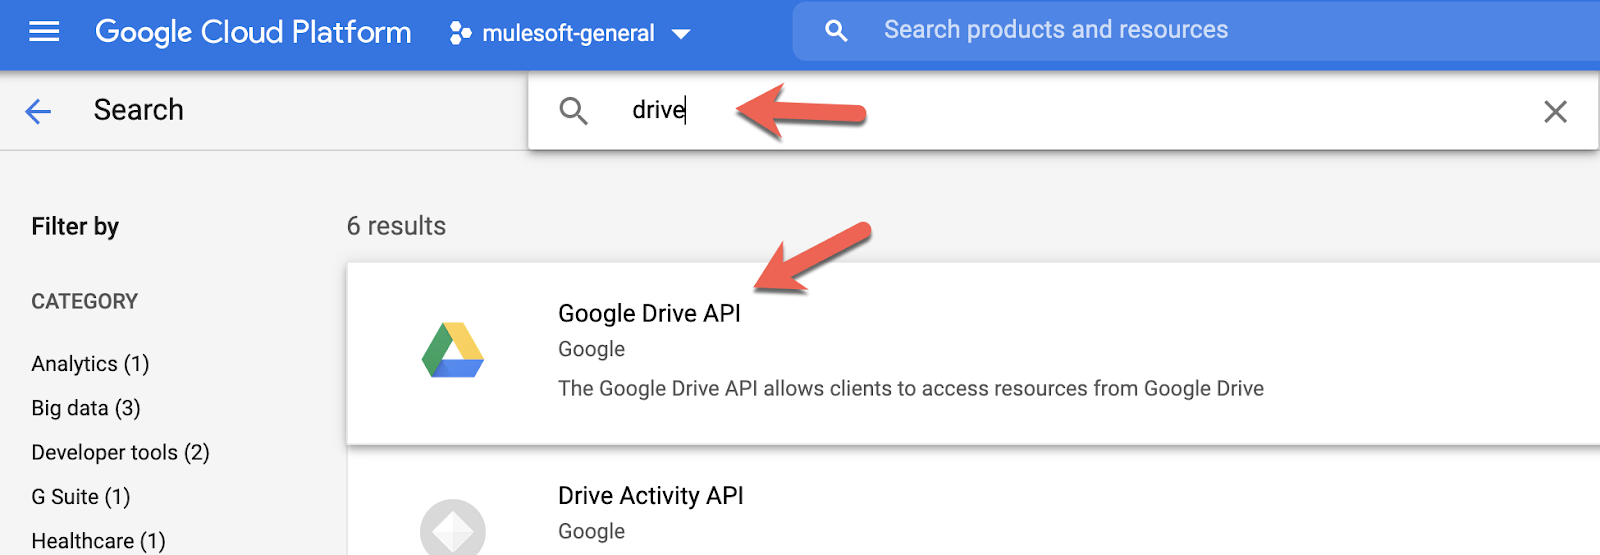
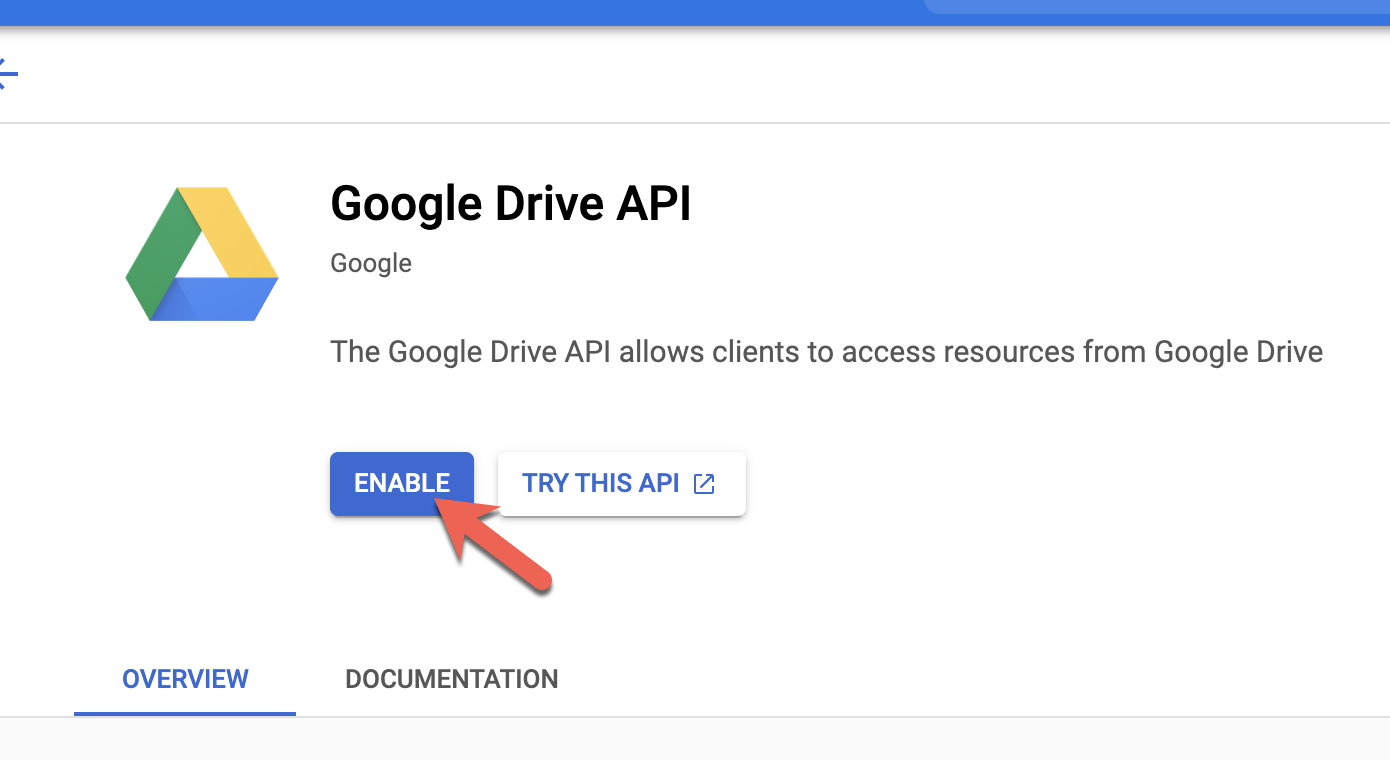
Search for drive and click on Google Drive API
Click on Enable
Create Credentials
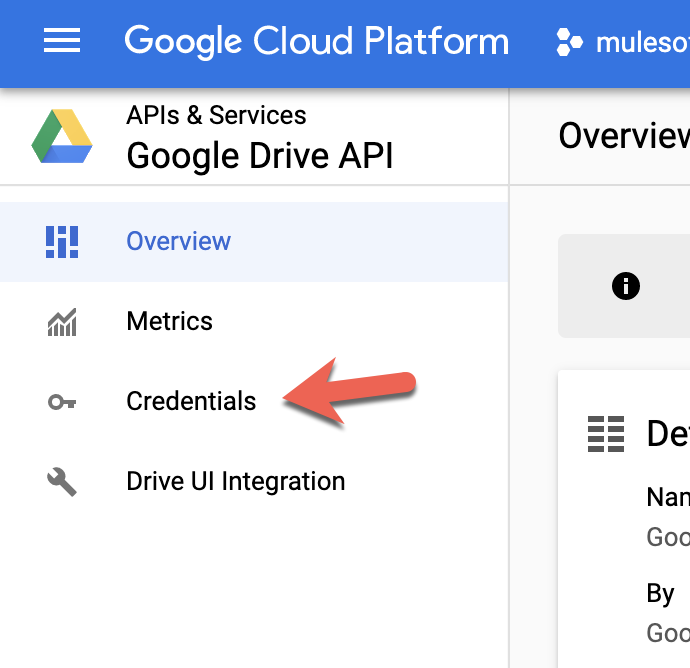
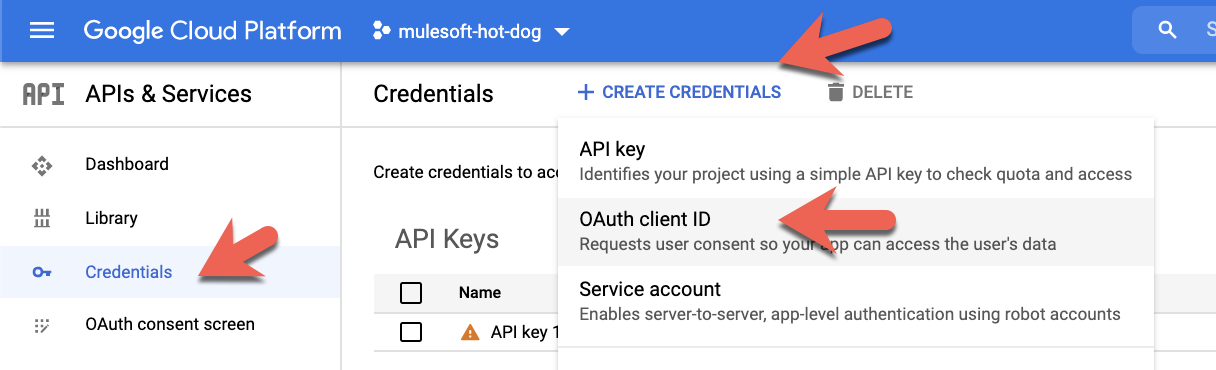
In the Overview screen, click on Credentials on the left hand navigation.
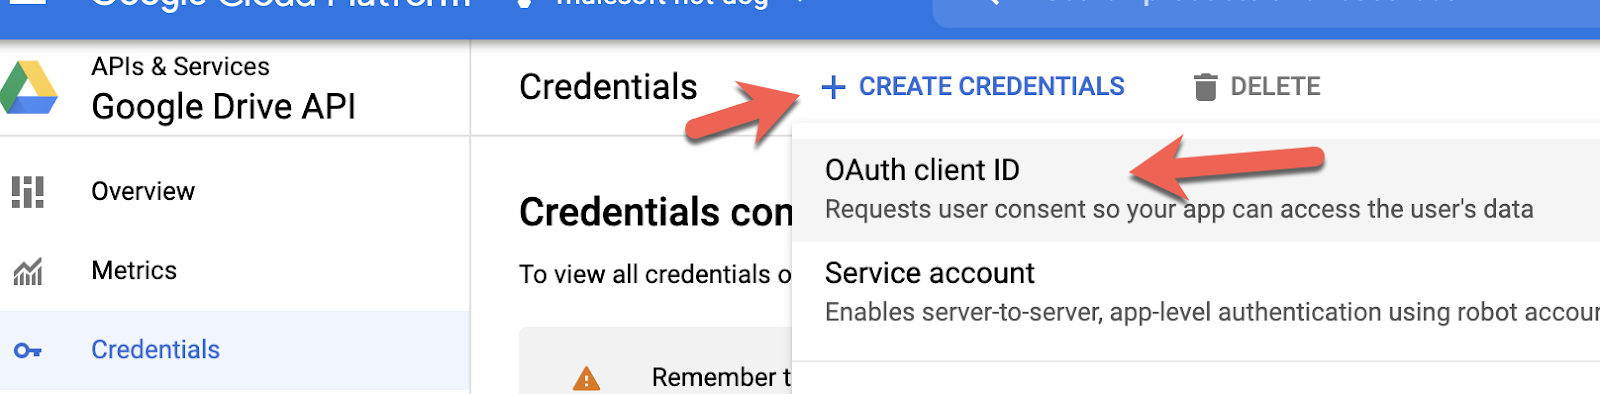
In the Credentials screen, click on Create Credentials and click on OAuth client ID
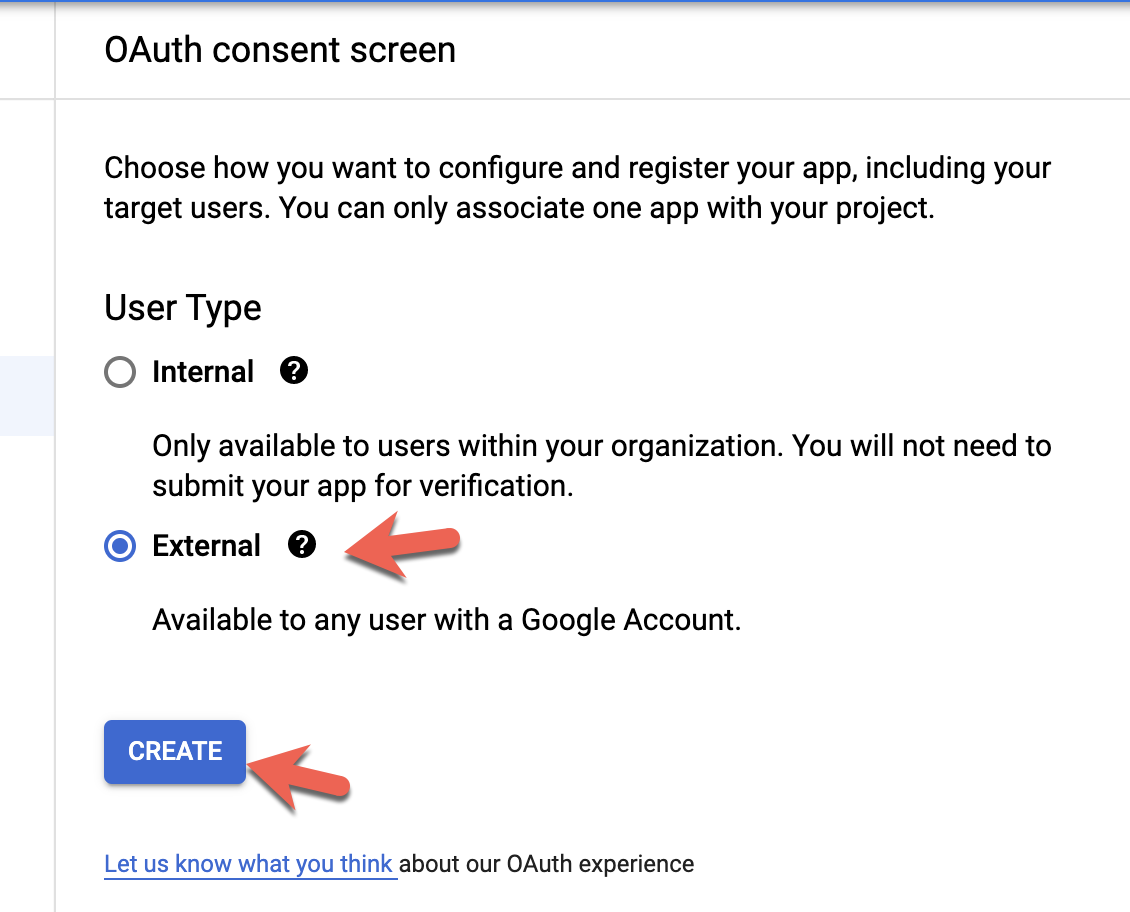
Before you can create an OAuth client ID, you need to configure the consent screen. Click on Configure Consent Screen. In the next screen, check External and click on Create
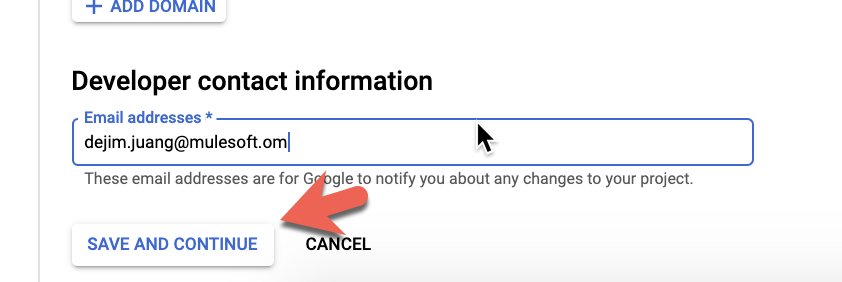
In the next screen, fill in the required fields for the App information and Developer contact information sections and click on Save and Continue near the bottom of the screen.
In the Scopes and Optional info section, just click on Save and Continue.
Lastly, on the Summary screen, click on Back to Dashboard to finish configuring the consent screen.
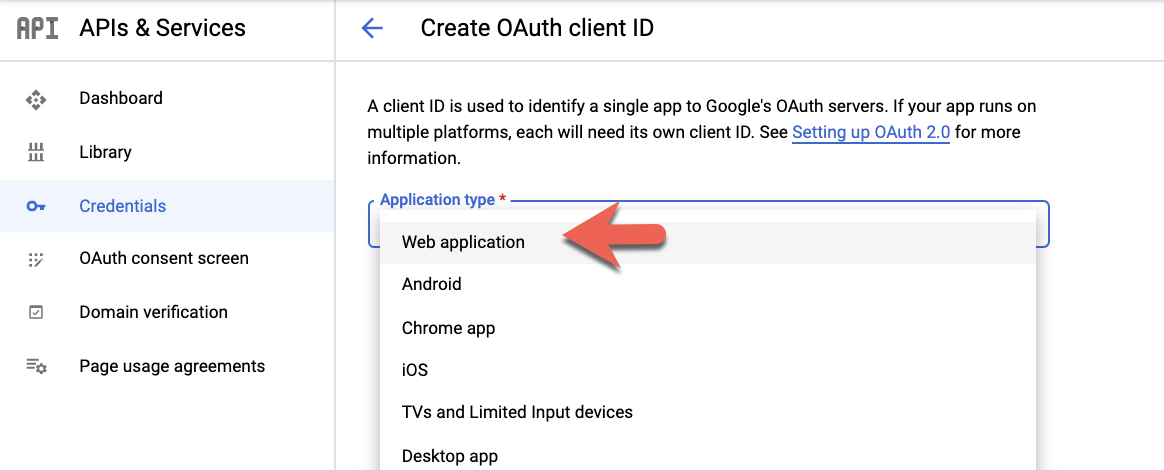
Now we can go back and setup the OAuth 2.0 client ID. Click on Credentials on the left hand navigation and then click on Create Credentials and OAuth client ID
Select Web application for the Application type drop-down.
Give the application a name (e.g. Mule Application) and add the following URI for the Authorized redirect URIs section and then click on Create
http://localhost:8091/callback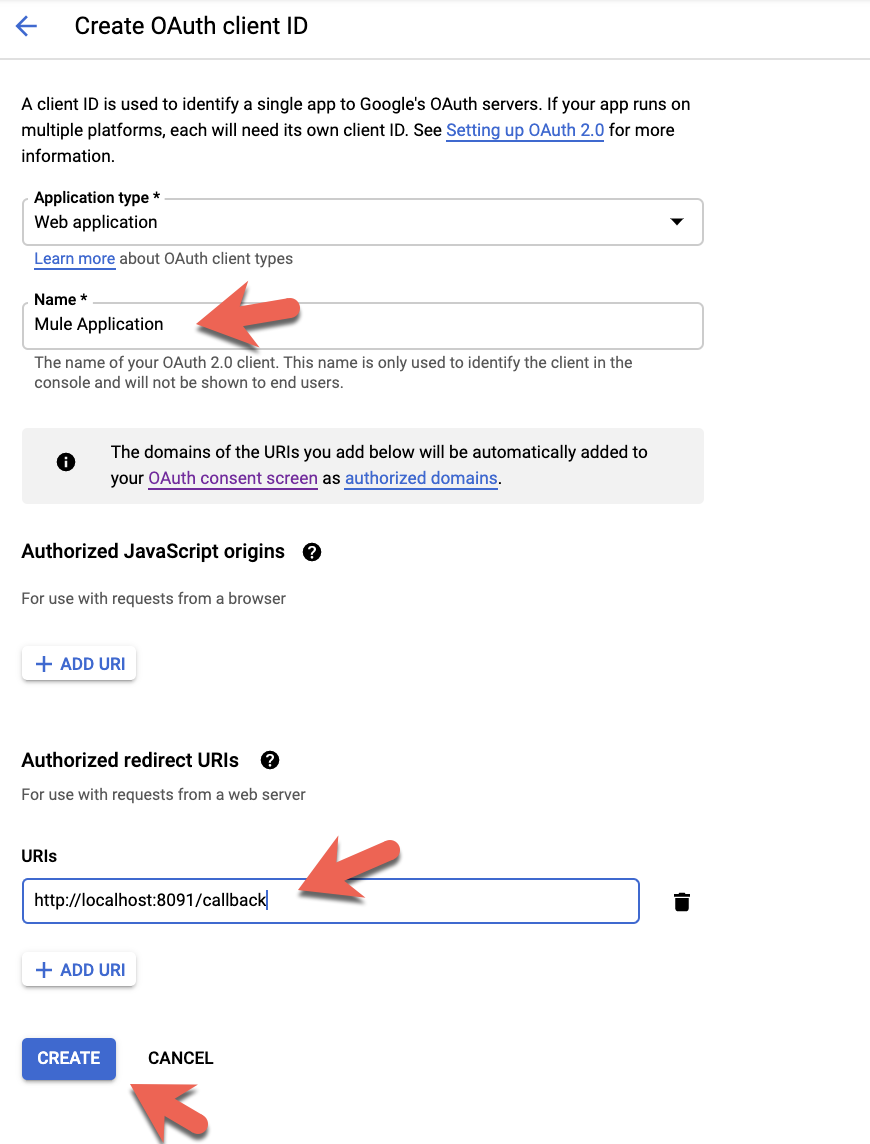
Copy down the client ID and client secret. You'll need these for the next section.

Create New Mule Project
Now that we've setup the Google API that we intend to use, let's create the Mule application. Switch over to Anypoint Studio and create a new project by going to File > New > Mule Project

Before we build our flow, we need to add the OAuth module. In the Mule Palette, click on Search in Exchange
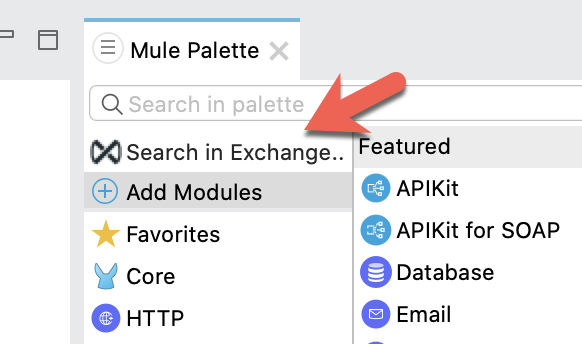
Search for OAuth and select the OAuth Module - Mule 4. Click on Add and then click on Finish
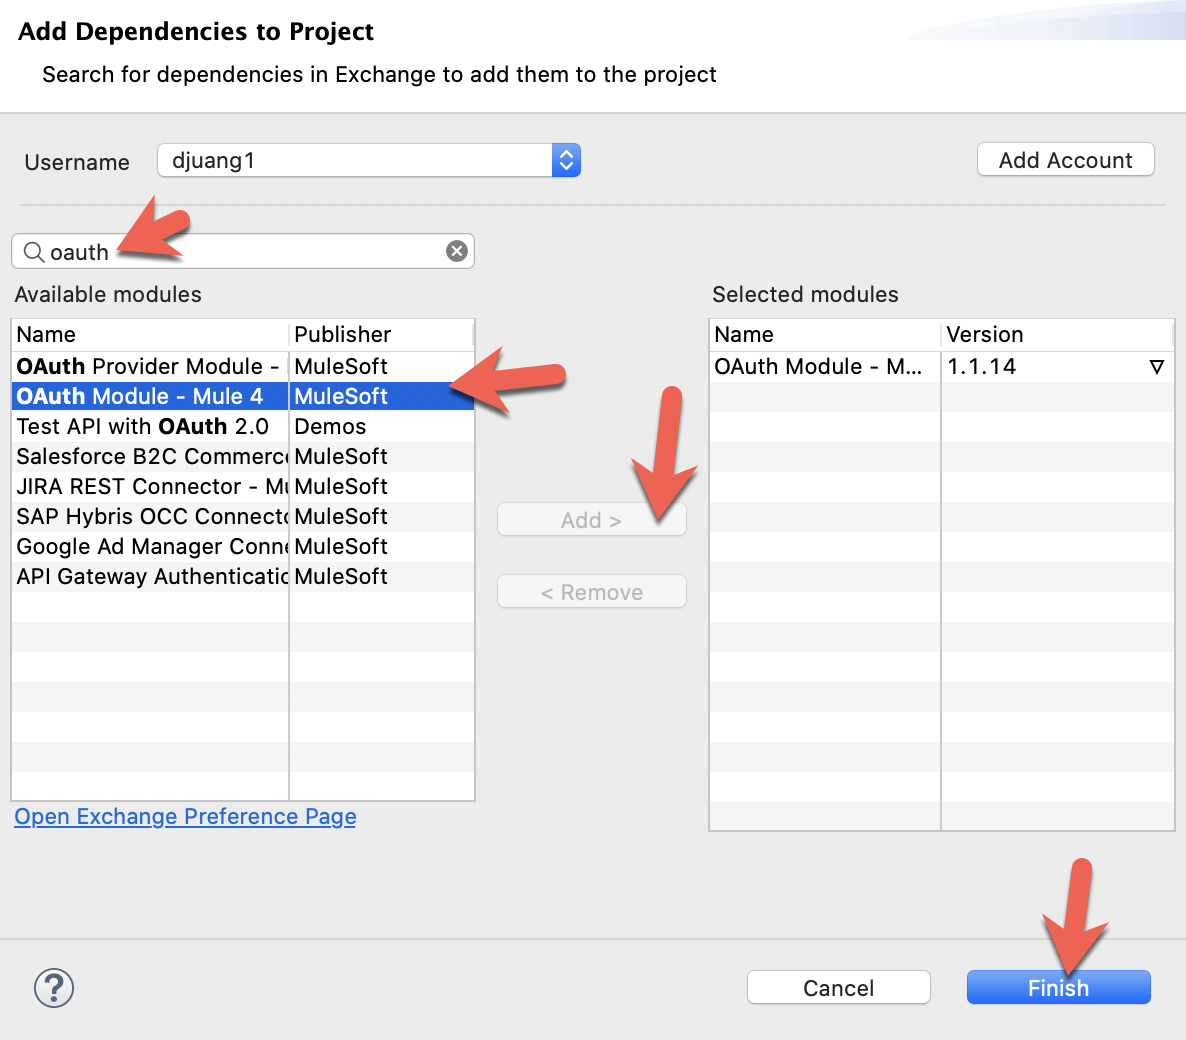
Additionally you can add the module as a dependency to your pom.xml file
<dependency>
        <groupId>org.mule.modules</groupId>
        <artifactId>mule-oauth-module</artifactId>
        <version>1.1.14</version>
        <classifier>mule-plugin</classifier>
</dependency>
Create Flow
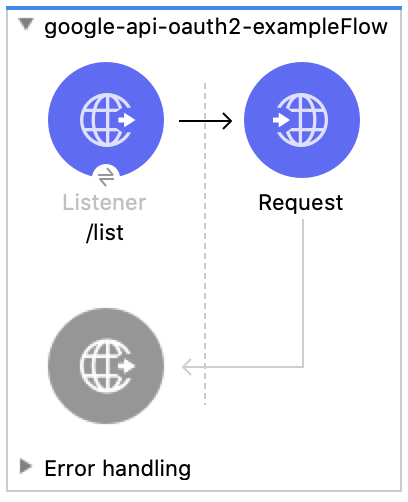
From the Mule Palette, drag and drop the following components to match the flow below. You'll need the HTTP > Listener, HTTP > Request components. We'll go back and configure everything later.
Set HTTP Listener Configuration
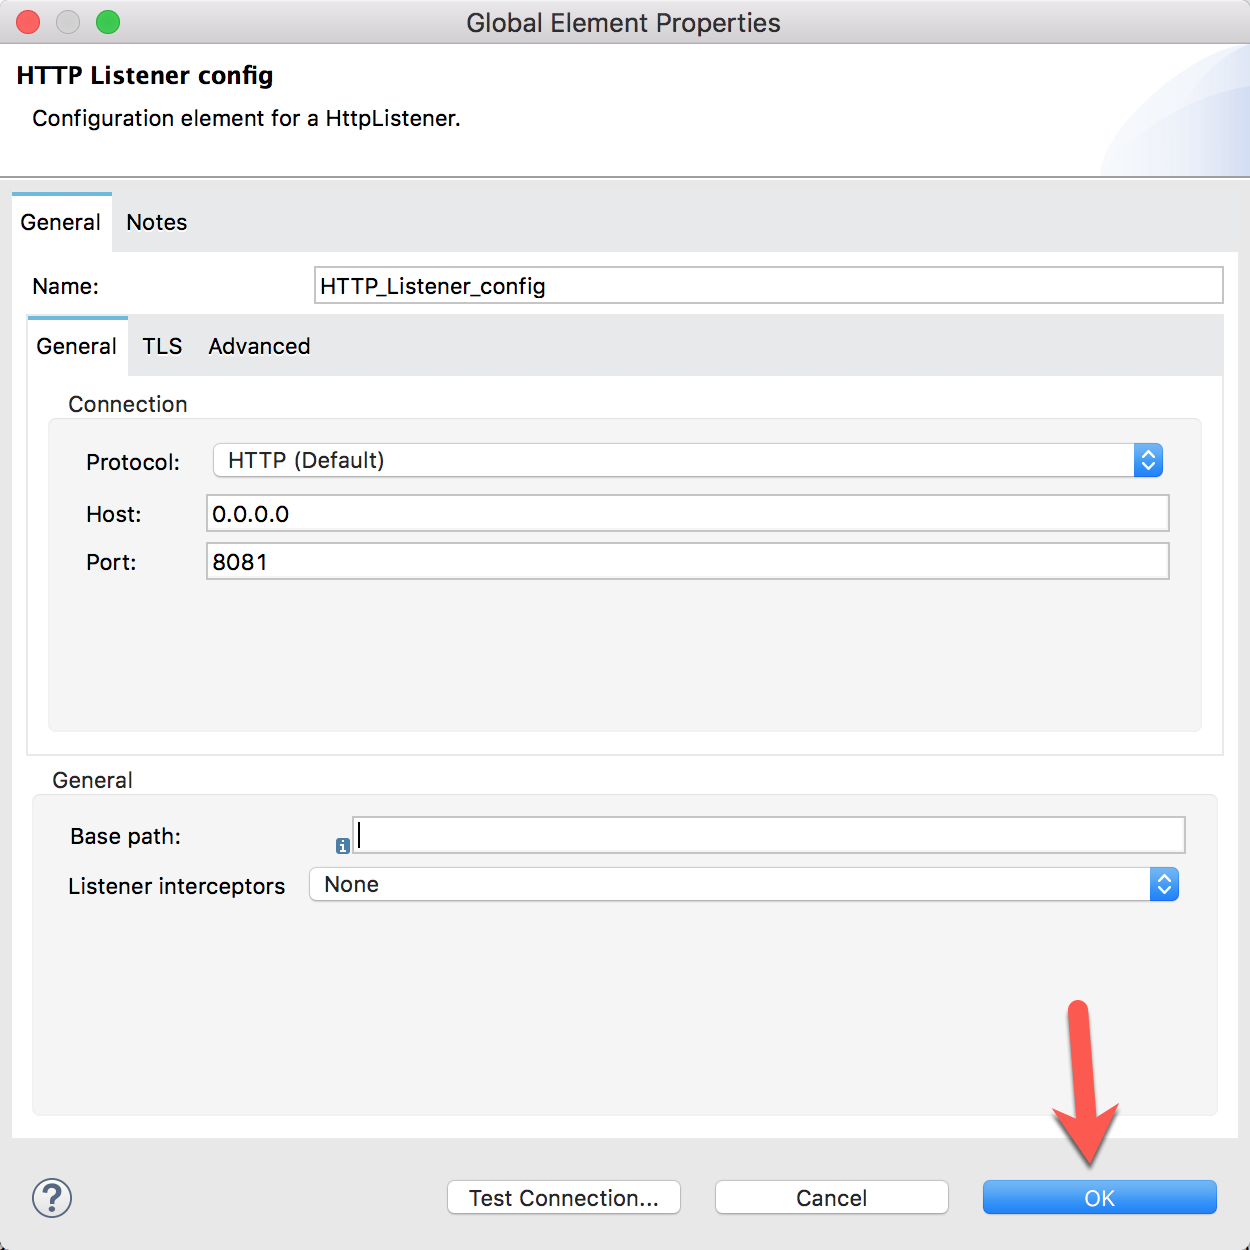
Now go back and select the HTTP Listener component in the flow we just created. If the Mule Properties tab doesn't open, click the Listener icon and click on the green plus sign to create a new Connector configuration.
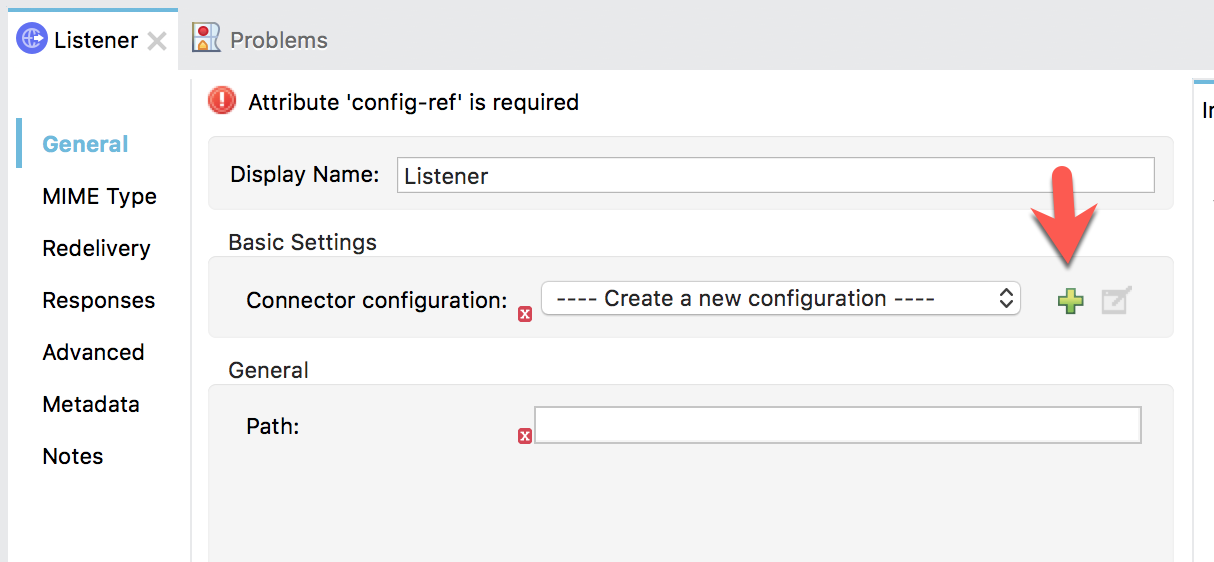
Under the General tab, and in the Connection section, take note of the port. By default this will be 8081. Go ahead and click on OK to accept the defaults and proceed.
Set Listener Path
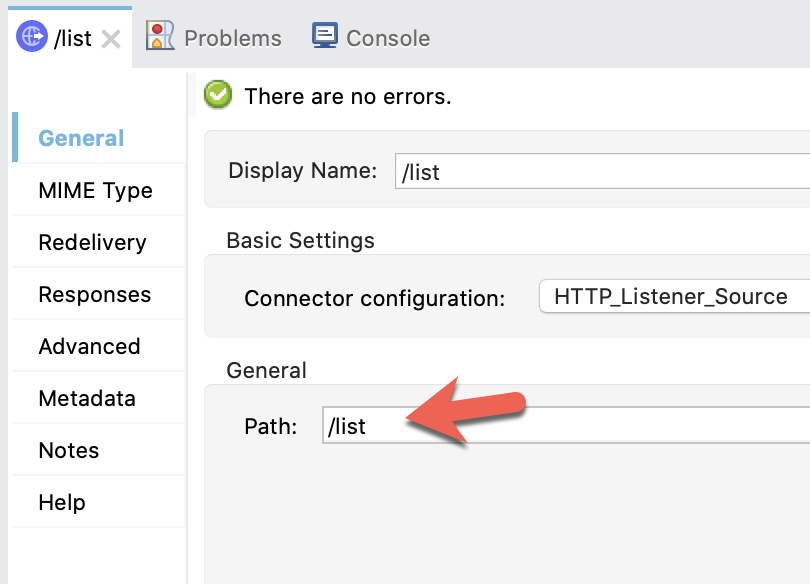
Back in the Listener Mule properties tab, fill in the Path field with the value /list. Also fill in the Display Name field with the value /list.
Let's configure the HTTP Request component now to call the Google API.
Set HTTP Request Configuration
Select the HTTP Request component. If the Mule Properties tab doesn't open, click the Request icon and click on the green plus sign to create a new Connector configuration.
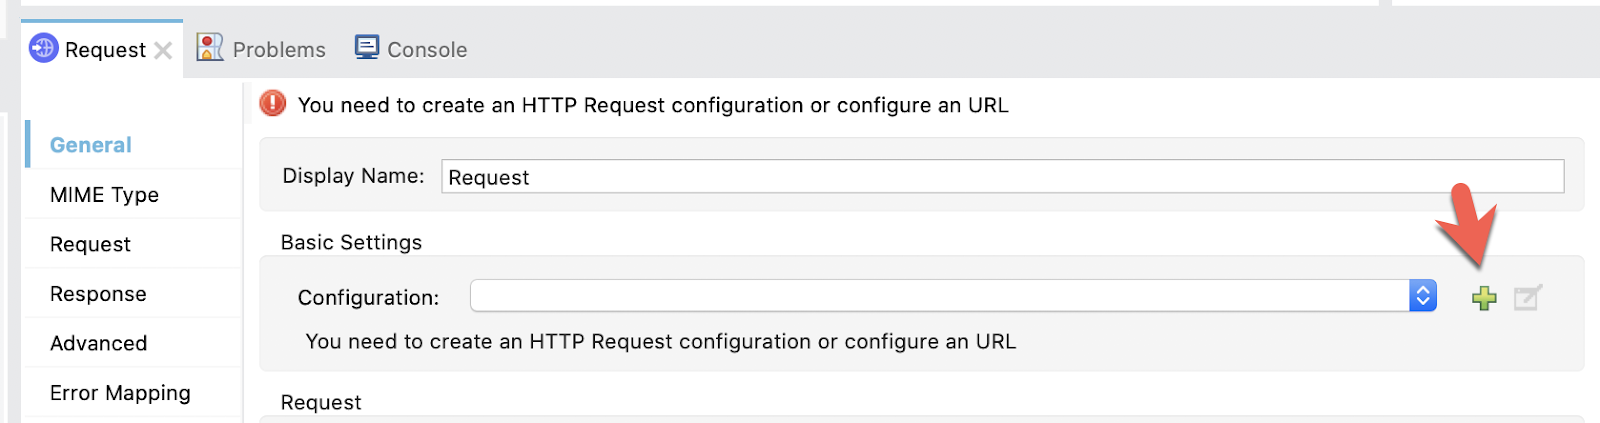
This is where the bulk of the configuration will be for to call the Google API.
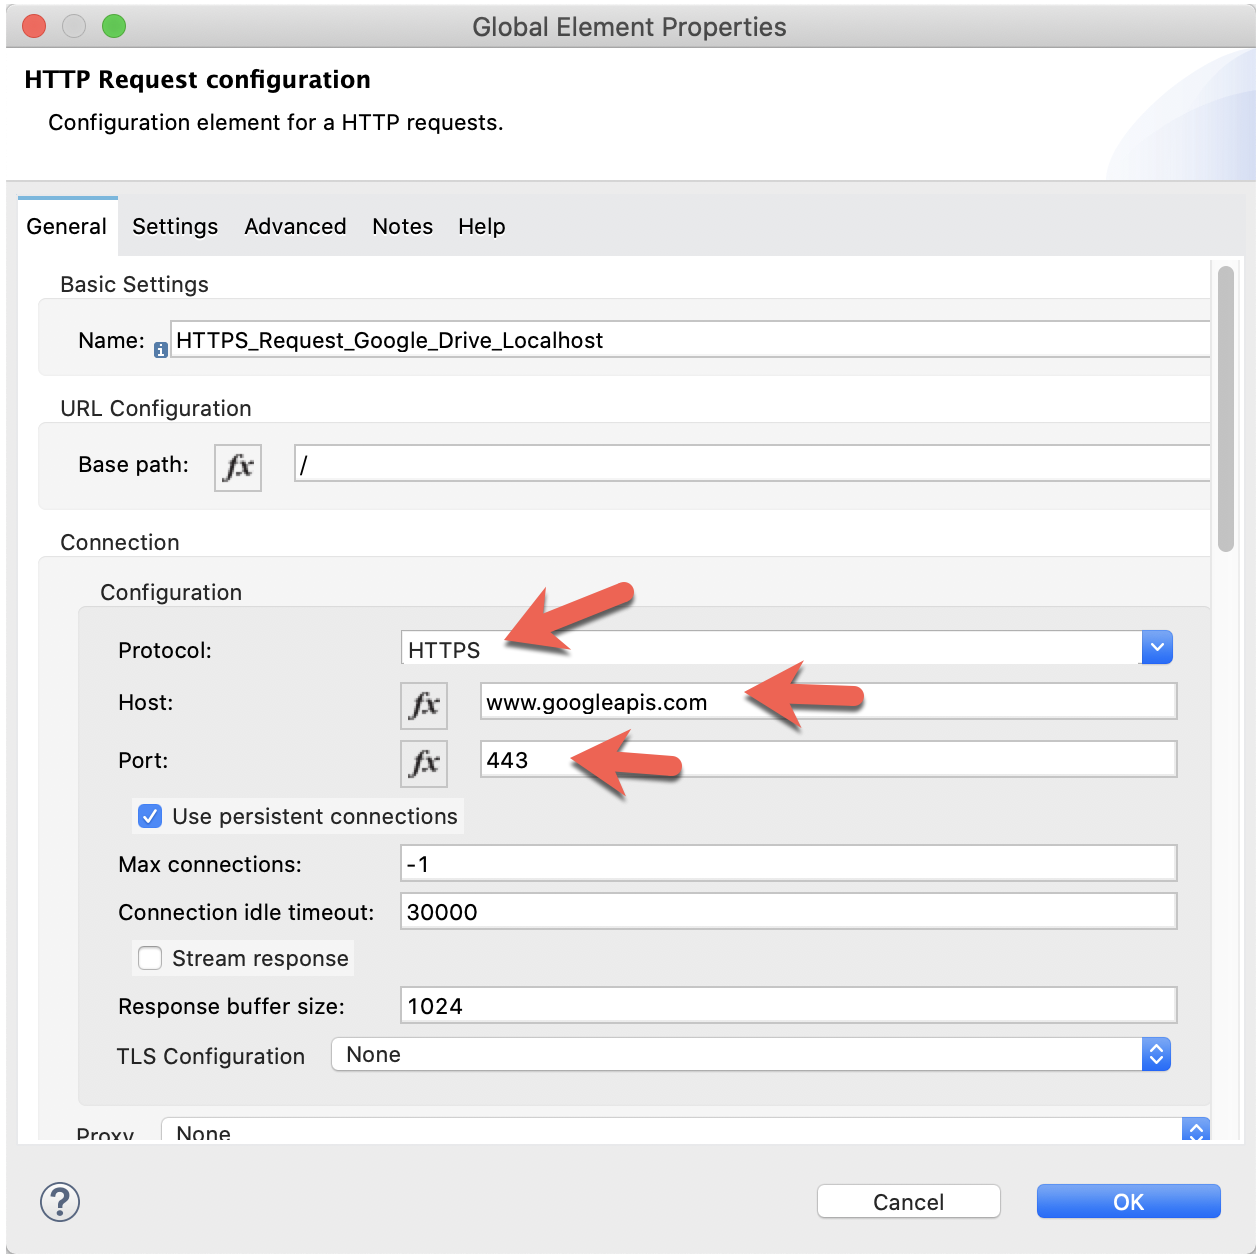
Under the General tab, and in the Connection section, change the Protocol to HTTPS. Set the Host to www.googleapis.com, and set the Port to 443. Don't click on OK yet but scroll down.
Find the Authentication drop-down and change the value to Authorization code grant type. If the value is missing, you need to go back and add the OAuth Module that we covered in Section 3.
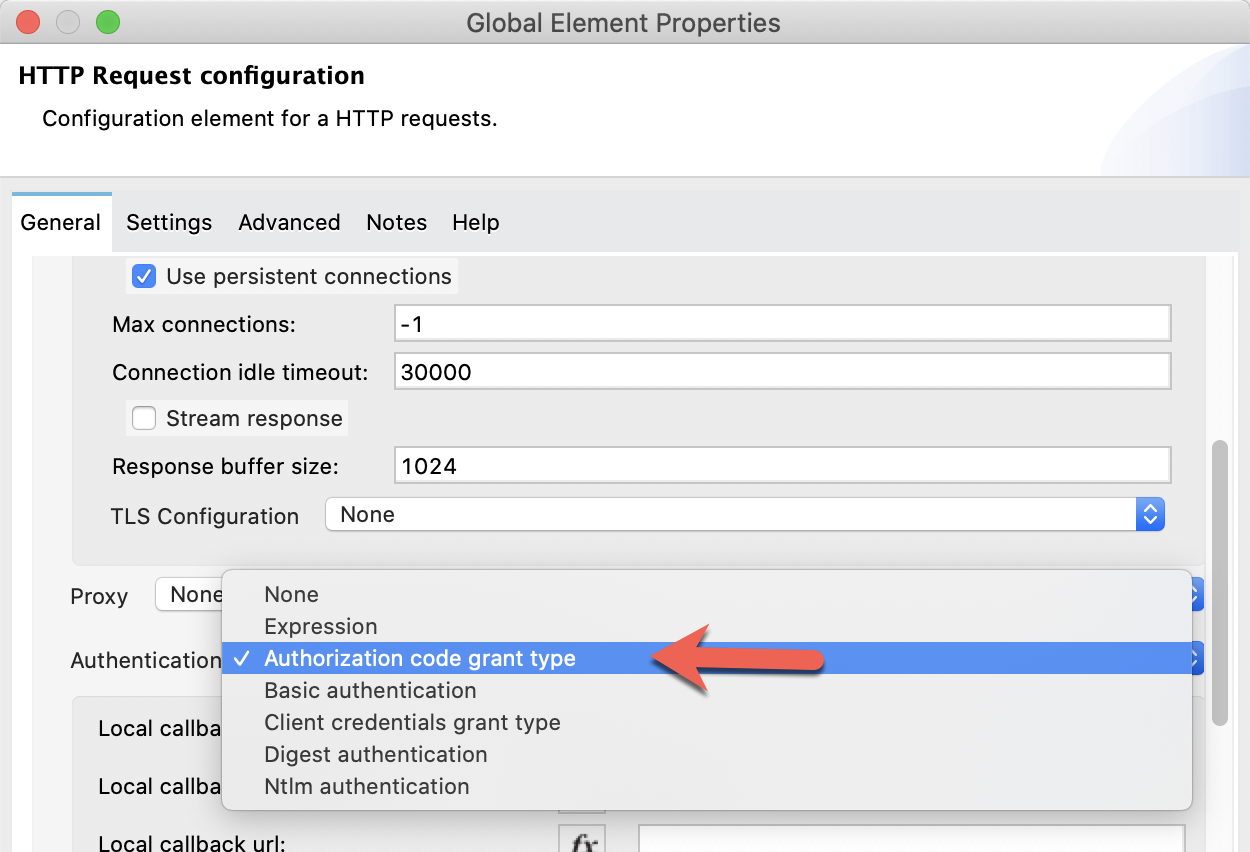
In the new section that appears, fill in the following fields that match the table below. You can see a screenshot of what it should look like below the table:
Field | Value | Description |
Local callback url |
| This matches the Authorized redirect URI from Step 2 |
External callback url |
| This matches the Authorized redirect URI from Step 2 |
Local authorization url |
| This is the endpoint where the user goes to get the token from the OAuth endpoint |
Authorization url |
| Google specific endpoint that the Local authorization url will redirect the user for authorization. |
Client id | This is the client ID from Step 2 | |
Client secret | This is the client secret from Step 2 | |
Scopes |
| A list of scopes for the Google Drive API can be found here: https://developers.google.com/drive/api/v3/about-auth#OAuth2Authorizing |
Token url |
| Google specific endpoint where the OAuth flow exchanges the code for access token and ID token. |
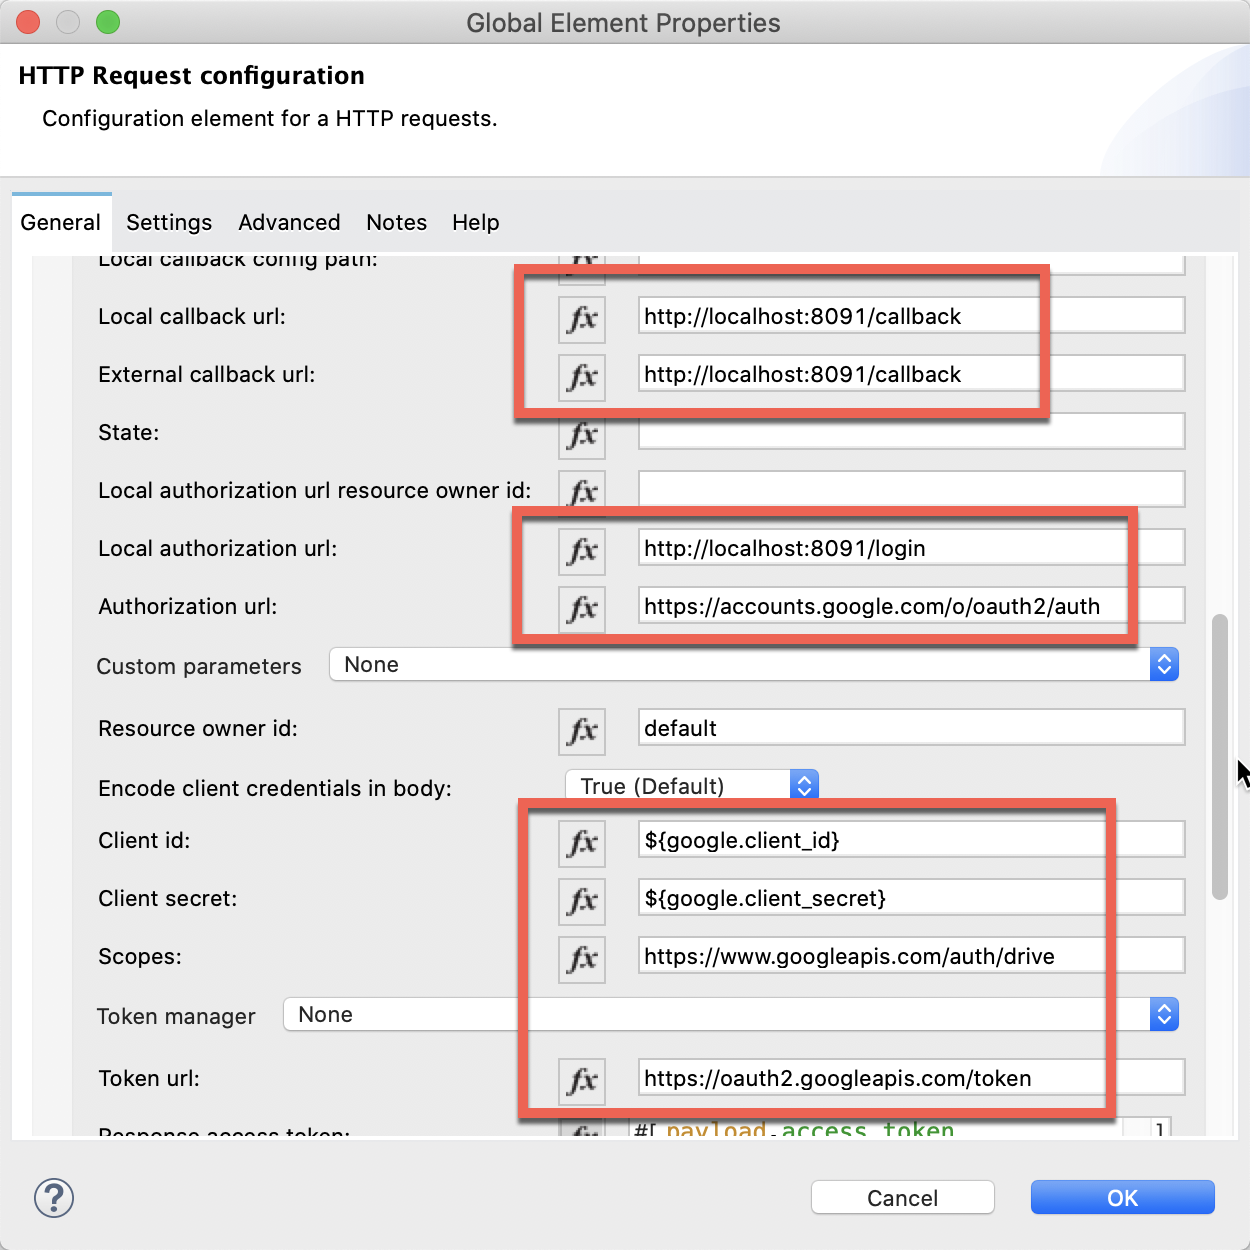
Click on OK to close the HTTP Request configuration screen.
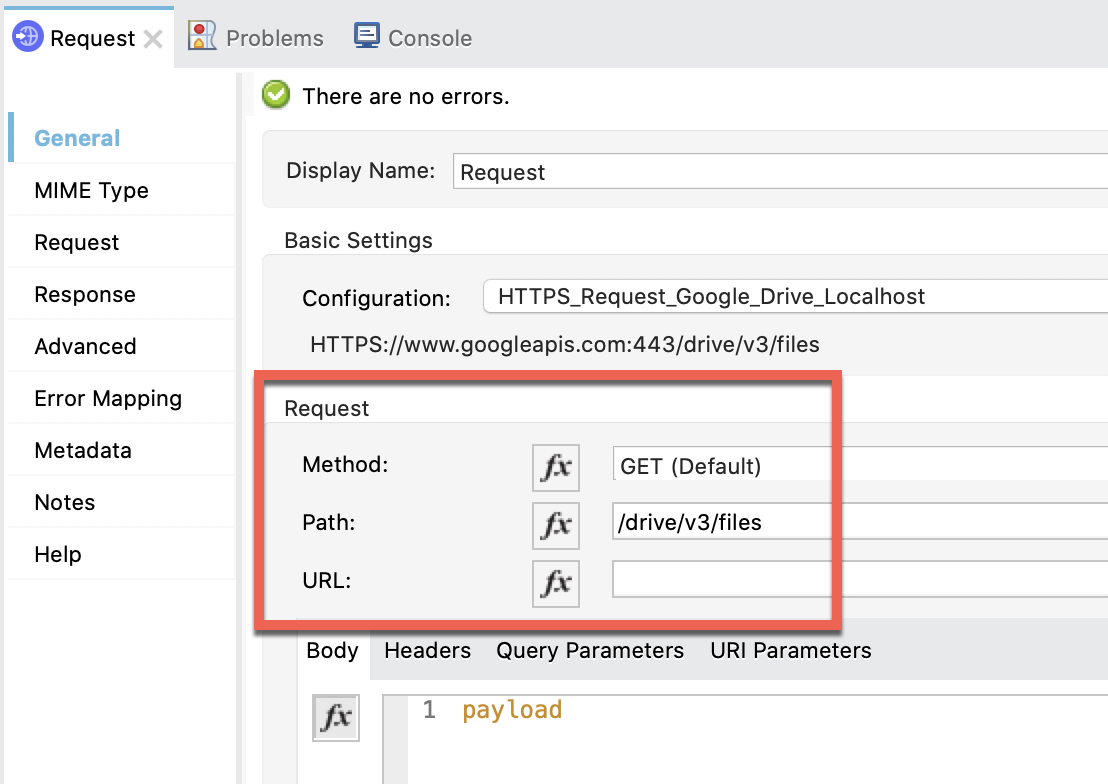
Set Request Method and Path
Back in the Request Mule properties tab, fill in the Method and Path field under the Request section.
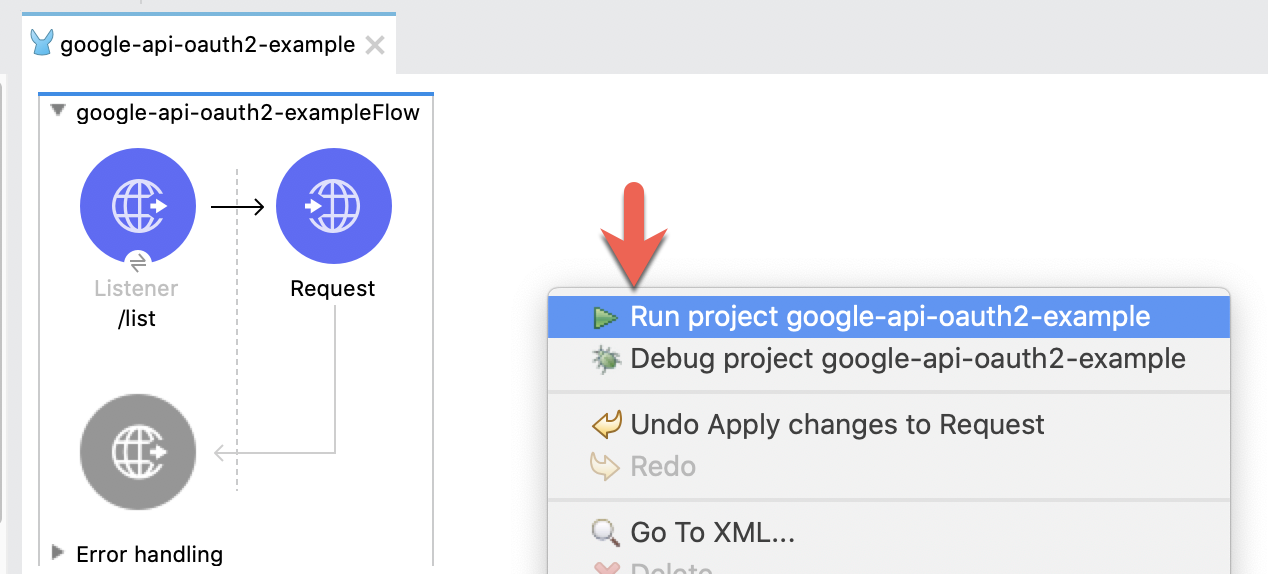
Now that everything has been configured, let's run the project and walk through the OAuth 2.0 flow. Right-click on the canvas and click on Run project
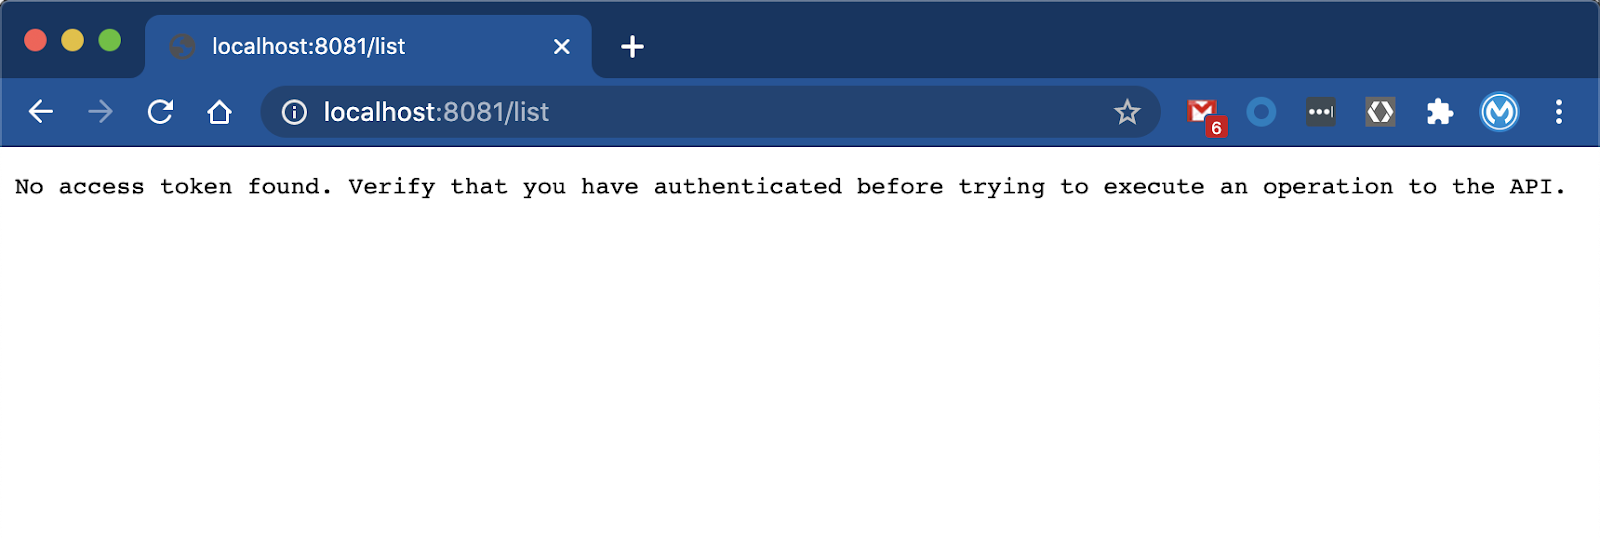
When the project is successful deployed, switch to your browser and navigate to the following URL
http://localhost:8081/listIf everything was configured successfully, you'll see the following response in your window. This is expected because you haven't authenticated the user against the OAuth 2.0 server yet.
Open another tab and navigate to the following URL. Note that the port number is 8091 versus 8081.
http://localhost:8091/login
If configured correctly, you'll be redirected to the Google Sign-In screen to authenticate the user. If you're already logged in, you'll be presented with the account you want to use. Once authenticated, you'll be redirected back to the authenticated redirect URI that you set up previously (http://localhost:8091/callback) and you'll see the following screen.

Switch back to the tab from earlier (http://localhost:8081/list) and click refresh. Now you should see the data successfully returned back from the Google API.

In this codelab you learned how to setup and call a Google API from a Mule application using OAuth 2.0. As you learned, there are a couple of steps that need to be completed on the Google side in the Google Cloud console before we can make the call.
While we only showed connecting with the Google Drive API, you can add additional APIs from their extensive library to your project. Just remember to add the scopes that you plan to call from Mule in order to have access to those APIs.
From a Mule standpoint, you learned how to use the HTTP Request component along with the OAuth Module to call the Google API. The Mule application is pretty basic but it shows the minimum number of steps needed to setup the call. If you have any questions or run into any issues, don't hesitate to reach out.
What's next?
Check out some of these codelabs...
- TBD