Azure Pipelines is a cloud service that you can use to automatically build and test your code project and make it available to other users. It works with just about any language or project type.
Azure Pipelines combines continuous integration (CI) and continuous delivery (CD) to constantly and consistently test and build your code and ship it to any target.

What you'll build
In this codelab, you're going to build an Azure pipeline to automate the continuous integration and continuous delivery.
What you'll learn
- How to create an Azure Organization
- how to create an Azure Project
- how to create an Azure Pipeline
- how to automate the building process
What you'll need
You can create an instance of each system in Cloud Services
How will you use use this tutorial?
How would you rate your experience with Git?
How would you rate your experience with Maven?
How would you rate your experience with Jenkins pipeline?
For this Lab we are going to use the Hello World example that is an example that is in Exchange. Please feel free to use this lab with any other project and import it into Studio.
Download the project form Exchange
- Open Studio
- Press the Exchange Button
- Search for Hello World
- Import the project into your Studio by pressing the Open button
At the end you should see something similar to this:

Update Module Dependencies
This project may have old dependencies, what we are going to do now is to update them.
- On the project name do a right click and select Manage Dependencies -> Manage Modules

- Check all the dependencies and press Apply and Close

Login to Azure
First login to Azure DevOps Services
Create a new Organization
Once you login, you will see the following screen
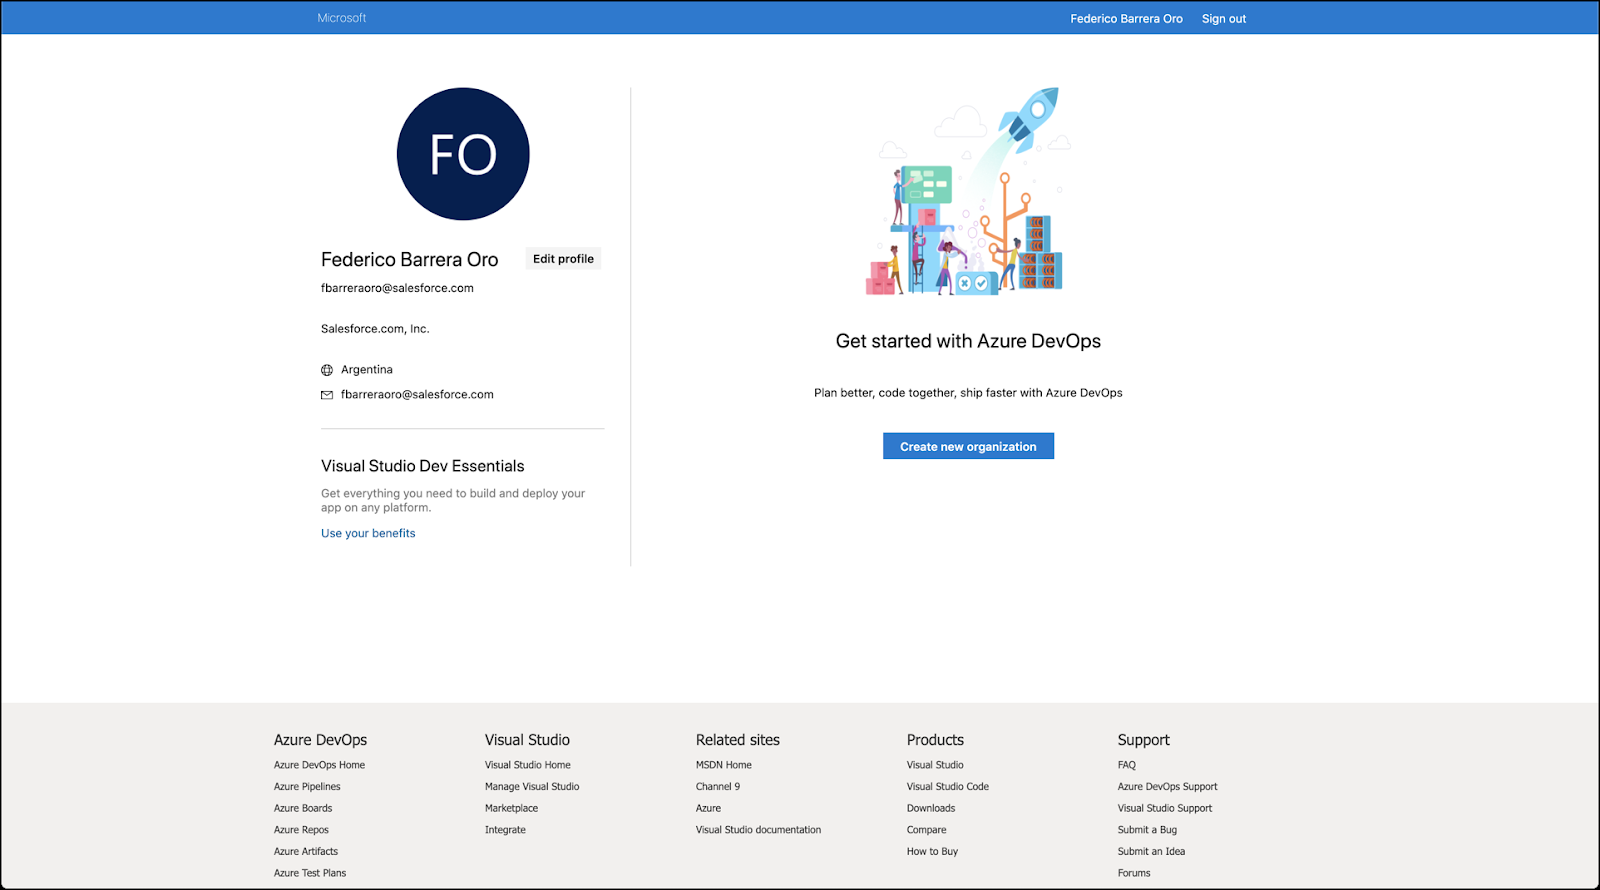
- Press the Create new organization button
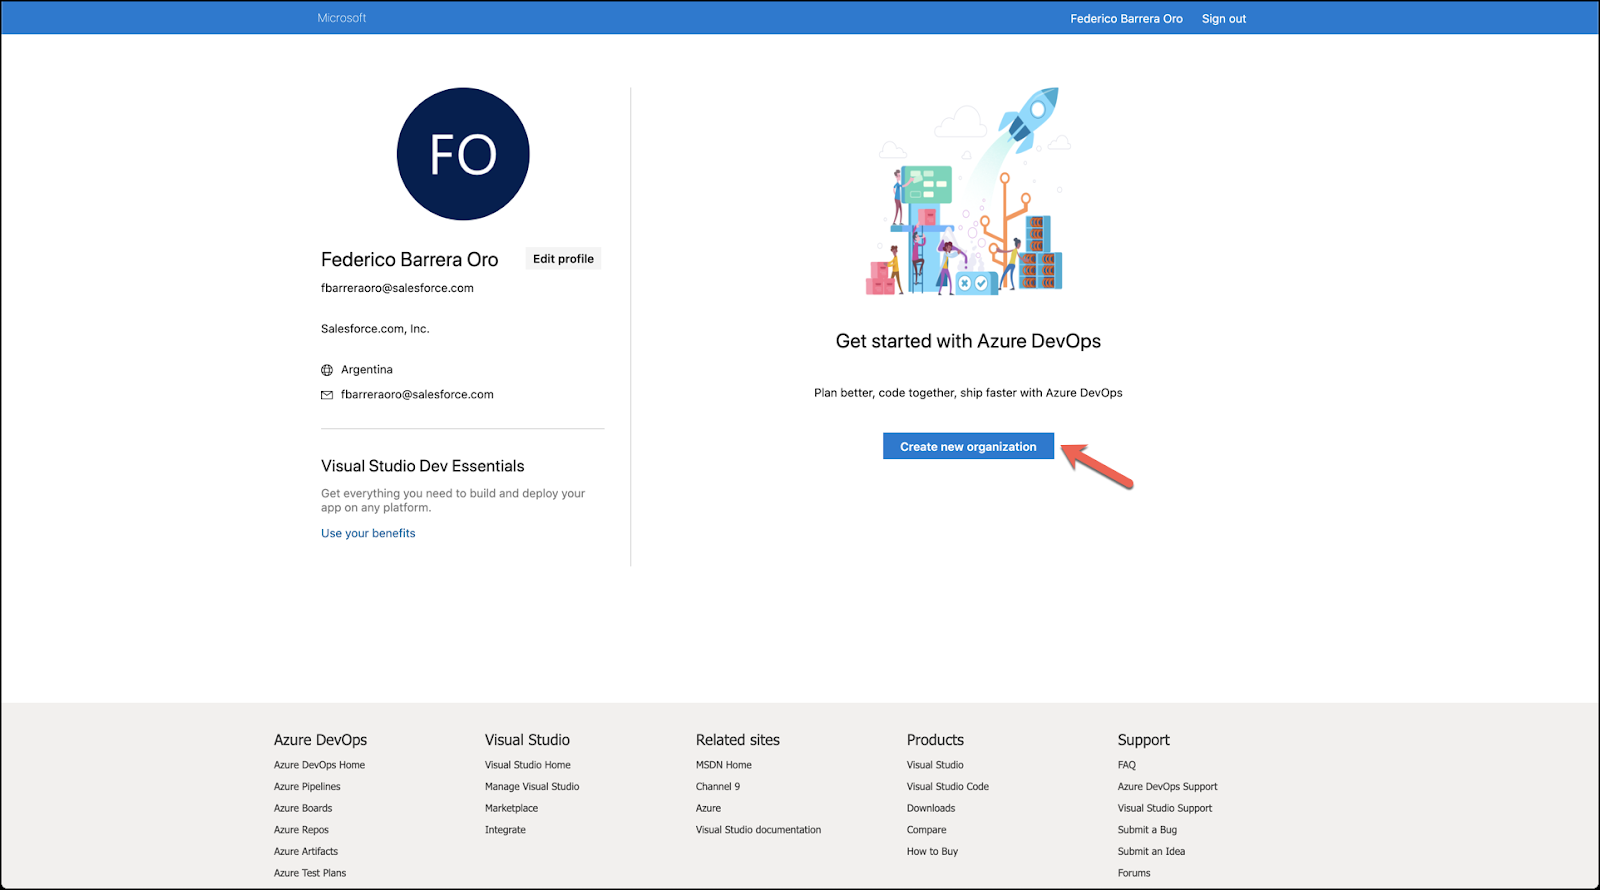
- Create the name of the organization and choose the region where you want to host the code and press Continue

Now you are ready to create a new project
Create a project
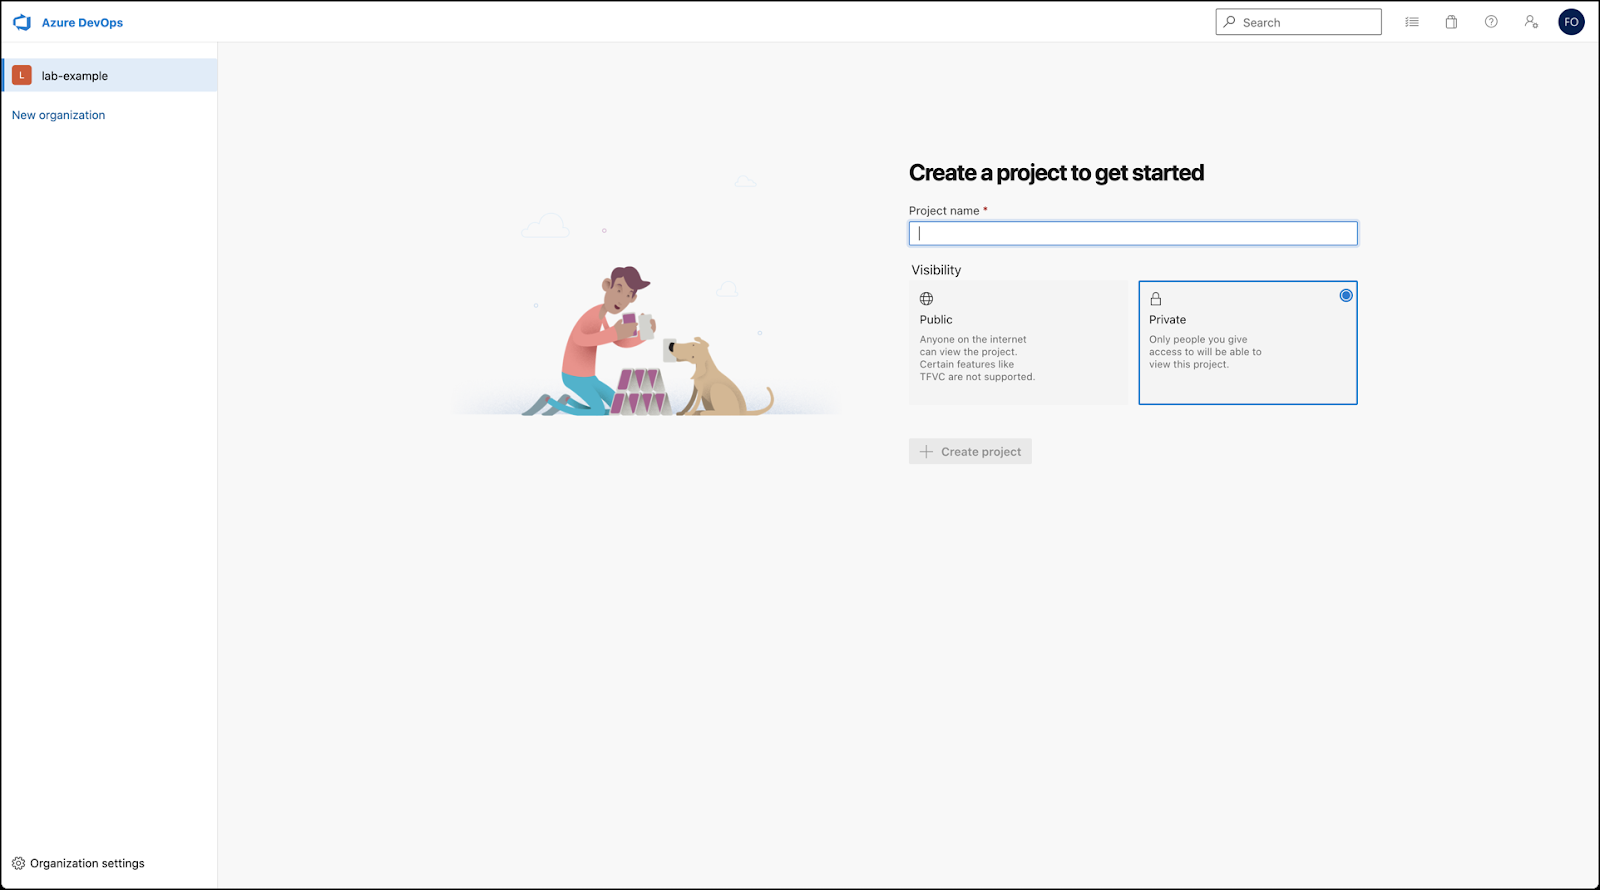
We created the Organization, now we need to create a new project.
- Complete the field with the project name. Press Create Project when finished.

This is going to be part of the git url. I would recommend to not use spaces. Also notice that we decided to make this project private.
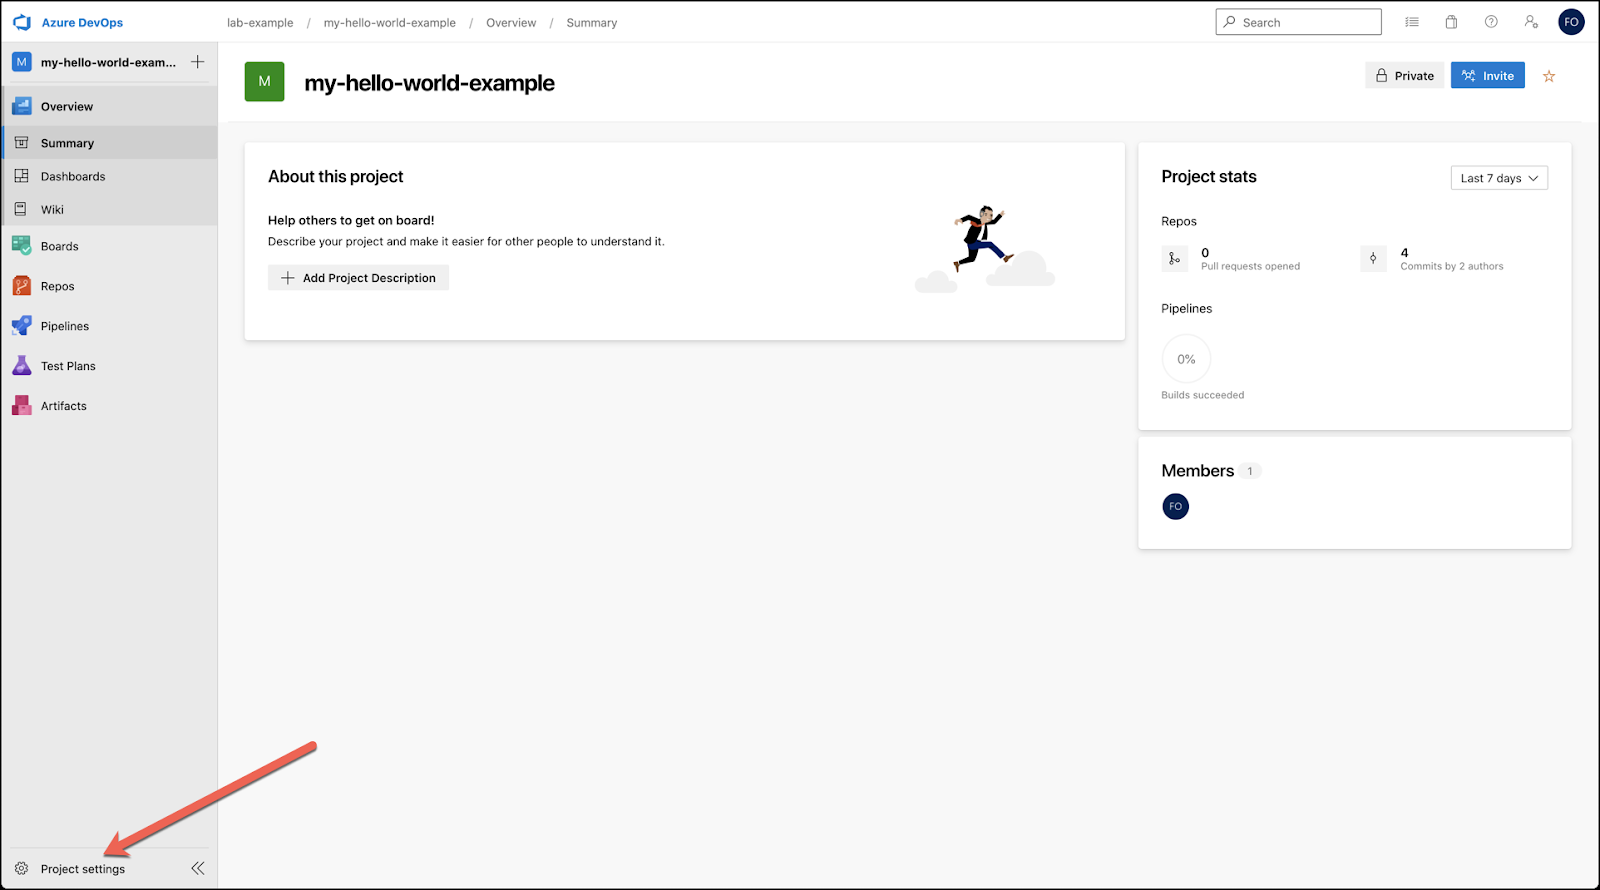
Once you create the project, you will see the following screen
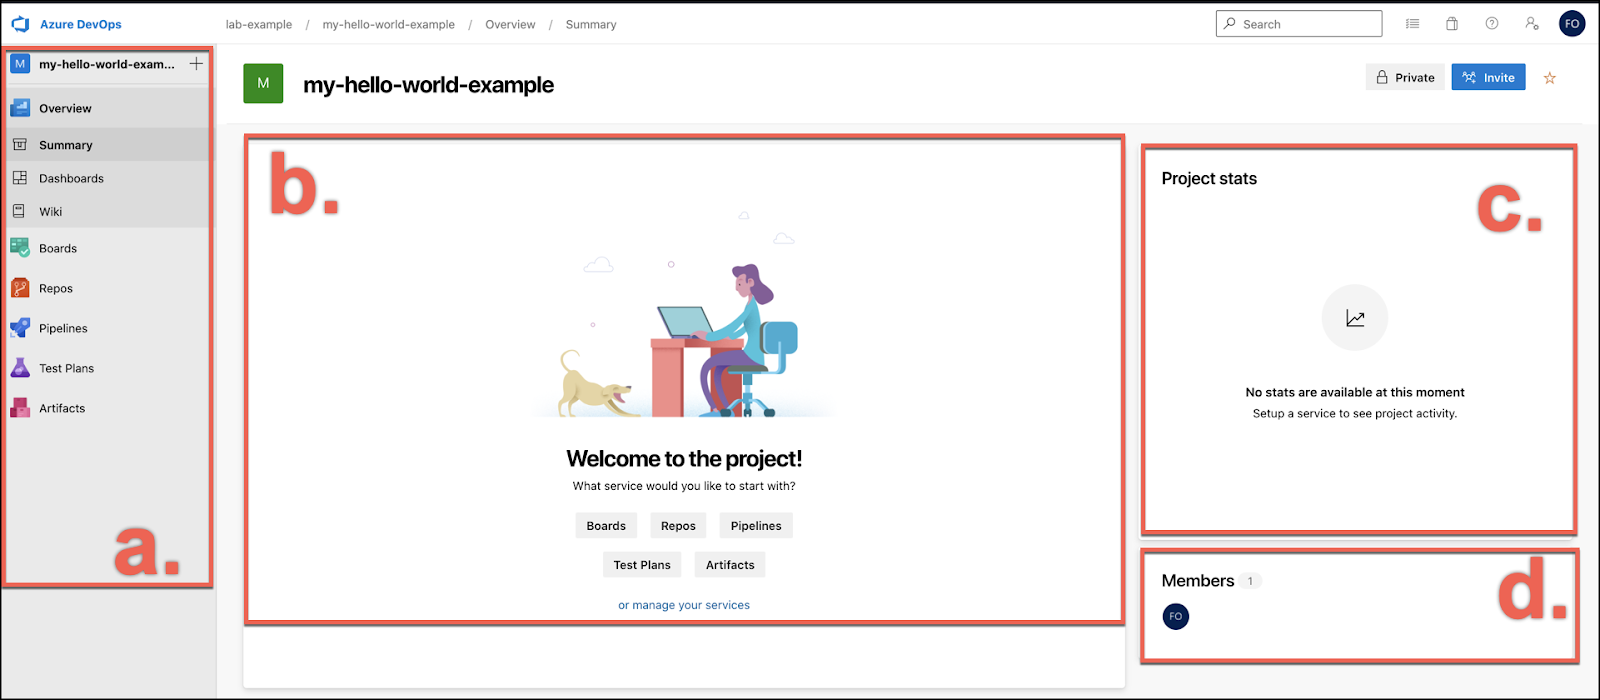
- On the left side you will see a Menu with the different components that a Project has.
- The central panel, describe the projects and the different options you may have.
- This panel shows the statistics
- Shows the members of this project. You can invite other developers to this project by pressing the blue Invite button on the upper right corner.
Be careful when you invite a user. By default they are invited with the stakeholder role. They won't have access to any repo unless you change her profile. More information can be found here. You can also go to the appendix to learn how to change the profile.
Generate Credentials
This step is needed if you login to Azure using a corporate user.
- Go to Repos. You will see the URL.
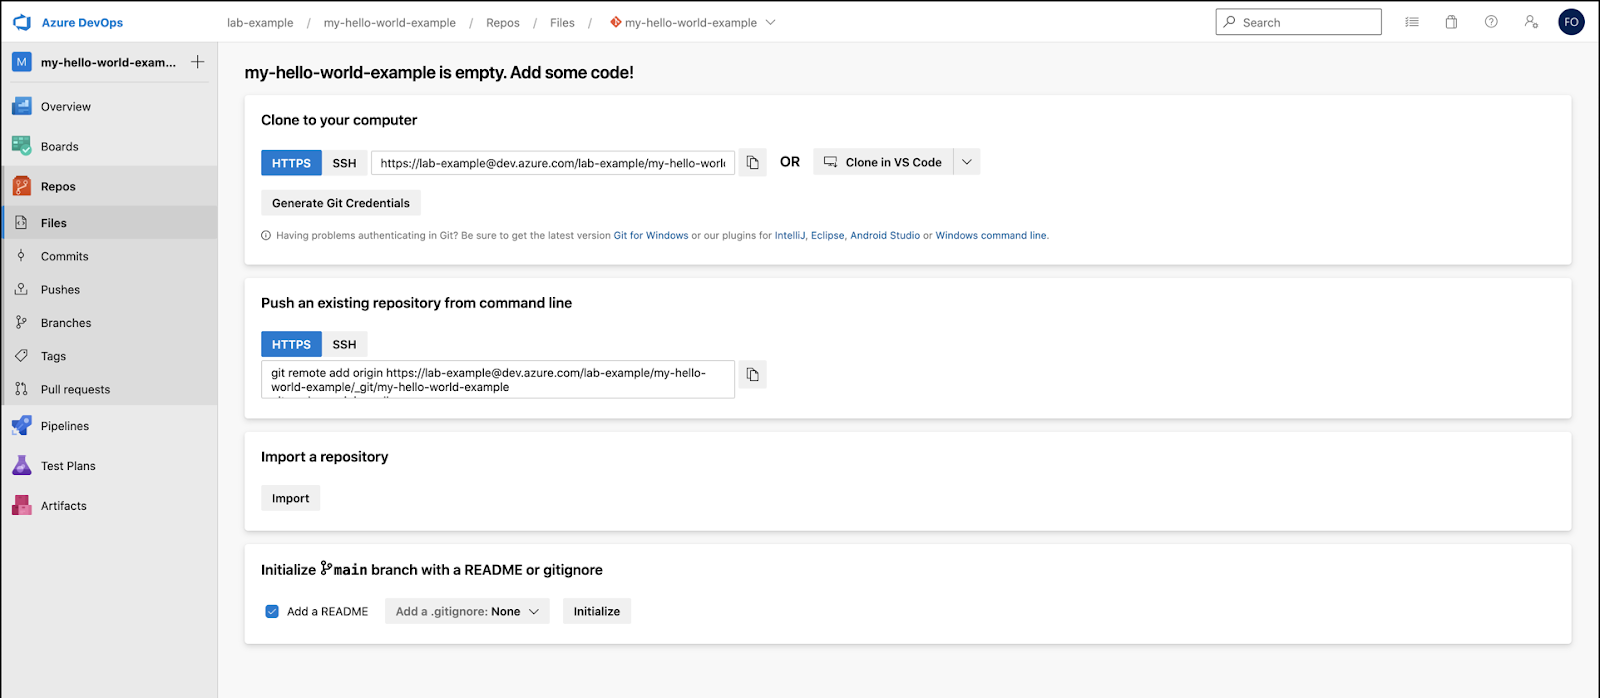
- Click Generate Git Credentials to get the username and password

Take note of the URL, user and password. You are going to need it in the next section.
Great!!! In the next section we are going to configure the Studio Project to use this repo
In this section we are going to initialize our mule project to the Git repository. We will be using EGit that comes with Studio. But feel free to choose any tool you want.
Create a local repository
- To create a local repository, In the Package Explorer, right-click the name of your project --> select Team --> select Share Project

- In the Configure Git repository window, Select the checkbox for Use or Create a repository in the parent folder of the project. (Note: Using this method you will make sure that the .git folder is created in your project root and not your parent folder.)

- Press Create Repository and finally Click Finish.

- In the Anypoint Studio package explorer, we can see the arrow mark and questions mark symbols for our studio files. This icon indicates that we have created a Git repository for the project on the local drive, but we have not yet registered it and are not yet tracking changes to the project.

- Now we need to register the local repository and track changes. To do this go to the package explorer, right click to the name of the project --> Team --> Commit

- Once we have clicked on the Commit button. We will see the Git Staging tab opened up. Select all the files that we want to check-in in Git then right-click on the selected files and click on Add to index.

- Add a commit message to the text box on the right and click on the Commit button. Our changes will be stored in the local git repository.

- In the package explorer, we can now notice that there is a yellow barrel icon which indicates that the changes have been committed to our local git repo. Also, there is no more arrow icon next to the project name.

Push Changes into the Remote Repository
Now that we have everything in our local repository. We want to push the changes in the remote one.
- In the Package Explorer, right-click the name of your project navigate to Team --> Remote --> Push

- Complete the URL of the repository created in Azure and push the changes. Don't forget to configure username and password.

- Select the Specification for Push from the Source ref and Destination ref and then Click on Add Spec, then Click on Finish.

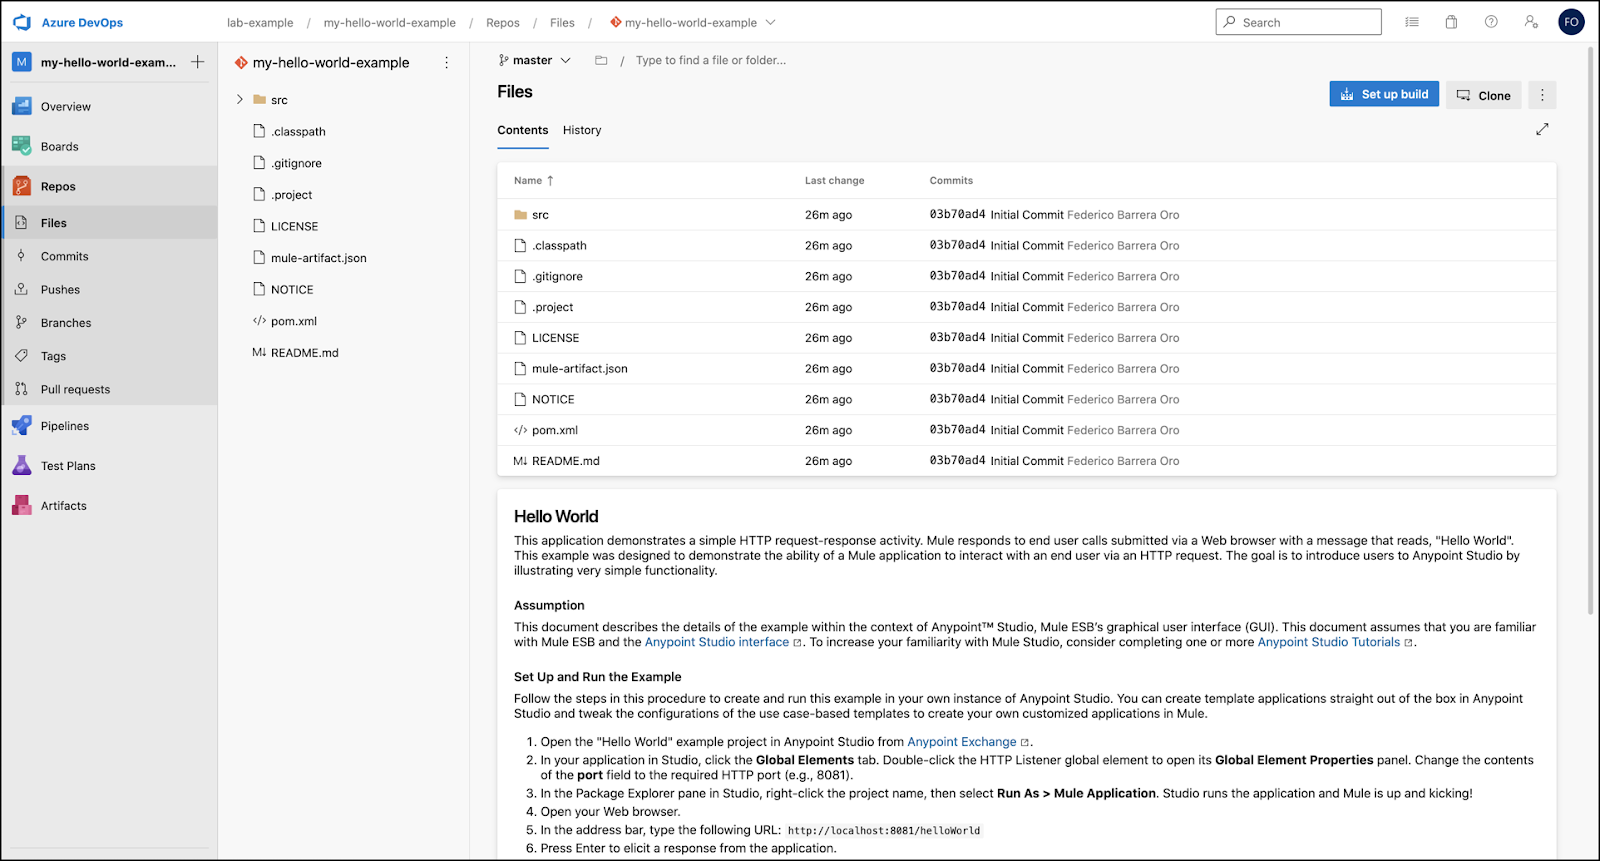
- You can go back to Azure and see the committed changes.
A complete guide on how to use Git with Studio can be foundhere
To do the deployment we are going to use the maven plugin. Information about the Mule Maven Plugin can be foundhere.
In the next section we will configure the pom.xml file.
Configure POM File
- Go to Studio and open the pom.xml file.
- Find the section where the plugin is.
<plugin>
    <groupId>org.mule.tools.maven</groupId>
    <artifactId>mule-maven-plugin</artifactId>
    <version>${mule.maven.plugin.version}</version>
    <extensions>true</extensions>
    <configuration>
        <classifier>mule-application</classifier>
    </configuration>
</plugin>- We are going to add the cloudhubDeployment configuration
- Add the following configuration in the configuration tag
<cloudHubDeployment>
    <uri>https://anypoint.mulesoft.com</uri>            (1)
    <muleVersion>4.3.0</muleVersion>                    (2)
    <username>${anypoint.username}</username>           (3)
    <password>${anypoint.password}</password>           (4)
    <environment>${cloudhub.environment}</environment>  (5)
    <applicationName>${cloudhub.app}</applicationName>  (6)
    <workerType>Micro</workerType>                      (7)
</cloudHubDeployment>
These are all parameters that can be hardcoded inside the POM or injected when you do the deployment. The description of each parameter can be found here:
- Define anypoint platform (US or EU).
- Define Runtime Version
- Define anypoint deployment username
- Define anypoint deployment password
- Define anypoint environment (Sandbox, Production)
- Define application name
- Define worker type (Micro, Small, Medium)
If you want to test it, you can deploy manually from your computer. Try to execute the following command:
mvn -V -e -DskipTests deploy -DmuleDeploy \
-Danypoint.username=<username> -Danypoint.password=<password> \
-Dcloudhub.app=dev-hello-world -Dcloudhub.environment=Sandbox
- Commit the changes into the repo.
Add dependencies
Azure doesn't have a global settings.xml for maven. Everything needs to be in the POM. That's why we are going to add some repositories to the file.
- Go to the repository section in the pom.xml file.
- Copy the following values:
<repository>
    <id>mulesoft-public</id>
    <url>https://repository.mulesoft.org/nexus/content/repositories/public/</url>
    <layout>default</layout>
</repository> - In line 15, update the munit.version to 2.2.1.
- Commit the changes and let's create a new pipeline.
In this section, we are going to create an Azure pipeline to automate the deployment to cloudhub.
- Go to Azure and click in the Pipelines Section.
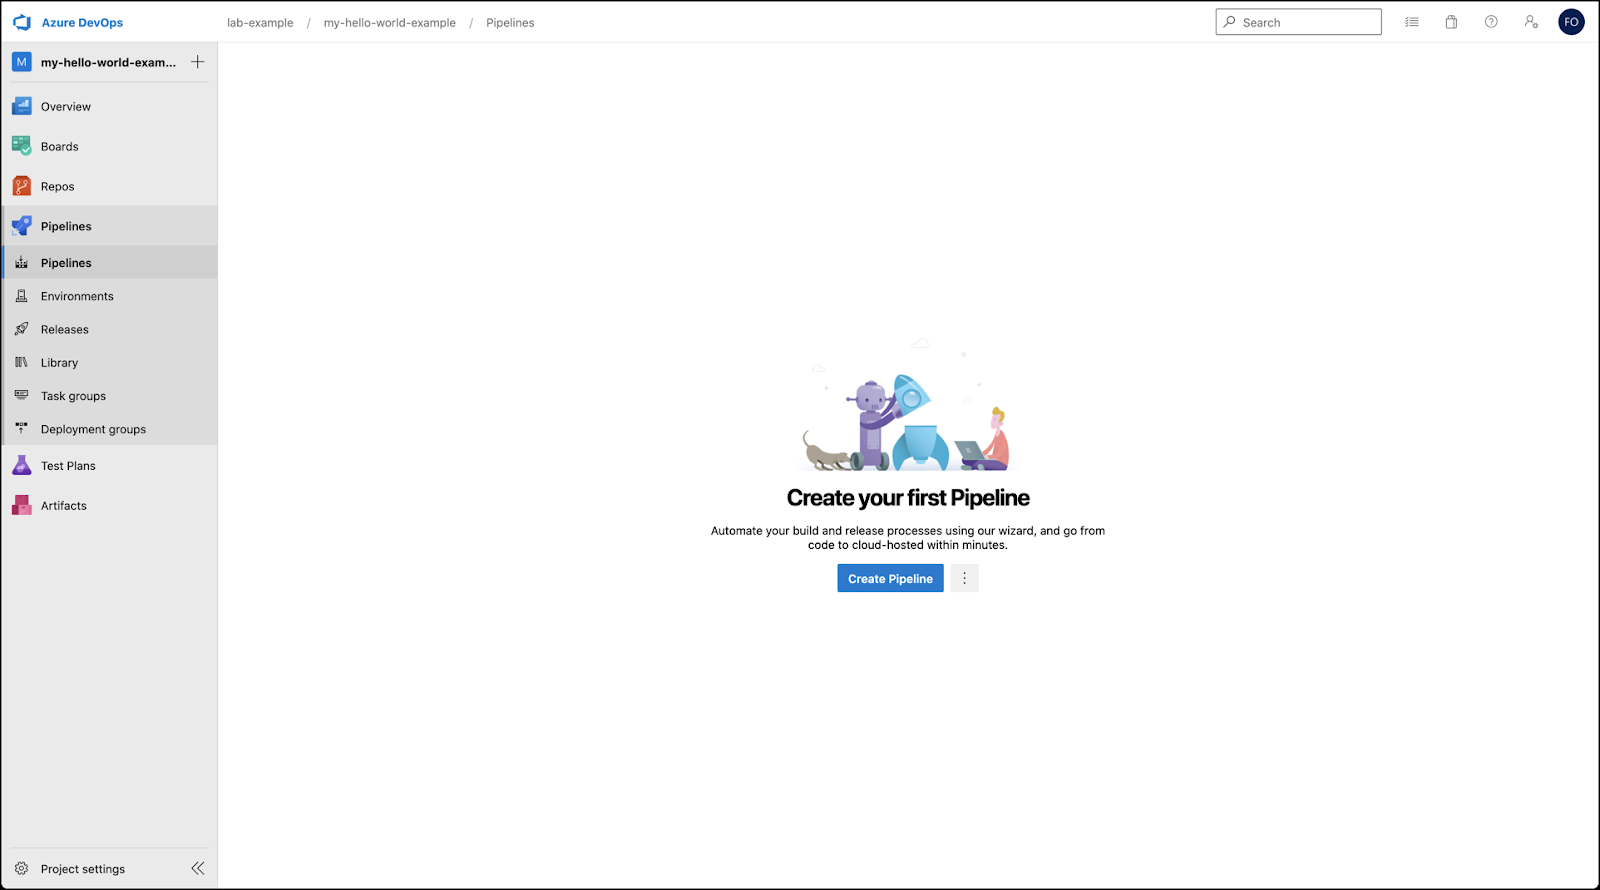
- Press the Create Pipeline button.
- Where is your code? Select Azure Repos Git

- Select the repo we created before

- Choose Maven option

- Once you select the configuration pipeline, you will see the yaml file with an example.

- Press Save and run
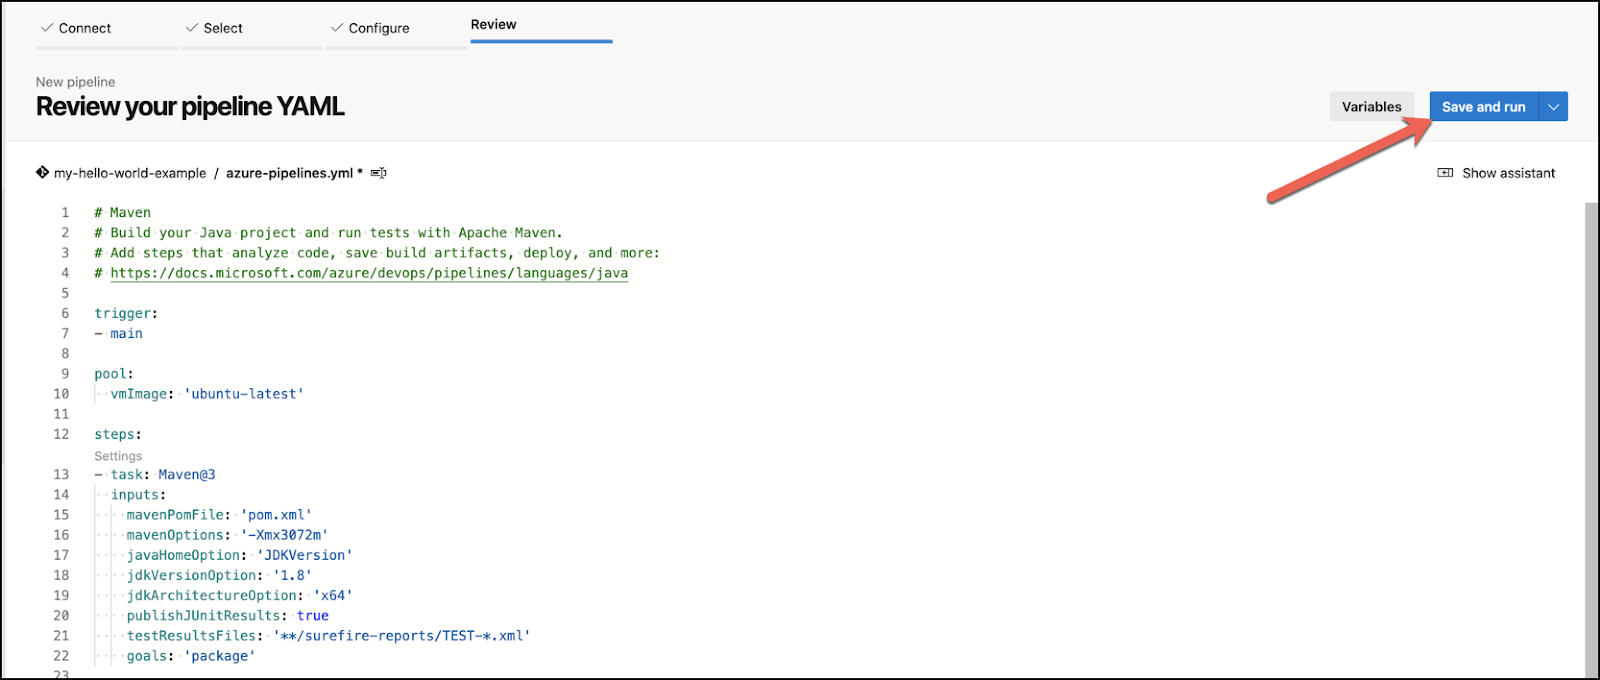
- Leave all the values as default and press Save and run. Again

- After you clock the button, the pipeline will be executed. Doing a click, you can see the logs being executed.
Azure provides access to the public repositories by default, but if you need access to the Enterprise Repository, you need to follow these steps.
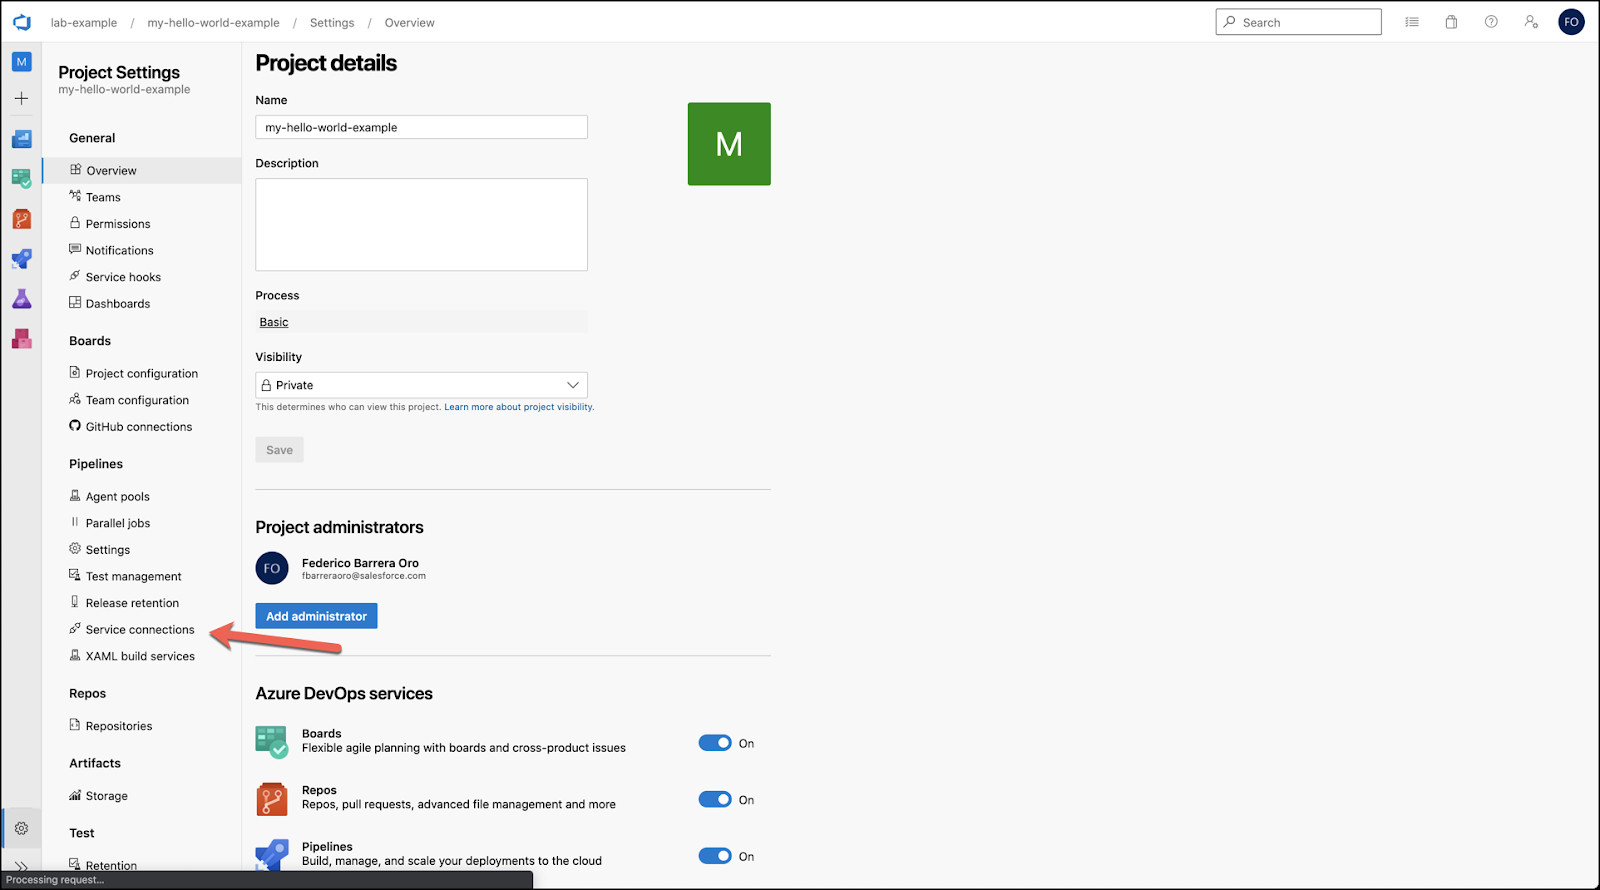
- First you need to go to the Project Settings.
- Select Service connections
- Press Create a service connection

- Select Maven in the menu that appear on the right, and press Next.

- Configure the details with the following information:
- Repository Url: https://repository.mulesoft.org/nexus-ee/content/repositories/releases-ee/
- Repository Id: MuleRepository
- Username: <YOUR_ID>
- Password: <YOUR_PASSWORD>
- Details: Mulesoft Enterprise (Optional)

- Press Save when finished

Now we need to update the pom.xml file. We will add some libraries needed by the MUnit plugin to run.
- Go to your project and open the pom.xml file.
- At the end copy the following lines
<pluginRepositories>
    <pluginRepository>
        <id>mulesoft-release</id>
        <name>mulesoft release repository</name>
        <layout>default</layout>
        <url>http://repository.mulesoft.org/releases/</url>
        <snapshots>
            <enabled>false</enabled>
        </snapshots>
    </pluginRepository>
    <pluginRepository>
        <id>mule-public</id>
        <url>https://repository.mulesoft.org/nexus/content/repositories/releases</url>
    </pluginRepository>
    <pluginRepository>
        <id>MuleRepository</id>
        <name>MuleRepository</name>
        <url>https://repository.mulesoft.org/nexus-ee/content/repositories/releases-ee/</url>
        <layout>default</layout>
        <releases>
            <enabled>true</enabled>
        </releases>
        <snapshots>
            <enabled>true</enabled>
        </snapshots>
    </pluginRepository>
    <pluginRepository>
        <id>mulesoft-public-plugin</id>
        <name>MuleSoft Public Repository</name>
        <url>https://repository.mulesoft.org/nexus/content/repositories/public/</url>
        <layout>default</layout>
    </pluginRepository>
</pluginRepositories>
Great, you configure the Mulesoft Enterprise Repository in Azure.
In this section we are going to add two more steps to the pipeline.
The first step will build the package. The second one will test the application and the third one will deploy the application to cloudhub.
We need to update the azure-pipelines.yml. This file is in the repo now. You can do a git pull and edit the file in Studio.
In this lab we are going to do in Azure
Build Step
This is the step where the jar is going to be created. This step is created when you create a new pipeline. We are going to make some changes to this step.
- Go to the pipelines section and press edit
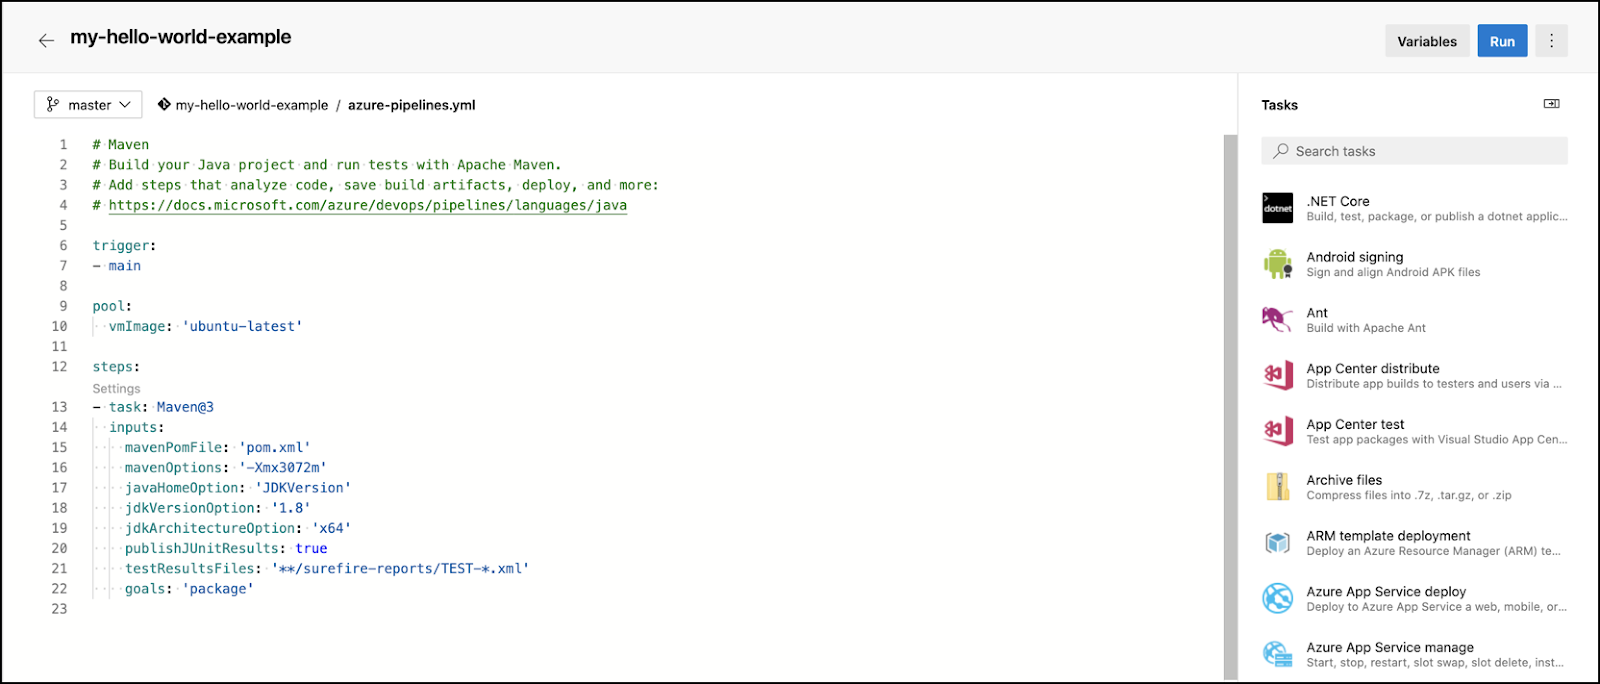
- Add a displayName parameter, so it's easy to identify the step.
- task: Maven@3
  displayName: Build
  inputs:
    mavenPomFile: 'pom.xml'
    mavenOptions: '-Xmx3072m'
    javaHomeOption: 'JDKVersion'
    jdkVersionOption: '1.8'
    jdkArchitectureOption: 'x64'
    publishJUnitResults: true
    testResultsFiles: '**/surefire-reports/TEST-*.xml'
goals: 'package'- Add a maven option parameter to not execute the unit test. step
- task: Maven@3
  displayName: Build
  inputs:
    options: '-DskipTests'
    mavenPomFile: 'pom.xml'
    mavenOptions: '-Xmx3072m'
    javaHomeOption: 'JDKVersion'
    jdkVersionOption: '1.8'
    jdkArchitectureOption: 'x64'
    publishJUnitResults: true
    testResultsFiles: '**/surefire-reports/TEST-*.xml'
    goals: 'package'
- Remove publishJUnitResult and testResultsFiles parameters.The final version of the task should look like this.
- task: Maven@3
  displayName: Build
  inputs:
    options: '-DskipTests'
    mavenPomFile: 'pom.xml'
    mavenOptions: '-Xmx3072m'
    javaHomeOption: 'JDKVersion'
    jdkVersionOption: '1.8'
    jdkArchitectureOption: 'x64'
    goals: 'package'
Test Step
In this step we are going to run the MUnit tests. To execute this step, you need a Nexus user to access the Enterprise Mulesoft Repository. If you don't have one, you can check here to see how to request one. If you aren't a customer and you can't get these credentials, you can skip this step and move to the next one.
As I mentioned before, we are required to configure a private repository. So first go to the appendix to add the Mulesoft Enterprise Repository credentials to the project.
Maven Authentication
Azure doesn't have a global settings.xml where you can configure all the repositories, profiles and credentials. Instead it has a step where you can add the server credentials into the settings.xml installed in the image. That's why we are going to create a Maven Authentication step to add the credentials we created in the appendix.
- Stand the cursor on line bejor the
goals: 'package'line.
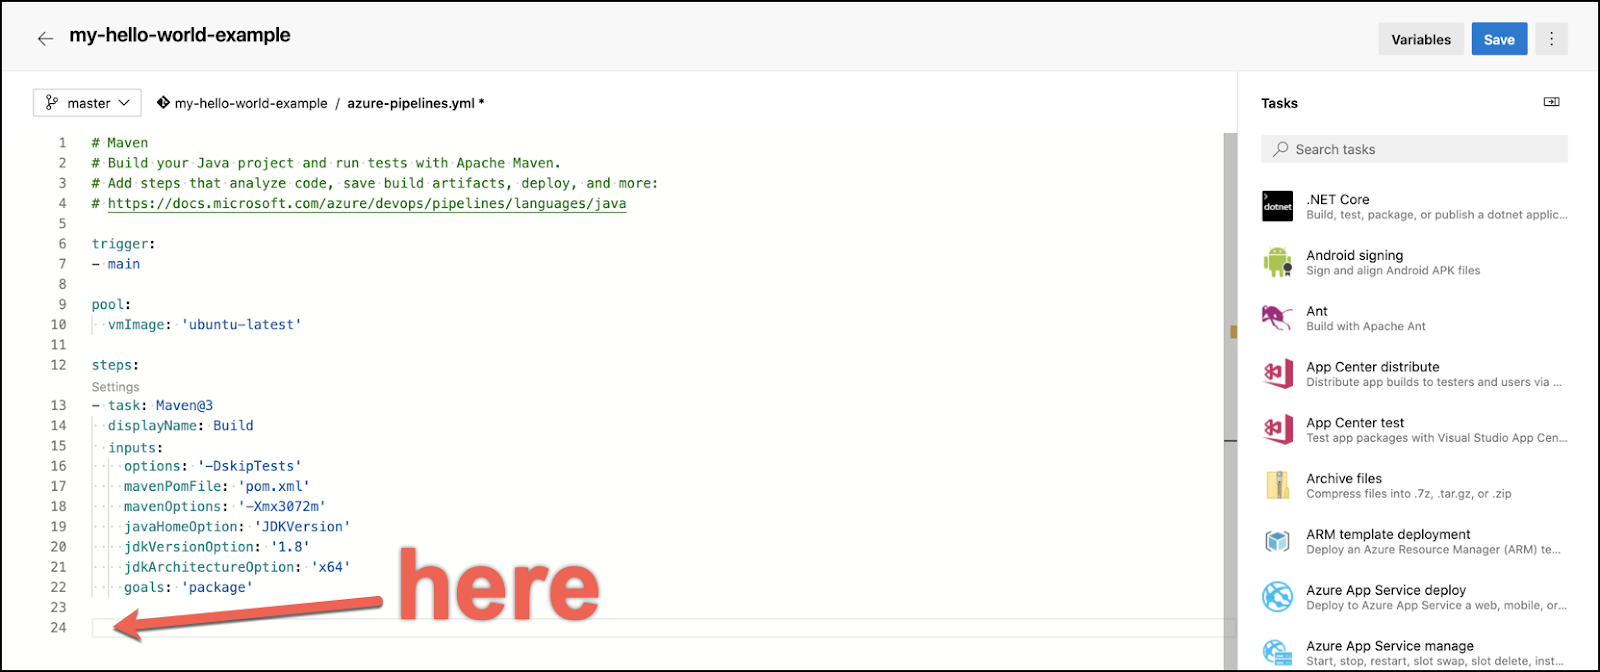
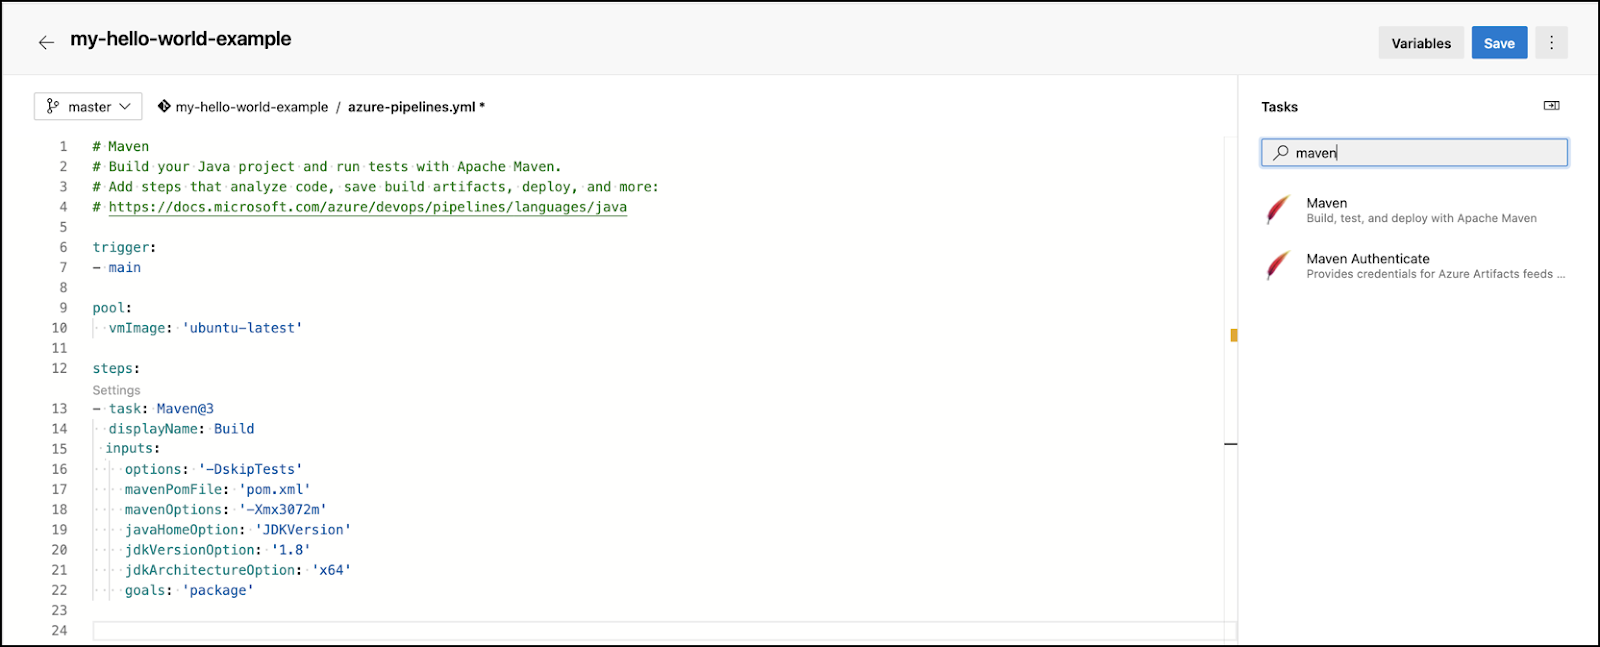
- On the right side of the screen you can see a menu with tasks. In the search bar type maven. Choose Maven Authenticate
- On the next screen choose MuleRepository from the second combo
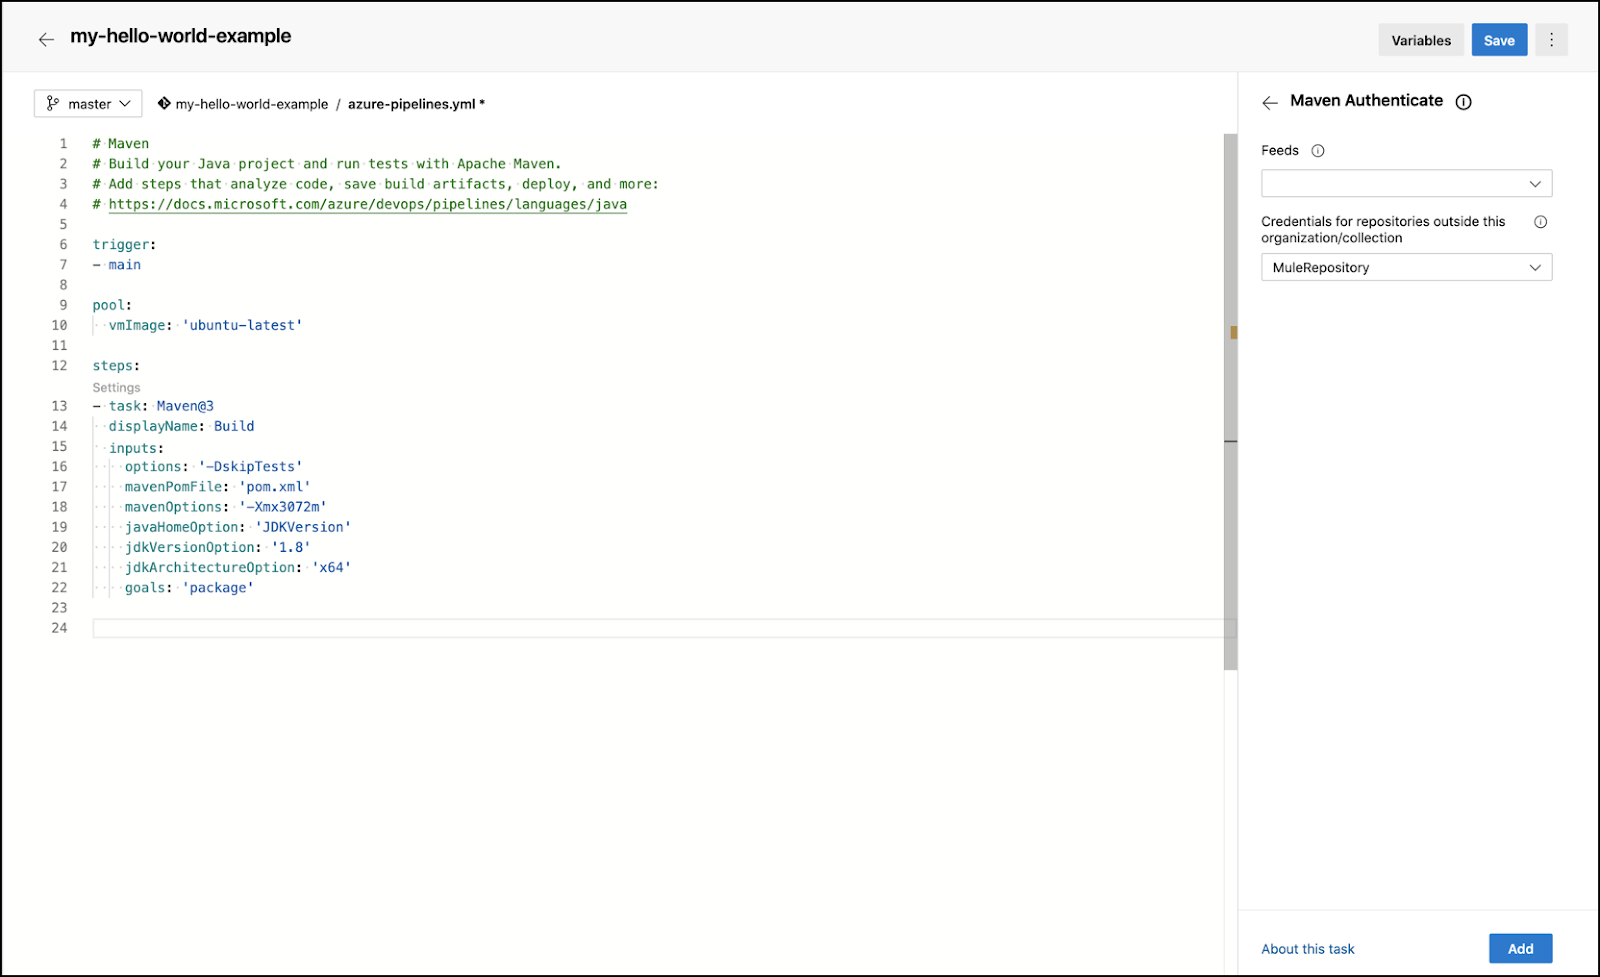
- Press Add
The step should look like this:

Maven Test
Here we are going to create the maven test task.
- Stand the cursor after the maven authenticate step
- On the right side of the screen you can see a menu with tasks. In the search bar type maven. Choose Maven.
- Configure the following parameters:
- Maven POM file: pom.xml
- Goal(s): test
- Publish to Azure pipelines: checked
- Test Results File: ./target/surefire-reports/TEST-*.xml
- Test run title: Hello World Example Report
Leave the rest as default. Press add when finished.

At the end you should see something like this

Deploy Step
The last step will deploy the package into Cloudhub.
In the pom.xml file we declared 4 variables.
- anypoint.username
- anypoint.password
- cloudhub.environment
- cloudhub.app
Define Variables
In Azure, we can declare variables to be used in the pipeline. We are going to define one variable to be replaced in the pipeline we deploy.
Define Username Variable
- Press the Variables button located on the right top side of the screen

- Press New Variable.
- Complete with the following:
- Name: mule.username
- Value: <CLOUDHUB_USERNAME>

- Press OK.
Define Password Variable
- Press the (+) button.
- Complete with the following:
- Name: mule.password
- Value: <CLOUDHUB_password>
- Keep this value secret: checked.

- Press OK.
Define Environment Variable
- Press the (+) button.
- Complete with the following:
- Name: mule.environment
- Value: Sandbox

- Press OK
Define Application Name Variable
- Press the (+) button.
- Complete with the following:
- Name: mule.app
- Value: <Unique Applicaton Name>

- Press OK
Once finished you will see all the variables listed. Press Save to Continue.

Maven Deploy
We declared the variables, now it's time to create the deployment task.
- Stand the cursor after the maven test step.
- Copy and paste the following code:
- task: Maven@3
  displayName: Deploy
  inputs:
    mavenPomFile: 'pom.xml'
    goals: 'deploy'
    options: '-DskipTests -DmuleDeploy -Danypoint.username=$(mule.username)-Danypoint.password=$(mule.password) -Dcloudhub.environment=$(mule.environment)-Dcloudhub.app=$(mule.app)'
    publishJUnitResults: false
    javaHomeOption: 'JDKVersion'
    mavenVersionOption: 'Default'
    mavenAuthenticateFeed: false
    effectivePomSkip: false
sonarQubeRunAnalysis: falseAt the end you should see something like this

Save the Pipeline
We are going to save the pipeline and this is going to be a new commit.
- Press the Save button besides the Variable button.

- Add a commit message and description

- Press Save to commit the changes.
Congratulations!!! You have the Yaml file with the pipeline.
We created the pipeline, in this section we are going to run it
- Press the Run button.

- Leave all the values as default and press the Run button again, located at the end of the menu.

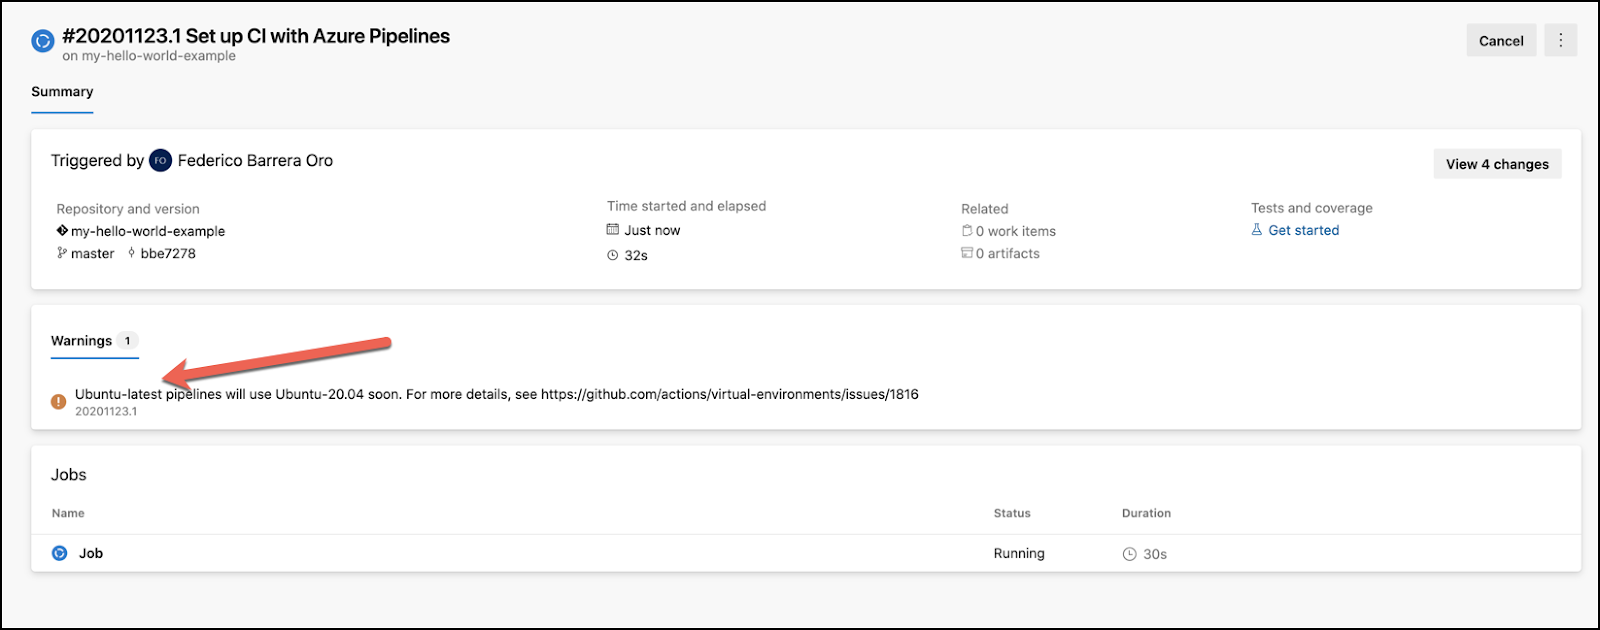
After you press run you will see a screen showing the pipeline information.
- Go to the Job panel and press the link
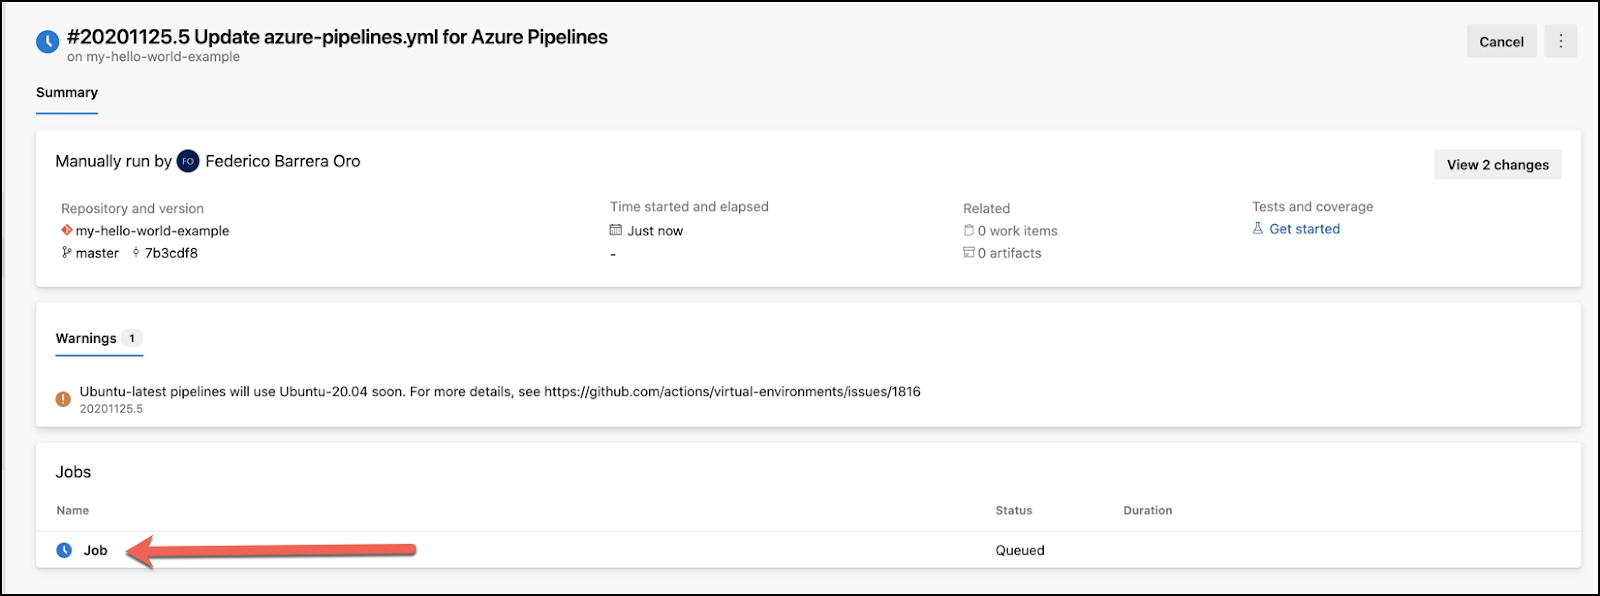
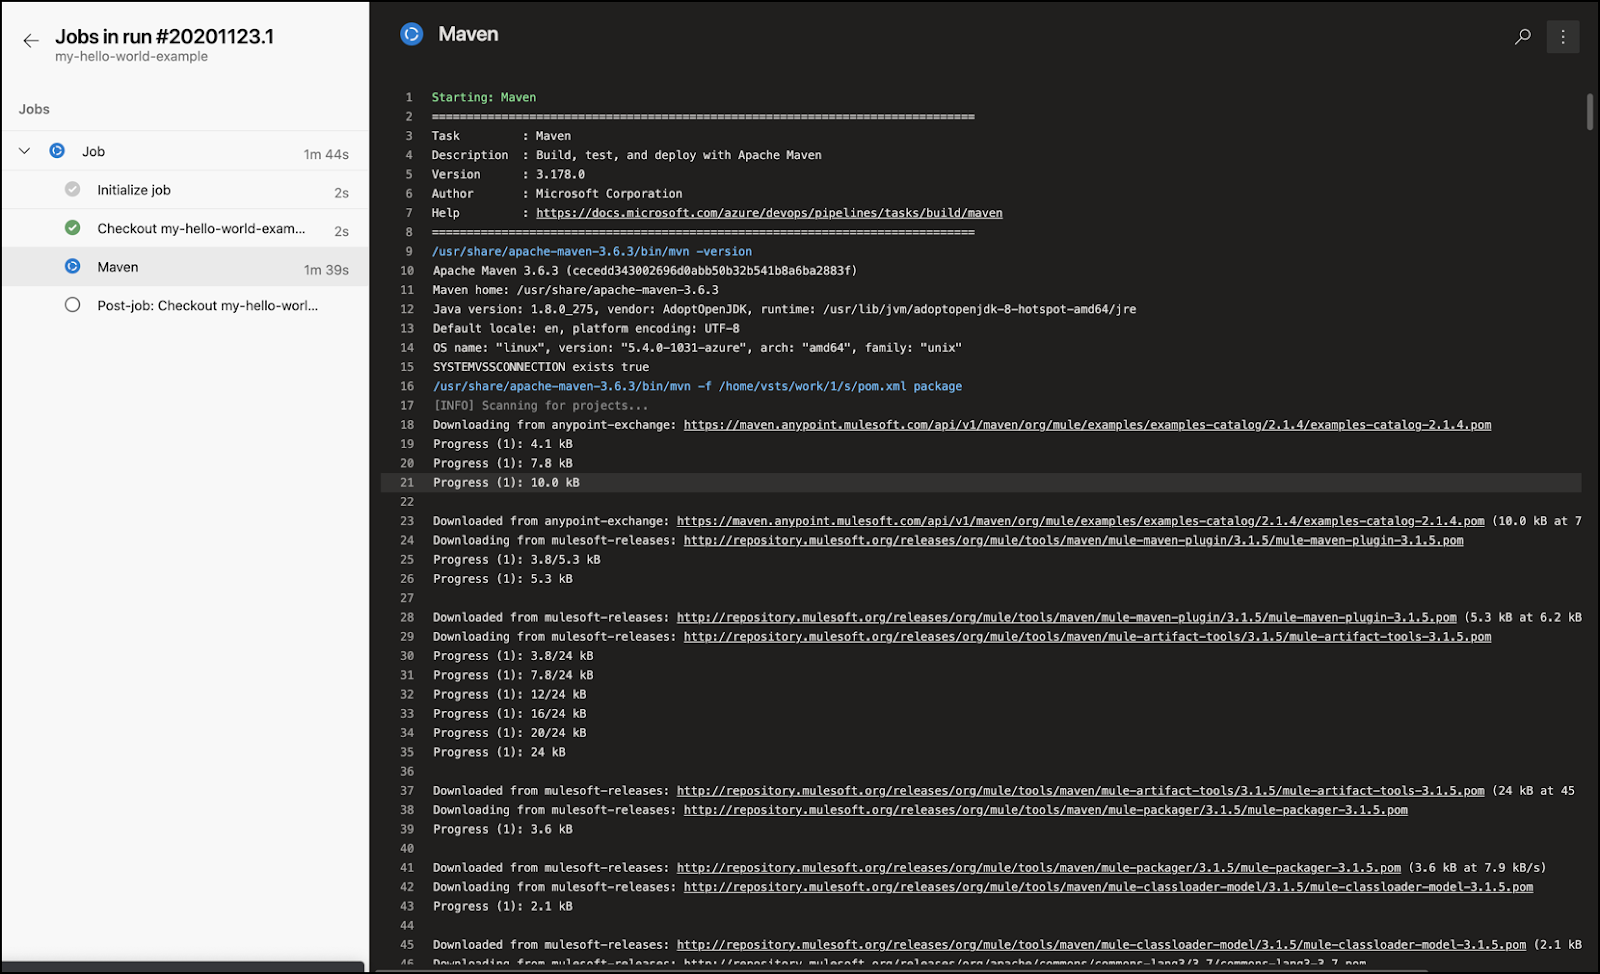
When you press the link a live window will appear. It shows the steps and logs of the current step running. Let's wait the process to finish to continue.
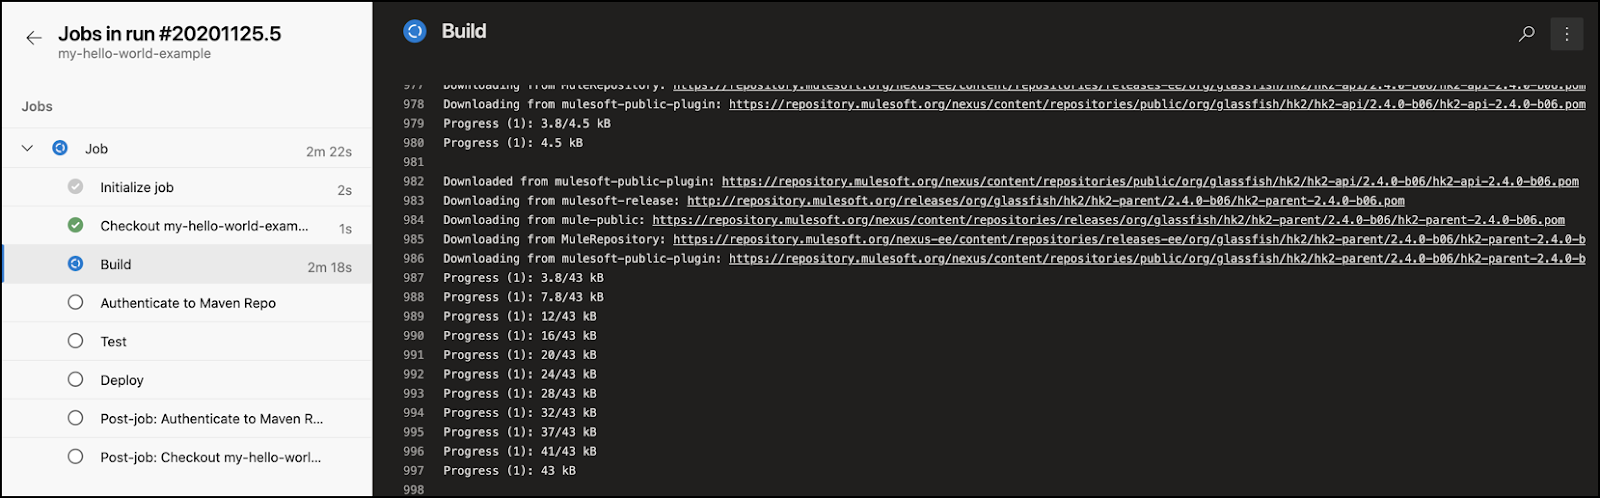
- Once it's finished you will see a green check mark. You can browse for each step and see the logs.
- Go to Cloudhub and check that the app is deployed and running.

- You can also see the test report that was created during the run. For that go to the Test Plans

- Go to Runs. You will find a list of reports.

- Double click on one of them and you will see the detail of that test.

By running the pipeline, we:
- Build the Package
- Run the MUnit Tests
- Deploy the application in Cloudhub
- Get MUnit reports.
In the next section we are going to automate the build process, so each time you push a change, the pipeline starts automatically.
To automate the process is really simple. We just need to update the trigger section in the pipeline file.
- Open the pipeline.
- Identify the trigger section

- Change the file with the following:
trigger:
  batch: true
  branches:
    include:
      - releases/*
With this command all the branches are going to be triggered automatically. Also we are setting the batch property to true, If you have many team members uploading changes often, you may want to reduce the number of runs you start. If you set batch to true, when a pipeline is running, the system waits until the run is completed, then starts another run with all changes that have not yet been built.
- Save the pipeline to finish.
If you want to get more information around this subject you can check here
Now we are going to do a change in the project, push the changes and see how the build process starts automatically
- First go to Studio and select the logger component
- Replace the message field with this one "New Change: " ++ (attributes.requestPath default "NONE")

- Commit the change
- If you go to Azure, you should see the new job running
- Once the deployment is finished, you can make a call to http://<hostname>/helloWorld and check the logs to see the changes.
In this codelab, you learned how to implement a CICD solution using Azure Pipeline. Please take a look at the Resources to learn more about Azure and the Mule Maven Plugin